
Using a yoga stick is one of the most effective ways to safely deepen your stretches, correct postural imbalances, and release stubborn tension in your back and shoulders. By acting as a rigid extension of your limbs, this simple tool bridges the gap between your hands and feet, allowing you to open up your chest, shoulders, and hips without straining your spine. Whether you are dealing with stiff shoulders, tight hamstrings, or lower back discomfort from long hours of sitting, incorporating a yoga stick into your routine helps restore natural mobility and alignment.
Unlike flexible straps or bands, a solid alignment bar provides a fixed, unyielding reference point. This structural rigidity forces both sides of your body to work symmetrically, making it easier to identify and correct muscle imbalances. By learning how to use this tool mindfully, you can safely target deep muscle groups, improve your posture, and build a sustainable routine for long-term spinal health.
Understanding How a Yoga Stick Enhances Flexibility and Back Health
A yoga stick—often referred to as a stretching pole, alignment bar, or posture stick—is a simple, lightweight rod designed to assist in mobility training. Unlike stretching straps that can bend or stretch under tension, a yoga stick maintains a fixed length and shape. This rigidity provides a stable lever that helps you control the depth of your stretches, ensuring that your joints move through a safe and symmetrical range of motion.
Products mentioned in this guide
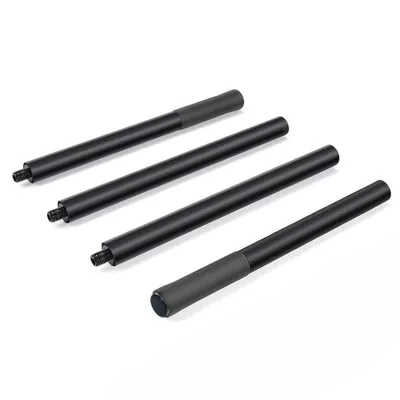


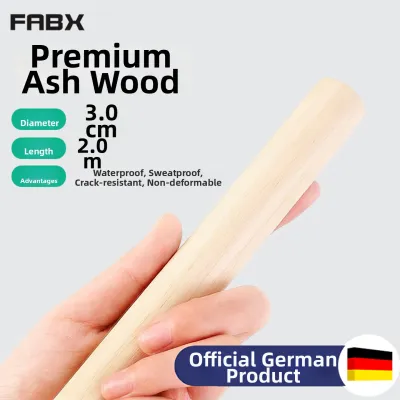
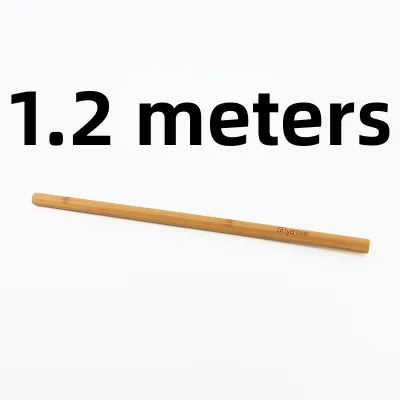

![[INSTOCK] [ON SALE] [NEW ITEM] A686 A687 A688 YOGA STICK/FITNESS ACCESSORIES/STICK](https://img.lazcdn.com/g/p/c4c93fa6b7185487c0a7a67f119726f3.jpg_400x400q80.jpg_.webp)
Prices are valid at publication and may change. Please refer to the product page for the latest price.
The primary mechanical benefit of using a yoga stick is leverage. When your muscles are tight, reaching for your toes or binding your hands behind your back often causes you to round your spine, compress your chest, and strain your neck. By holding the stick, you effectively extend your reach. This allows you to perform deep stretches while keeping your spine long, your shoulders relaxed, and your chest open. It shifts the effort from straining to reach a position to gently breathing into the stretch itself.
This tool is particularly beneficial for individuals who spend long hours sitting at desks, driving, or looking down at screens. Prolonged sitting causes the hip flexors and hamstrings to tighten, which pulls the pelvis out of alignment and increases pressure on the lower back. Simultaneously, the shoulders roll forward, and the upper back rounds, leading to chronic tension in the neck and shoulders. The yoga stick acts as an alignment mirror, helping you open up the front of your body and activate the underused muscles of your upper back to restore a neutral posture.
Choosing Your Yoga Stick and Preparing for a Safe Session
Selecting the right equipment and preparing your body are essential steps to ensure a safe and productive stretching session. Yoga sticks come in various designs, and choosing one that matches your body size and comfort level will make a significant difference in your practice.

When choosing a yoga stick, consider the following criteria:
- Length: The stick should be long enough to allow a wide grip during overhead movements. For most adults of average height, a stick measuring 80 to 100 centimeters is ideal. If you are taller or have exceptionally broad shoulders, look for a model that is 100 to 120 centimeters long.
- Material: Traditional wooden sticks made from polished beech or pine offer a sturdy, natural feel and excellent durability. Alternatively, high-density plastic or stainless steel models are lightweight and often feature interlocking or adjustable designs, making them easy to store or travel with. Some modern versions feature a cross-shaped design with a central locking mechanism, which is highly effective for hands-free posture correction.
- Grip Comfort: Look for a stick with non-slip foam padding in the center or at the ends. This ensures a secure grip, especially if your hands sweat during practice.
- Price Bands: These tools are highly accessible, with basic wooden or plastic models typically ranging from ₱300 to ₱600, while premium adjustable or padded versions generally cost between ₱700 and ₱1,200 on local online marketplaces.
Before you begin, prepare your practice space. Ensure you have a clear radius of at least two meters around you. In typical homes, check your vertical clearance to avoid hitting low-hanging ceiling fans, chandeliers, or light fixtures during overhead movements. Wear lightweight, flexible, and breathable clothing. In warm, humid tropical conditions, moisture-wicking fabrics will keep you comfortable and prevent the stick from slipping against sweaty skin.
Never perform deep static stretches on cold muscles. Spend at least five minutes doing a dynamic warm-up to increase blood flow and joint lubrication. Gentle arm circles, standing torso twists, and a few rounds of cat-cow poses on a yoga mat are excellent ways to prepare your body before using the stick for deeper stretching.
Step-by-Step Stretches to Improve Overall Flexibility
Using a yoga stick systematically allows you to target major muscle groups that restrict overall mobility. Focus on slow, controlled movements and coordinate each stretch with your breath.
Shoulder and Chest Openers
Stiff shoulders and a tight chest are common contributors to poor posture and upper back pain. These two exercises use the stick to gently open the thoracic region and mobilize the shoulder joints.
Overhead Pass-Throughs (Shoulder Dislocates) Stand tall with your feet hip-width apart and your core engaged. Hold the yoga stick in front of your thighs using a very wide, overhand grip. Keeping your arms completely straight, slowly inhale and lift the stick overhead. As you exhale, continue the movement, bringing the stick down behind your back toward your glutes. Inhale to lift the stick back up and over to the starting position.
- Form Check: If you have to bend your elbows or shrug your shoulders to get the stick behind you, widen your grip. Keep your ribs tucked down and avoid arching your lower back to force the movement. Perform 10 to 12 controlled repetitions.
Wide-Grip Pull-Downs Hold the stick overhead with a wide, overhand grip. Inhale deeply to lengthen your spine. As you exhale, bend your elbows and pull the stick down behind your head toward your upper back, actively squeezing your shoulder blades together. Hold this position for two seconds to activate the upper back muscles, then inhale as you extend your arms back to the starting position. Repeat this movement 10 times.
Hamstring and Leg Stretches
Tight hamstrings pull down on the pelvis, which can flatten the natural curve of your lower back and cause chronic lower back pain. The yoga stick helps you stretch these muscles safely without rounding your spine.
Seated Forward Fold with Stick Support Sit on your yoga mat with both legs extended straight in front of you, feet flexed and toes pointing toward the ceiling. Hold the yoga stick with an overhand, shoulder-width grip. Loop or hook the center of the stick behind the soles of your feet. If you cannot reach your feet, bend your knees slightly until you can hook the stick. Inhale to grow tall through your spine, and as you exhale, gently pull on the stick to draw your chest toward your shins.
- Form Check: Focus on hinging from your hips rather than bending from your waist. Keep your gaze forward toward your toes to maintain a neutral neck. Hold this position for 20 to 30 seconds, breathing deeply into the stretch.
Supine Single-Leg Raises Lie flat on your back on your yoga mat. Bend your left knee and place your left foot flat on the floor to stabilize your pelvis. Lift your right leg and hook the center of the yoga stick behind the arch of your right foot, holding the ends of the stick with both hands. Slowly straighten your right leg as much as comfortable. Use the leverage of the stick to gently pull your leg toward your torso until you feel a moderate stretch along your hamstring. Keep your shoulders relaxed and flat on the mat. Hold for 30 seconds, then switch sides.
Targeted Techniques to Relieve Back Tension and Discomfort
To address deep-seated spinal stiffness, you can use the yoga stick to facilitate gentle twists, supported extensions, and posture correction exercises.
Gentle Spinal Twists and Extensions
Rotational mobility is essential for a healthy spine. These techniques help release the small, supportive muscles surrounding your vertebrae.
Seated Spinal Twist Sit cross-legged on the floor or upright on a firm chair. Place the yoga stick horizontally across your upper back, resting it comfortably on your shoulders (on the meaty part of your trapezius muscles, never directly on your neck). Loop your arms over the ends of the stick so your elbows hang naturally. Inhale deeply to lengthen your spine. As you exhale, slowly rotate your torso to the right, using your core muscles to drive the movement. The stick keeps your shoulders level and prevents you from slouching as you twist. Hold for three to five deep breaths, return to the center on an inhale, and repeat on the left side. Perform five sets per side.
Supine Supported Chest and Spine Extension Lie on your back with your knees bent and feet flat on the floor. Place the yoga stick horizontally underneath your mid-back, roughly at the level of your shoulder blades (thoracic spine). Slowly lower your upper body over the stick, letting your head rest on the mat. If your neck feels strained, place a small pillow or yoga block under your head. Extend your arms out to the sides in a “T” shape. Breathe deeply into your chest and ribcage, allowing the gravity-assisted pressure of the stick to gently open up your thoracic spine. Hold this position for one to two minutes, keeping your lower back relaxed.
Supported Backbends and Posture Correction
Counteracting the forward-slouched posture requires opening the front of the body while training the nervous system to recognize proper spinal alignment.
Standing Back Extensions Stand with your feet hip-width apart. Place the yoga stick horizontally across your upper back, resting on your shoulders, and loop your arms over it. Engage your glutes and thighs to stabilize your lower body. Inhale deeply, lift your chest toward the ceiling, and gently lean back from your upper spine. Keep your neck long and aligned with your spine; do not let your head drop backward.
- Form Check: The bend should occur in your upper and mid-back, not your lower back. Keep your core tight to protect your lumbar spine. Hold for 5 to 10 seconds, then slowly return to an upright position. Repeat 5 times.
The Posture Alignment Check Hold the stick vertically along your spine. The stick should make contact with three points: the back of your head, your upper back (between your shoulder blades), and your sacrum (the flat bone at the base of your spine). Hold the stick in place with one hand behind your neck and the other behind your lower back. Practice walking slowly or performing shallow squats while maintaining all three points of contact. This exercise teaches your body what a neutral, aligned spine feels like, helping to correct forward head posture over time.
Safety Guidelines, Common Mistakes, and When to Stop
While a yoga stick is an excellent tool for mobility, improper use can lead to muscle strain or joint irritation. Adhering to proper form and listening to your body’s signals is critical for a safe practice.
Avoid these common mistakes during your sessions:
- Gripping Too Tightly: White-knuckling the stick increases tension in your forearms, shoulders, and neck, which defeats the purpose of the stretch. Keep your grip firm but relaxed.
- Holding Your Breath: Forgetting to breathe triggers a stress response in your nervous system, causing your muscles to contract and resist the stretch. Maintain slow, deep, diaphragmatic breathing.
- Bouncing (Ballistic Stretching): Rapidly bouncing or pulsing to force a deeper stretch can cause micro-tears in the muscle fibers. Always use slow, controlled, static holds.
- Forcing Past Your Limits: Do not push your body into painful positions.
Always work within your “edge.” The edge is the point in a stretch where you feel a mild, warm, and manageable pulling sensation in the targeted muscle. If you feel sharp, stabbing, or radiating pain, or if you find yourself tensing other parts of your body to cope with the sensation, you have gone too far. Back off immediately.
Stop conditions: Stop the exercise immediately if you experience sharp joint pain, numbness, tingling down your arms or legs, dizziness, or sudden discomfort.
If you have a history of herniated discs, sciatica, severe spinal issues, osteoporosis, joint hypermobility, or have recently undergone surgery, do not use a yoga stick without consulting a healthcare professional or a licensed physical therapist. Always check the manufacturer’s safety instructions for your specific yoga stick model before use.
Building a Sustainable Stretching Routine
Consistency is the key to experiencing lasting improvements in your flexibility and a significant reduction in back tension. Aim to practice these yoga stick exercises three to four times a week, dedicating 10 to 15 minutes per session. You can easily integrate this routine into your morning stretch, use it as a midday break from your desk, or practice it in the evening to unwind before bed.
Track your progress by observing subtle physical changes over time. You might notice that you can narrow your hand placement on overhead pass-throughs, reach further down the stick during forward folds, or simply stand taller with less effort. Keeping a simple journal or taking weekly photos of your posture can provide visual proof of your improved mobility and spinal alignment.
Frequently Asked Questions (FAQ)
Can I use a regular wooden dowel instead of a specialized yoga stick?
Yes, a smooth, sturdy wooden dowel, a broom handle, or a clean PVC pipe of adequate length (80 to 100 centimeters) can serve as an effective alternative. However, you must inspect the tool thoroughly before use. Ensure it has no splinters, cracks, sharp edges, or structural weaknesses that could cause it to snap under tension. Avoid using fragile, thin, or uneven household items, as they can break and cause injury.
How long should I hold each stretch with the yoga stick?
For static stretches, hold each position for 20 to 30 seconds while maintaining slow, deep breaths. Repeat each stretch two to three times per side. Avoid holding any stretch to the point of muscle fatigue, shaking, or pain. If you are using the stick for dynamic mobility work, focus on slow, continuous movement for 10 to 12 repetitions rather than holding a static position.
Community discussion
Share your experience or ask a question. Comments are reviewed before publication.