
To secure gear on your backpack using an elastic cord rope, you must route the cord through reinforced attachment points, apply balanced tension to keep items flush against the pack, and secure the ends with reliable cord locks or knots. In tropical climbing environments, such as the humid, rugged trails of the Philippines, sudden downpours and dense vegetation can easily snag loose gear. Properly utilizing elastic cords ensures your sleeping pad, helmet, or trekking poles remain stable without shifting your center of gravity. However, elastic cords are best reserved for lightweight, compressible, or awkwardly shaped items; they require careful inspection and tension management to prevent gear loss or sudden snap-backs.
While external lashing is a valuable skill for maximizing your pack’s capacity, it is important to remember that no amount of gear-securing equipment can replace proper mountaineering training, physical preparation, and sound trail judgment. Before embarking on any high-altitude climb, you must understand your own physical limits and the specific demands of your route.
Inspecting Your Backpack Attachment Points and Cord Condition
Before you even pack your bag for a challenging ascent, you must evaluate the structural integrity of both your backpack and your elastic cord rope. Not every loop on a modern backpack is designed to bear weight or withstand the constant tension of a stretched cord. In tropical climbing environments, such as the humid rainforests of the Philippines, high moisture levels can accelerate the degradation of both fabrics and elastic materials, making pre-trip inspections even more critical.
Products mentioned in this guide

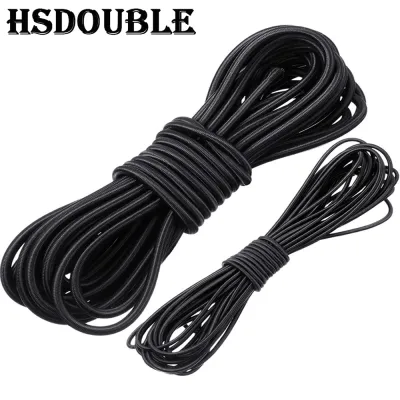
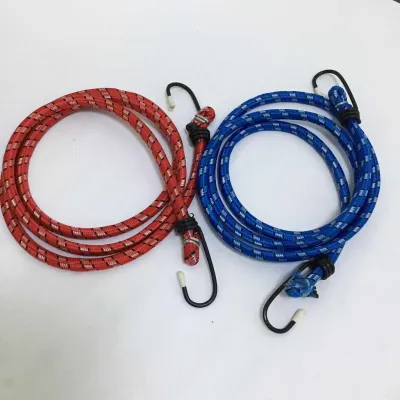
Prices are valid at publication and may change. Please refer to the product page for the latest price.
Look closely at your pack’s exterior. Locate the reinforced daisy chains, which are strips of webbing sewn with multiple loops, specifically designed for lashing gear. Standard gear loops, often found at the bottom corners of the pack, and compression straps are also excellent anchoring points. Avoid using thin, decorative loops or hydration tube clips, as these can easily tear under the stress of a tightly pulled elastic cord.
Next, examine the elastic cord rope itself. Run your fingers along the entire length of the cord to feel for any inconsistencies in thickness or elasticity. Inspect the outer woven sheath for signs of fraying, fuzzy patches, mold, or discoloration caused by UV degradation. If you see the white, inner rubber strands poking through the sheath, the cord is compromised and must be replaced immediately to avoid a sudden snap on the trail.
Finally, inspect any hardware attached to the cord, such as plastic toggles, cord locks, or metal hooks. Check metal hooks for signs of bending, rust, or metal fatigue, especially if you frequently climb in highly humid or coastal mountain regions. Ensure that any plastic cord locks grip the cord firmly without slipping when pulled. If the hardware shows any signs of structural weakness, swap it out before heading to the trailhead.
Securing Bulky and Compressible Items Like Sleeping Pads
Lightweight, bulky items like closed-cell foam sleeping pads or inflatable mattresses are prime candidates for external lashing. Because these items take up significant internal volume, securing them to the outside of your pack frees up valuable space for heavy essentials.

When deciding how to mount your sleeping pad, consider the profile of your backpack and the terrain you will encounter. Horizontal lashing across the bottom or top of the pack keeps the load compact but can make your profile wider, increasing the risk of snagging on narrow, overgrown trails. Vertical lashing along the center of the pack keeps your profile slim but requires a longer cord and careful routing to prevent the pad from sliding downward.
To secure the pad, wrap the elastic cord around the item and thread it through the pack’s daisy chains. Using an “X-lashing” pattern—where the cord crosses over itself in an X shape—helps distribute the tension evenly across the surface of the pad, preventing it from slipping out of either end. Adjust the tension so the pad is held flush against the backpack body. The cord should be tight enough to prevent the pad from bouncing or shifting as you walk, but not so tight that it permanently deforms or slices into soft foam materials. If the foam begins to pinch or crease deeply, ease off the tension slightly.
To prevent the cord from slipping under the constant vibration of hiking, always back up your plastic cord locks. Tie a simple overhand knot or a slipknot directly behind the cord lock once the desired tension is achieved. This secondary knot acts as a mechanical stop, ensuring that even if the cord lock’s internal spring fails or slips on a wet cord, your gear remains firmly anchored.
Attaching Hard or Awkwardly Shaped Gear Like Helmets and Poles
Rigid climbing gear, such as climbing helmets and trekking poles, presents a different challenge. Unlike soft sleeping pads, these items do not compress, meaning an elastic cord must be routed strategically to prevent them from swinging or rattling loose.
To secure a climbing helmet, thread the elastic cord directly through the helmet’s ventilation slots or chin strap attachment points before securing it to the pack’s daisy chains. This creates a positive mechanical anchor that prevents the helmet from sliding out of the cord’s grasp. For trekking poles, slide the poles through the pack’s dedicated tool loops, then wrap the elastic cord tightly around the upper shafts, routing it through the pole baskets to prevent vertical slippage.
Pay close attention to the orientation of sharp edges, spikes, and metal hardware. Position trekking pole tips, ice axe picks, and crampon teeth facing away from both the elastic cord and your backpack fabric. A sharp metal edge rubbing against a stretched elastic cord under tension will quickly slice through the protective sheath, leading to catastrophic cord failure.
As you route the cord, verify that it does not block access to critical areas of your pack. You should still be able to easily unzip main compartments, access side water bottle pockets, or reach your hydration sleeve without having to completely unlash your external gear. Keeping these pathways clear saves time and energy during quick trail rests.
Managing Weight Distribution and Trail Balance
How you distribute weight on the exterior of your backpack directly impacts your balance, safety, and energy expenditure on steep, uneven mountain trails. Improperly secured gear that sways or pulls you off-balance can lead to slips and falls, particularly on technical terrain.
Always aim to keep heavy or dense external items centered and as close to your back panel as possible. While elastic cords are excellent for securing lightweight gear, placing heavy items far from your back creates a leverage effect, pulling your shoulders backward and forcing you to lean uncomfortably forward to compensate. Keep the heaviest items inside the pack, close to your spine, and use the external elastic cords primarily for light, high-volume gear.
Avoid top-heavy configurations. Lashing a heavy, water-logged item or multiple pieces of gear to the very top of your pack raises your center of gravity. This can cause severe swaying when you make sudden movements, traverse steep side-slopes, or scramble over boulders. Keep your external load balanced symmetrically from left to right to prevent uneven shoulder strain.
Before you take your first step on the trail, perform a quick sway and balance test. Put on your fully loaded backpack, adjust the hip belt and shoulder straps, and take a few steps, gently shaking your torso from side to side. If you feel any gear shifting, bouncing, or pulling you in one direction, stop and adjust the tension of your elastic cords or reposition the items until the load feels like a natural extension of your body.
Safety Inspections and When to Retire an Elastic Cord
Elastic cords are highly convenient, but they are subject to wear, environmental degradation, and eventual fatigue. Relying on a worn-out cord during a demanding climb poses a significant safety risk to both your gear and your physical well-being.
Regularly monitor your cord for signs of elastic fatigue during your climb. If you notice that the cord has lost its snap, remains permanently stretched out after use, or if the plastic hooks show signs of bending or stress whitening, the cord’s structural integrity is compromised. A stretched cord cannot maintain the tension required to keep gear secure, leading to items shifting or falling off unnoticed.
The physical danger of a snapping elastic cord should never be underestimated. When a cord under high tension suddenly breaks or slips from an anchor point, it recoils with immense speed and force. If your face or eyes are in the path of this recoil, it can cause severe injury. Always stand to the side when tensioning or releasing elastic cords, and never pull a cord directly toward your face.
If you detect any signs of damage, or if the trail conditions become exceptionally severe with high winds and heavy rain, do not hesitate to retire the elastic cord. Switch to static webbing straps, utility cord, or repack your gear internally. It is far better to carry a slightly bulkier pack with internally stored gear than to risk losing essential equipment or sustaining an injury on the mountain.
Frequently Asked Questions (FAQ)
Is elastic cord rope better than static webbing for backpack gear?
Elastic cord rope and static webbing serve different purposes on a climbing pack. Elastic cords excel at securing lightweight, compressible, or oddly shaped items because the stretch absorbs trail vibrations and maintains constant pressure on shifting loads. However, for heavy, rigid, or high-value gear, static webbing straps are far superior. Static straps do not stretch under load, providing absolute security and preventing heavy items from swaying or pulling away from the pack frame during steep ascents.
How do I prevent the metal hooks from scratching my backpack fabric?
Metal hooks on elastic cords can easily abrade or puncture delicate backpack fabrics over time. To prevent this, choose cords equipped with plastic-coated or rubber-tipped hooks. Alternatively, you can wrap the metal hooks in heavy-duty electrical tape or slip a small piece of rubber tubing over the hook ends. When routing the cord, try to anchor the hooks exclusively to dedicated metal D-rings, heavy webbing loops, or plastic attachment points rather than directly against the lightweight nylon body of your backpack.
Community discussion
Share your experience or ask a question. Comments are reviewed before publication.