
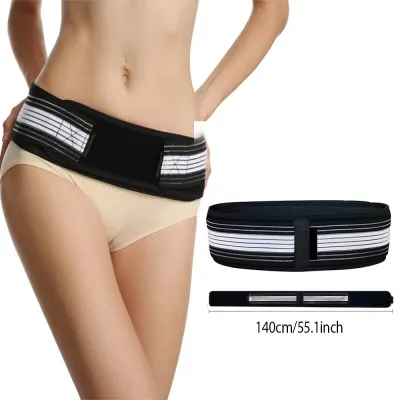
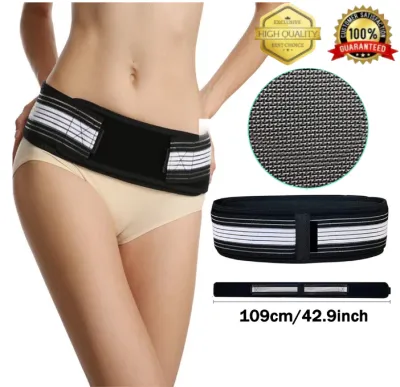
To wear a sciatica pain relief belt correctly, you must position it low across your hips—just above your pubic bone and below the crest of your pelvis—rather than high around your waist. Secure the primary band snugly to establish a stable foundation, then pull the secondary tension straps forward to apply targeted compression directly over your sacroiliac (SI) joints. A properly adjusted belt should feel firm and supportive, stabilizing your pelvis during daily movements without pinching your skin, restricting your breathing, or sliding upward when you sit down.
In warm, humid climates like the Philippines, managing heat and moisture is a key part of wearing a support belt comfortably. When you are walking through local markets, commuting, or engaging in light recreational sports, a misplaced or overly tight belt can quickly cause skin irritation or excessive sweating. Understanding how to align, tighten, and maintain your sciatica pain relief belt ensures you receive the intended pelvic support while maintaining full mobility throughout your day.
Understanding When to Use a Sciatica Belt and Safety Boundaries
A sciatica pain relief belt, often referred to as a sacroiliac (SI) joint belt, is designed to provide external stabilization to the pelvis and lower spine. This targeted compression is particularly helpful during periods of mild to moderate discomfort when you need to perform daily activities, stand for extended periods, or engage in low-impact exercises. By gently squeezing the pelvic bones together, the belt helps minimize micro-movements at the SI joint, which can otherwise irritate the sciatic nerve and cause radiating pain down the leg.
Products mentioned in this guide
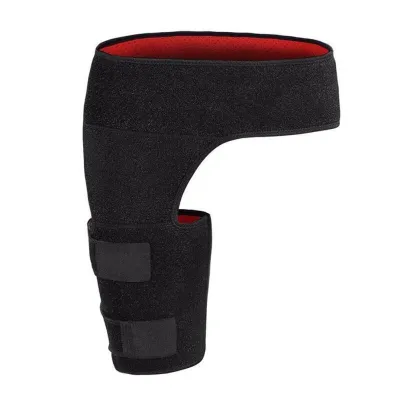
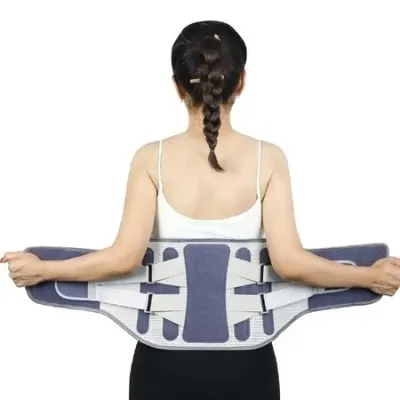
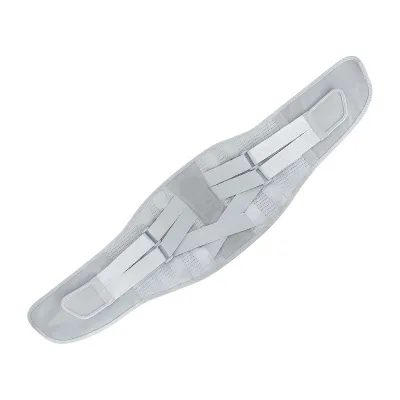
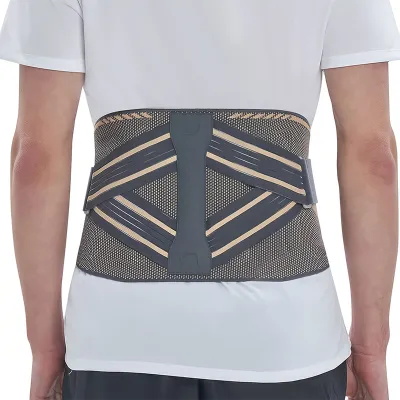
Prices are valid at publication and may change. Please refer to the product page for the latest price.
However, a support belt is a temporary aid and not a permanent cure for underlying spinal or nerve issues. It is crucial to establish clear safety boundaries before incorporating a belt into your daily routine. If you experience a sudden increase in sharp pain, spreading numbness, or a pins-and-needles sensation traveling down your thigh or calf, you should remove the belt immediately. These symptoms may indicate that the belt is compressing a nerve or that your underlying condition requires professional medical evaluation.
Before wearing any new support garment, always read the manufacturer’s specific instructions regarding sizing, placement, and material composition. Many belts utilize synthetic elastics, neoprene, or rubberized grips to prevent slipping, which can trigger allergic reactions or heat rashes in tropical conditions. If you have sensitive skin, inspect the material list carefully and consider performing a short trial wear of fifteen to twenty minutes to check for any signs of redness, itching, or localized swelling.
Step-by-Step Guide to Positioning the Belt Correctly
Achieving the correct anatomical placement is the most critical factor in ensuring your sciatica pain relief belt works as intended. Many users instinctively pull the belt up around their natural waist or stomach, assuming it should cover the lower back curve. However, placing the belt too high renders it ineffective because it cannot stabilize the pelvic ring from that position.

To find the correct starting point, locate the bony protrusions at the front of your hips, known as the anterior superior iliac spines. The main body of the belt should sit directly over these hip bones, wrapping around the widest part of your pelvis and crossing the upper portion of your buttocks at the back. The lower edge of the belt should align roughly with the crease where your legs bend when you sit down, allowing for a full range of hip flexion.
Once you have positioned the belt low on your hips, wrap the primary band evenly around your pelvis. Ensure that the front closure is centered and that the fabric lies completely flat against your body without twisting or bunching. If your belt features built-in silicone grips, alignment pads, or contoured support zones, verify that these elements are positioned symmetrically according to the manufacturer’s design.
Secure the primary hook-and-loop closure with a moderate amount of tension. At this stage, the belt should feel secure enough to stay in place on its own, but it should not feel tight or restrictive. Avoid pulling this initial layer to its maximum stretch, as doing so leaves no room for the secondary adjustment straps to function properly and can cause the material to bunch up when you move.
Adjusting Tightness for Optimal Compression and Mobility
After securing the primary band, you can use the secondary tension straps to customize the level of compression. These outer straps are designed to pull from the back of the belt toward the front, allowing you to apply targeted pressure directly over the sacroiliac joints. Grasp both secondary straps simultaneously, pull them forward with equal force, and secure them onto the main band to ensure balanced lateral support.
Finding the ideal balance between compression and mobility requires a systematic approach. To verify that the belt is not too tight, perform a simple breathing test: take a deep breath in and exhale fully. The belt should not restrict your ribcage or lower abdomen from expanding naturally. Additionally, you should be able to slide one or two fingers flat beneath the top and bottom edges of the belt without struggling or feeling excessive resistance.
Next, test your mobility by performing a few light, functional movements that mimic your daily routine. Try walking a short distance, bending slightly at the knees, and transitioning from a standing to a sitting position. Observe how the belt behaves during these movements; it should remain firmly in place over your hips without riding up toward your waist or digging painfully into your thighs.
If you feel a throbbing sensation, localized coldness in your legs, or a restriction in your normal walking stride, the compression is likely too high. Loosen the secondary straps slightly until the discomfort subsides while maintaining a supportive, snug feel. Remember that the goal is stabilization, not immobilization; your pelvis should feel supported, but your hips must still move freely.
Common Fitting Mistakes and How to Correct Them
Even with step-by-step instructions, it is common to make minor fitting errors that compromise the effectiveness of your sciatica pain relief belt. Recognizing these mistakes early allows you to make quick adjustments and avoid unnecessary discomfort or skin irritation.
The most frequent error is placing the belt too high, wrapping it around the natural waist or lumbar spine. When positioned here, the belt compresses the soft tissues of the abdomen rather than the bony structure of the pelvis, which can increase intra-abdominal pressure and fail to stabilize the SI joint. If you notice the belt shifting upward when you sit, or if you feel pressure on your stomach rather than your hips, loosen the band and slide it down until it rests firmly over your pelvic bones.
Another common mistake is over-tightening the belt in an attempt to get faster pain relief. Excessive compression can restrict local blood circulation, pinch superficial nerves, and cause muscle fatigue by limiting natural movement patterns. If you observe deep red marks, skin indentations, or experience a tingling sensation after removing the belt, reduce the tension on your next wear and ensure you are utilizing the secondary straps for targeted, rather than global, tightness.
Wearing the belt unevenly is a third mistake that can lead to asymmetrical pressure across your pelvis. If one side of the belt is pulled tighter or positioned higher than the other, it can alter your gait and introduce postural imbalances that may worsen your lower back discomfort. Always use a mirror or feel the alignment of the straps with your hands to ensure the belt is perfectly horizontal and centered on your body.
Maintaining Your Belt and Recognizing Wear
To ensure your sciatica pain relief belt continues to provide consistent compression and support, proper maintenance is essential. Over time, sweat, body oils, and dust can accumulate in the fabric, breaking down the elastic fibers and reducing the grip of the hook-and-loop fasteners.
Always check the product care label for specific washing instructions, as most support belts require gentle hand washing in cool water with a mild detergent. Avoid using bleach, fabric softeners, or harsh chemicals, which can degrade the synthetic materials and elastics. After washing, squeeze out excess water gently without wringing the belt, and lay it flat to air dry in a shaded, well-ventilated area away from direct sunlight, which can dry out and crack rubberized components.
Regularly inspect the hook-and-loop fasteners for lint, hair, or fabric debris that may have gathered in the loops, as this buildup can cause the straps to slip under tension. You can use a small brush or a fine-toothed comb to clean the fasteners and restore their gripping power.
Over months of regular use, the elastic fibers in the belt will naturally begin to stretch out and lose their rebound capacity. If you find that you must pull the straps significantly tighter than before to achieve the same level of support, or if the closures frequently pop loose during light movement, the belt has reached the end of its functional lifespan. Replacing a worn-out belt is necessary to maintain proper pelvic stabilization and prevent re-injury.
Frequently Asked Questions (FAQ)
Can I wear a sciatica pain relief belt all day?
It is generally not recommended to wear a sciatica pain relief belt continuously throughout the entire day. While the belt provides valuable external support, relying on it constantly can lead to muscle dependency, where your core and pelvic stabilizing muscles become less active and weaken over time. Aim to wear the belt during periods of increased physical activity, prolonged standing, or when your pain is actively flared up, and take regular breaks of several hours to allow your muscles to engage naturally. Additionally, you should remove the belt when sitting for extended periods, as the seated posture naturally changes pelvic alignment and can cause the belt to dig into your abdomen.
Should I wear the belt over or under my clothes?
Whether you wear the sciatica belt over or under your clothing depends largely on your skin sensitivity, the belt’s material, and your environment. Wearing the belt over a thin, snug layer of clothing—such as a lightweight cotton t-shirt or athletic wear—is often the most comfortable option, as it provides a barrier that absorbs sweat and prevents the belt’s edges from chafing your skin. However, if the manufacturer specifies that the belt is designed for direct skin contact and features non-slip silicone grips, you can wear it under your clothes. In hot and humid conditions, wearing it over a breathable fabric layer can help manage moisture and reduce the risk of developing heat rashes or skin irritation.
Is it safe to sleep with a sciatica belt on?
Medical professionals generally advise against wearing a sciatica pain relief belt while sleeping. When you lie down, the gravitational forces acting on your pelvis and spine are significantly reduced, meaning the external stabilization provided by the belt is no longer necessary. Furthermore, wearing a tight compression band for several hours while inactive can restrict blood circulation, cause skin irritation from trapped sweat, and potentially compress nerves as you shift positions in bed. If you experience severe nighttime sciatica pain, focus on optimizing your sleeping posture using supportive pillows between your knees (for side sleepers) or under your knees (for back sleepers) to relieve pressure on the sciatic nerve naturally.
Community discussion
Share your experience or ask a question. Comments are reviewed before publication.