
With the unpredictable tropical weather in the Philippines—ranging from intense summer heatwaves to sudden typhoon downpours during the monsoon season—maintaining a consistent outdoor training routine can be a major challenge. Setting up a dedicated home workout space is the ideal solution, but deciding between an indoor trainer cycling setup and a standalone spin bike requires careful evaluation. The right choice depends primarily on whether you already own a road or mountain bike, your available floor space, and your specific training goals.
If you already own a high-quality bicycle and want to maintain your exact outdoor riding posture, geometry, and gear shifting, an indoor cycling trainer is your best option. This setup is highly compact, allowing you to fold the trainer and store it away when not in use. Conversely, if you do not own a bicycle, want a hassle-free, low-maintenance machine that multiple family members can easily share, and have a permanent spot in your home, a standalone spin bike is the superior choice.
Understanding the Basics: Trainers vs. Spin Bikes
To make an informed decision, it is essential to understand how these two types of equipment function mechanically. An indoor cycling trainer is an auxiliary device designed to convert your existing outdoor bicycle into a stationary workout machine. These trainers generally fall into two categories: wheel-on and direct-drive models. Wheel-on trainers clamp onto your bike’s rear quick-release or thru-axle, pressing a resistance roller directly against your rear tire. Direct-drive trainers require you to remove your rear wheel entirely and mount your bike’s frame directly onto the trainer’s built-in cassette, offering a more stable and realistic riding experience.
Products mentioned in this guide
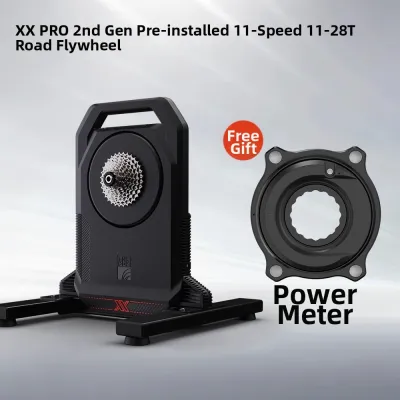
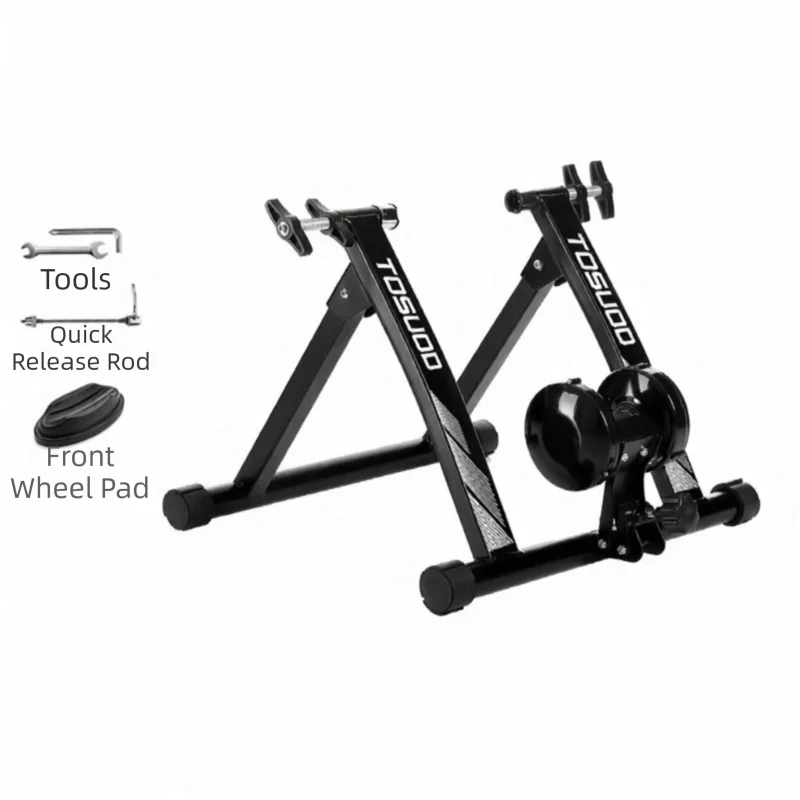
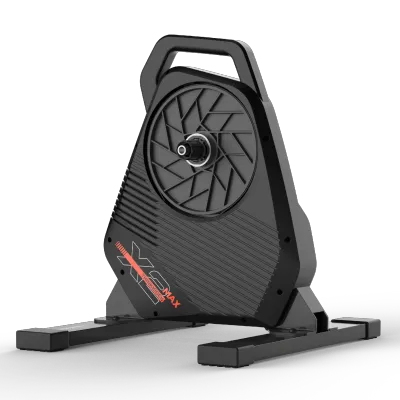
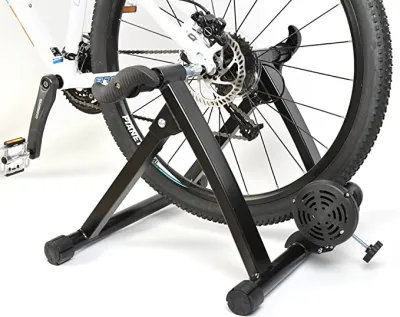
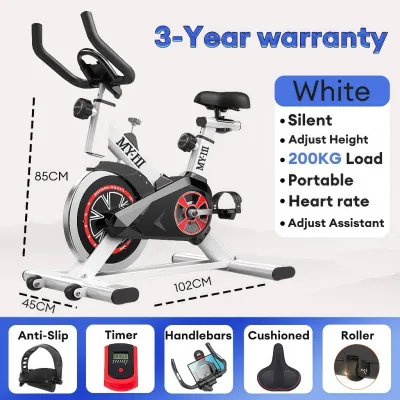
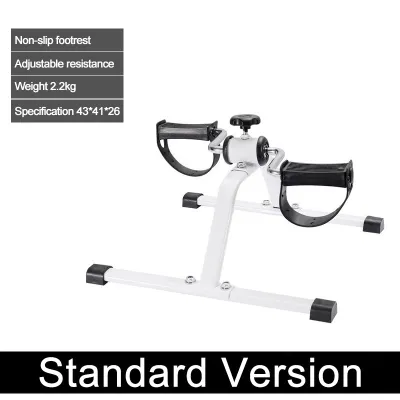
Prices are valid at publication and may change. Please refer to the product page for the latest price.
A spin bike, on the other hand, is a fully integrated, standalone stationary bicycle. It features a heavy, perimeter-weighted flywheel connected to the pedals via a chain or belt drive, simulating the momentum of a moving bicycle. Spin bikes utilize either friction pads or magnetic calipers to apply resistance to the flywheel, controlled manually by a dial on the frame. Because they are built as single, cohesive units, spin bikes feature heavy-duty steel or aluminum frames designed to withstand intense, high-cadence riding and standing efforts without the need for an external bicycle.
The primary operational difference lies in the user experience and biomechanics. A trainer relies entirely on your outdoor bike’s specific geometry, saddle, handlebars, and gear ratios, providing an identical match to your road-riding setup. A spin bike offers a generic, highly adjustable frame with a fixed-gear or freewheel mechanism, making it highly versatile for general cardiovascular fitness but less representative of real-world road cycling dynamics.
Core Comparison Dimensions: Indoor Trainer Cycling vs. Spin Bikes
Space and Storage Requirements
Physical footprint and storage flexibility are critical considerations, especially for those living in space-constrained urban condominiums or apartments in Metro Manila. A standalone spin bike is a heavy, solid piece of equipment that typically weighs between 40 to 60 kilograms. While most models feature small transport wheels on the front stabilizer bar, moving a spin bike in and out of a closet for every workout is physically demanding and impractical. Consequently, a spin bike requires a dedicated, permanent floor space of approximately 4 feet by 2 feet. You must also ensure there is sufficient clearance around the machine for safe mounting and dismounting.

In contrast, an indoor cycling trainer offers exceptional storage flexibility. When your workout is complete, you can unmount your bicycle and fold the trainer’s legs flat, allowing it to slide under a bed, fit behind a door, or sit neatly in a closet. The bicycle itself can then be parked in its usual spot, hung on a wall mount, or stored on a balcony. This modular nature makes a trainer setup highly attractive for multi-use rooms where floor space must be reclaimed after exercise. However, if you leave the bicycle permanently mounted on the trainer, the overall footprint is actually larger than that of a spin bike, stretching to nearly 6 feet in length.
Budget and Hidden Costs
When evaluating the financial commitment, looking beyond the initial sticker price of the machine is vital. Spin bikes represent a highly transparent, all-in-one purchase. A reliable magnetic resistance spin bike can range from ₱10,000 to ₱25,000, while premium commercial-grade or smart studio bikes with integrated touchscreens can cost between ₱45,000 and ₱90,000. Once purchased, there are virtually no additional hardware costs required to begin your workouts.
An indoor cycling trainer can appear more budget-friendly at first glance, but it often carries significant hidden costs. Basic magnetic or fluid wheel-on trainers start around ₱5,000 to ₱15,000, while high-performance smart direct-drive trainers range from ₱30,000 to over ₱65,000. However, this assumes you already own a compatible, well-maintained bicycle. If you do not, purchasing a suitable road or gravel bike will add an extra ₱15,000 to ₱100,000+ to your total investment.
Furthermore, setting up a trainer often requires purchasing additional accessories. For a direct-drive trainer, you must purchase a rear cassette (₱2,000 to ₱5,000) that matches your bike’s drivetrain speed and brand, as many trainers do not include one. If your bike uses a modern thru-axle system rather than a traditional quick-release, you may need to purchase specific axle adapter kits (₱1,500 to ₱3,000). For wheel-on trainers, you will almost certainly need a dedicated, hard-compound trainer tire (₱1,500 to ₱3,000) to prevent your outdoor tire from wearing down or shedding rubber dust, along with a front-wheel riser block (₱800 to ₱2,000) to level your bike’s geometry.
Ride Feel and Fitness Goals
The biomechanics and kinetic sensations of each option directly impact your training outcomes and overall enjoyment. An indoor trainer excels at replicating the exact “road feel” of outdoor riding. Because you are sitting on your actual saddle, gripping your own handlebars, and shifting through your physical gear cassette, the muscle recruitment patterns are identical to outdoor cycling. This makes the trainer an indispensable tool for competitive cyclists, triathletes, and long-distance riders training for local endurance events. Smart trainers enhance this realism by automatically adjusting resistance to simulate wind resistance, drafting, and steep road gradients when paired with virtual training software.
A spin bike offers a different pedaling dynamic characterized by high kinetic momentum. The heavy flywheel (typically 15 to 22 kilograms) stores energy as you pedal, creating a smooth, continuous stroke that helps pull your legs through the “dead spots” of the pedal rotation. This fixed-gear feel is highly effective for high-intensity interval training (HIIT), fast-paced cadences, and rhythm-based workouts where you ride to the beat of high-energy music. However, because the frame is completely rigid and lacks lateral compliance, it does not train the core and stabilizing muscles used when balancing a real bicycle outdoors. If your goal is general cardiovascular health, weight management, or high-sweat studio workouts, the spin bike’s design is perfectly optimized for these activities.
Setup, Noise, and Daily Convenience
The daily user experience can make or break your long-term consistency. Spin bikes offer unmatched convenience. There is zero assembly or preparation required before a workout; you simply adjust the seat and handlebar collars, step onto the pedals, and begin. This makes it incredibly easy to squeeze in a quick 20-minute session before work. Additionally, because the adjustment mechanisms are highly standardized, multiple family members of varying heights can share the same machine with minimal hassle.
A trainer setup introduces a higher level of friction, particularly if you use the same bicycle for outdoor weekend rides. Mounting and unmounting the bike, aligning the chain, tightening the axle, and calibrating the trainer’s sensors can take several minutes and leave grease on your hands. If you plan to leave your bike permanently attached to the trainer, this friction is eliminated, but you lose the utility of your outdoor bicycle.
Acoustic noise is another critical factor for home environments. Traditional wheel-on trainers are notoriously loud, producing a high-pitched, mechanical whine as the tire spins against the metal roller. This noise, combined with the vibration transmitted through the floor, can easily disturb family members or neighbors in adjacent apartments. Direct-drive trainers and magnetic spin bikes, however, are exceptionally quiet. Because they utilize non-contact magnetic resistance, the only sound generated is the quiet whir of the internal belt or your bicycle’s chain, allowing you to exercise early in the morning or late at night without causing a disturbance.
Decision Framework: Making Your Final Choice
Choosing between these two fitness tools requires aligning your personal living situation, equipment ownership, and athletic aspirations. Use the following structured guidelines to identify which setup fits your lifestyle.
Choose an Indoor Cycling Trainer if:
- You already own a road, gravel, or mountain bike: You can leverage your existing investment to access high-performance indoor training without buying an entirely new machine.
- You are training for outdoor cycling events: Maintaining your exact saddle, handlebar reach, and pedal stance (Q-factor) is crucial for preventing overuse injuries and building event-specific muscular endurance.
- You have limited or flexible living space: You need a compact setup that can be folded down, packed away, and stored in a closet or under a bed when your workout is finished.
- You want to participate in virtual cycling platforms: You enjoy detailed performance metrics, structured power-based training plans, and virtual racing on platforms like Zwift, Wahoo SYSTM, or TrainerRoad.
Choose a Spin Bike if:
- You do not own an outdoor bicycle: You want a complete, ready-to-use cardio solution without the added expense, complexity, and maintenance of buying and setting up a traditional bicycle.
- Multiple household members will use the machine: The quick-release adjustment levers allow family members of different heights to adjust the seat and handlebars in seconds.
- You prefer studio-style or rhythm-based workouts: Your fitness routine centers on high-intensity intervals, standing climbs, and instructor-led classes rather than simulating outdoor road routes.
- You prioritize low maintenance and high convenience: You want a durable, grease-free machine that is always ready to ride, requiring no calibration, wheel removal, or complex technical troubleshooting.
Verify First if Leaning Toward a Smart Trainer: Before purchasing a smart indoor trainer, you must perform several compatibility checks to ensure your bicycle can be mounted safely:
- Axle Standards: Measure your bike's rear dropout spacing. Standard road bikes often use 130mm or 135mm quick-release skewers, while modern disc-brake road, gravel, and mountain bikes use 12x142mm or 12x148mm (Boost) thru-axles. Ensure the trainer includes the correct adapters for your specific axle standard.
- Drivetrain Compatibility: Check the number of speeds on your rear cassette (e.g., 8, 9, 10, 11, or 12-speed). You must install a cassette on the trainer that matches your bike's speed and brand to ensure smooth, safe gear shifting.
- Frame Clearance: Some bicycle frames, particularly those with unique carbon fiber chainstay shapes or low-mounted disc brake calipers, may rub against the trainer's plastic casing. Check the trainer manufacturer's list of known incompatible bike models before buying.
Setup, Safety, and Maintenance Checklist
Proper installation and regular upkeep are vital to protect your physical safety, preserve your expensive equipment, and maintain your home environment.
For Trainers:
- Verify Carbon Frame Compatibility: Check your bicycle manufacturer's user manual or warranty terms before clamping a carbon fiber frame onto an indoor trainer. Some manufacturers explicitly void warranties for trainer use, as the lateral forces exerted on the rear dropouts during standing efforts differ significantly from natural outdoor riding forces.
- Secure the Axle Properly: Ensure the quick-release skewer or thru-axle is threaded correctly and tightened to the manufacturer's torque specifications. A loose connection can cause the bicycle to slip out of the trainer during a hard sprint, leading to severe frame damage or personal injury.
- Calibrate Regularly: For smart trainers, perform a "spindown" calibration within the trainer's companion app once every two weeks or after moving the unit. This ensures your power readings remain accurate and consistent.
For Spin Bikes:
- Achieve a Safe Ergonomic Fit: Adjust the saddle height so that your knee has a slight 10-to-15-degree bend when the pedal is at its lowest point (6 o'clock position). Adjust the handlebar height to a position that keeps your spine neutral and prevents excessive strain on your lower back.
- Check Fasteners and Pedals: Regularly inspect the pedal spindles and crank arms to ensure they are tightly threaded. High-torque standing climbs can gradually loosen these connections, which can strip the aluminum threads of the crank arms if left unchecked.
- Test the Emergency Brake: Ensure the mechanical push-down emergency brake works correctly. Because spin bike flywheels have high kinetic momentum, you must be able to stop the spinning pedals instantly in an emergency.
General Maintenance for Both Setups:
- Mitigate Sweat and Humidity: The warm, highly humid climate of the Philippines accelerates metal oxidation. Human sweat is highly corrosive due to its salt content and will quickly rust steel frames, seize bearings, and corrode electronic components. Drape a clean towel over your handlebars or use a specialized neoprene sweat guard (sweat thong) stretched between your seatpost and handlebars.
- Wipe Down After Every Session: Clean the entire frame, handlebars, console, and flywheel with a dry microfiber cloth immediately after your workout. For stubborn grime, use a damp cloth with a mild, diluted soapy solution; never use harsh chemical solvents or abrasive pads.
- Use a Heavy-Duty Floor Mat: Always place a thick, water-resistant rubber or PVC equipment mat under your setup. This protects your tiles, laminate, or wooden flooring from sweat damage, prevents the machine from slipping, and dampens low-frequency vibrations that travel through the floor.
Frequently Asked Questions (FAQ)
Can I use a mountain bike on an indoor cycling trainer?
Yes, you can use a mountain bike on most indoor trainers, but you must verify a few compatibility details first. For direct-drive trainers, ensure the unit supports your mountain bike’s rear axle width, which is commonly 148mm (Boost spacing), and that you install a cassette matching your bike’s drivetrain. For wheel-on trainers, you must swap your knobby off-road rear tire for a smooth, slick trainer-specific tire. Running a knobby tire on a wheel-on trainer’s metal roller produces extreme, deafening noise, severe physical vibrations, and will rapidly wear down the rubber tread within a few rides.
Do I need a smart trainer to use cycling apps?
No, a smart trainer is not mandatory to connect with virtual cycling applications like Zwift or Rouvy. You can use a classic, non-smart trainer or a standard spin bike by installing external speed and cadence sensors on your bicycle or pedal cranks. These sensors transmit your real-time pedaling data via Bluetooth or ANT+ to your tablet, phone, or computer, allowing the app to calculate an estimated virtual power curve. While this setup lets you navigate virtual routes, the app cannot automatically adjust the trainer’s resistance to match hills or headwinds; you must manually adjust the resistance using your bike’s gears or the trainer’s resistance knob.
Is a spin bike better for weight loss than a trainer?
Neither option is inherently superior for weight loss, as both provide highly effective, high-calorie-burning cardiovascular workouts. Weight loss is fundamentally driven by maintaining a consistent caloric deficit and exercising regularly. A spin bike is highly optimized for short, explosive, high-intensity interval training (HIIT) and standing climbs, which can burn a large number of calories in a short period. An indoor trainer is excellent for sustained, aerobic endurance rides that build cardiovascular efficiency over longer durations. Ultimately, the best machine is the one you enjoy using consistently, as long-term adherence is the most critical factor for successful weight management.

Community discussion
Share your experience or ask a question. Comments are reviewed before publication.