
Selecting the right push-up board requires a clear understanding of your current fitness level, your physical dimensions, and your specific upper-body training objectives. Rather than relying on a generic workout routine, a push-up board allows you to target distinct muscle groups—such as the pectorals, deltoids, triceps, and latissimus dorsi—by altering the angle and width of your grip. However, not every board is built to handle the same level of intensity, and choosing an incompatible model can lead to joint strain, poor workout form, or equipment failure.
In tropical environments like the Philippines, where high humidity and heat are constant factors, equipment durability becomes an even greater priority. Sweat can quickly make cheap plastic handles slippery, while moisture can degrade low-quality rubber components over time. By focusing on structural integrity, ergonomic handle designs, and customizable slot configurations, you can find a training tool that safely supports your home workouts and helps you progress toward a stronger, more balanced upper body.
Understand Push-Up Board Mechanics and Muscle Targeting
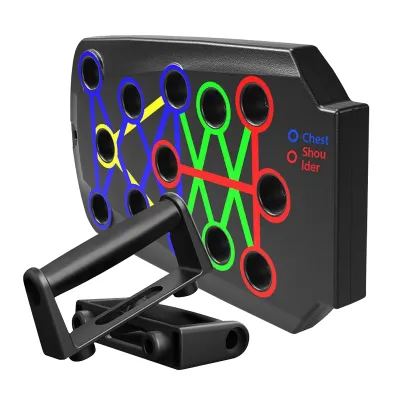
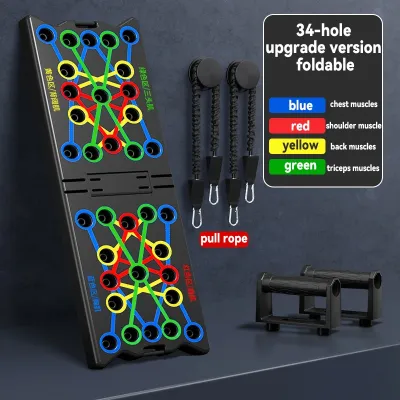
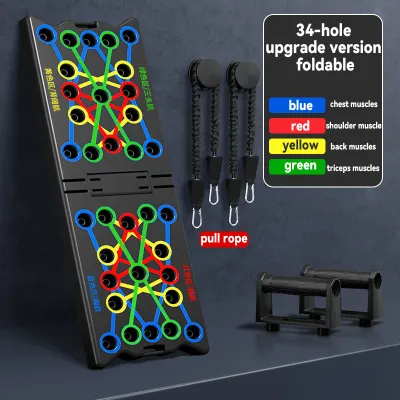
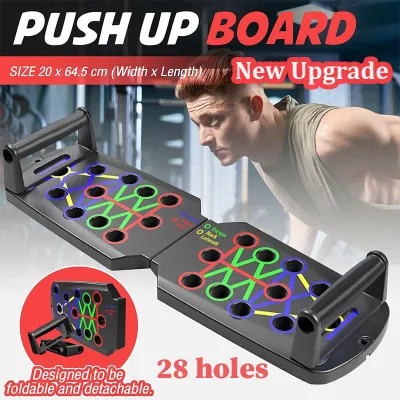
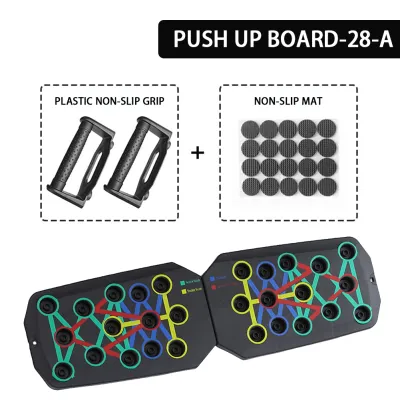
Push-up boards utilize a system of color-coded slots or adjustable tracks to guide your hand placement. This visual system is designed to take the guesswork out of targeting specific muscle groups. Typically, standard color-coding conventions designate red lines for chest development, yellow lines for shoulder activation, green lines for triceps isolation, and blue lines for targeting the upper back. By inserting the removable handles into these designated slots, you instantly alter the biomechanics of the movement, forcing specific muscle fibers to recruit more heavily to complete the lift.
Products mentioned in this guide

Prices are valid at publication and may change. Please refer to the product page for the latest price.
When shopping for a board, you will generally choose between fixed-slot designs and adjustable or rotating systems. Fixed-slot boards feature pre-molded holes set at specific angles and distances. These are highly stable, straightforward to use, and excellent for beginners who need structured guidance. Adjustable or rotating boards, on the other hand, allow the handles to pivot or slide along a track. This dynamic movement can increase core engagement and allow for a more natural joint path, but it also requires greater shoulder stability and control to prevent injury.
The width and angle of your grip are the primary drivers of muscle activation and joint stress. A wide grip places a greater stretch on the pectoral muscles, making it highly effective for chest hypertrophy, but it also increases the shear force on the shoulder joints. Conversely, a narrow grip shifts the workload to the triceps and the clavicular head of the chest. Angling the handles inward or outward changes the rotation of the shoulder joint; a neutral grip, where your palms face each other, significantly reduces wrist extension and minimizes stress on the rotator cuff, making it a safer option for high-volume training.
Furthermore, the angle of the wrist directly affects the elbow path during a repetition. When handles are angled outward, the elbows naturally flare, which targets the outer chest but requires strong shoulder stabilization. When handles are angled inward, the elbows tuck closer to the body, protecting the shoulder joint but placing a higher demand on the arms. Understanding this mechanical relationship helps you select configurations that match your joint health and prevent common injuries like shoulder impingement.
Key Features to Evaluate for Your Training Level
Before purchasing a push-up board from an online marketplace, you must evaluate its material durability and weight capacity. Most consumer-grade boards are constructed from Acrylonitrile Butadiene Styrene (ABS) plastic, which is lightweight and impact-resistant. However, the thickness of the plastic and the internal structural ribbing vary greatly between models. Always check the manufacturer’s specified weight limit to ensure the board can safely support your body weight, especially if you plan to wear a weighted vest or use resistance bands to increase the load.

Handle ergonomics and grip texture are critical for maintaining control during intense training sessions. Look for handles that feature textured rubber or silicone overmolds rather than smooth, bare plastic. In warm, humid climates, sweat can easily cause your hands to slip off bare plastic handles, which can lead to sudden joint hyperextension or falls. Ergonomically shaped handles that contour to the natural curve of your palm help distribute your body weight more evenly, reducing localized pressure on the ulnar nerve and preventing hand fatigue.
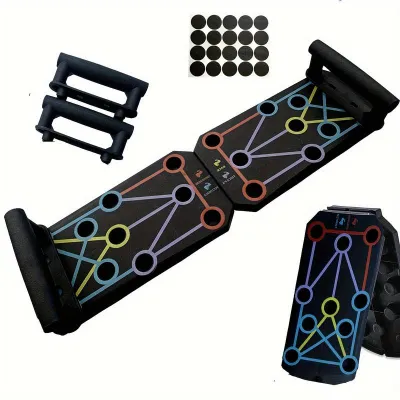
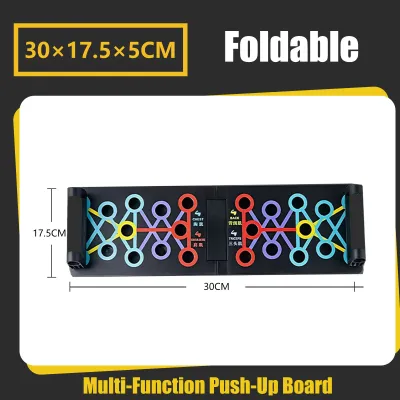
Portability is another key factor, particularly if you have limited workout space at home or prefer to train outdoors. Many modern boards feature a foldable design with a central hinge, allowing you to fold the platform in half for easy storage or transport. If you choose a foldable model, inspect the hinge mechanism to ensure it locks securely when open; a flimsy hinge can flex or collapse under load. Additionally, verify that the underside of the board is equipped with high-quality, non-slip rubber pads to prevent the platform from sliding on smooth tiled or polished wooden floors during your workout.
The design of the board’s base also plays a major role in overall stability. Some boards feature a solid flat bottom, while others utilize a hollowed-out grid pattern to reduce weight. While grid patterns make the board easier to carry, the plastic walls must be thick enough to prevent flexing when you apply your full body weight. In homes with ceramic or granite tile flooring, high-friction rubber feet are absolutely non-negotiable to prevent the board from sliding out from under you mid-repetition.
Matching Board Configurations to Specific Upper Body Goals
To maximize chest development, your board configurations should allow for both wide and moderate grip widths. Wide-grip positions stretch the pectoral fibers at the bottom of the movement, promoting muscle growth across the outer chest. However, to protect your shoulders, ensure the board’s slots do not force your elbows to flare out past a 45-degree angle from your torso. For inner chest definition, utilize narrower, parallel slots that allow you to squeeze your chest muscles forcefully at the peak of the push-up.
If your primary goal is to build stronger shoulders and defined triceps, you will need a board that offers specialized narrow and angled configurations. Shoulder-focused slots typically position the handles closer to your mid-torso, requiring you to lean forward slightly to perform the movement, which increases the load on the anterior deltoids. For triceps isolation, look for parallel slots spaced roughly shoulder-width apart or narrower. This setup forces your elbows to tuck tightly against your ribs, shifting the mechanical advantage away from the chest and directly onto the arms.
As your strength increases, standard bodyweight push-ups may no longer provide enough resistance to stimulate muscle growth. To continue progressing, look for push-up boards that feature integrated anchor points for resistance bands. By looping resistance bands through these anchors and over your back, you can add progressive overload, making the exercise significantly harder at the top of the movement where your muscles are strongest. Alternatively, you can adjust the difficulty by elevating your feet on a stable bench or step, shifting more of your body weight onto your upper chest and shoulders.
For beginners, a great way to build initial strength is to use the board in an elevated position. Placing the board on a sturdy, non-slip elevated surface reduces the percentage of your body weight you have to lift, allowing you to perfect your form before moving to the floor. As your strength develops, you can transition to flat floor push-ups, and eventually to decline push-ups by placing your feet on a chair or bed. The board’s handles remain useful throughout all these stages by keeping your wrists in a safe, neutral position.
How to Build Your Push-Up Board Shortlist
Building a reliable shortlist starts with verifying the physical dimensions of the board against your own body build. A board that is too narrow will prevent taller men or those with broad shoulders from achieving a proper wide-grip push-up, forcing the joints into restricted, uncomfortable angles. Measure your shoulder span and compare it to the board’s total length to ensure you have ample room to execute every exercise variation with a full range of motion.
Next, carefully review the return policies and warranty terms offered by the seller on your chosen ecommerce platform. Fitness equipment is subjected to repetitive, high-impact forces, and even durable plastics can occasionally suffer from manufacturing defects. A reliable warranty of at least six months to a year provides peace of mind, ensuring you can secure a replacement if the board cracks or the handle pegs shear off during normal use.
Another critical detail to check is the handle peg clearance. The pegs on the bottom of the handles must fit snugly into the board’s slots without excessive play or wobbling. If the pegs are too loose, the handles will wobble during your exercise, which compromises stability and can cause micro-tears in the plastic slots over time. Conversely, if they are too tight, they will be difficult to insert and remove, which can disrupt your momentum during fast-paced, high-intensity interval training.
Finally, analyze user reviews to gain insights into long-term durability and real-world performance. Look for feedback from buyers who have used the board for several months, paying close attention to comments regarding handle stability and joint comfort. If multiple reviews mention that the handles wobble in their slots or that the rubber feet peel off after a few weeks, it is best to remove that model from your shortlist. Prioritize boards that receive consistent praise for structural rigidity and stable, secure handle fitment.
Frequently Asked Questions (FAQ)
Are push-up boards safe for beginners with wrist pain?
Yes, push-up boards can be highly beneficial for beginners experiencing mild wrist discomfort. When you perform a standard push-up flat on the floor, your wrists are forced into a sharp 90-degree angle of extension, which places significant stress on the tendons and carpal tunnel. The elevated handles of a push-up board allow you to maintain a neutral, straight wrist alignment, distributing your body weight through your forearms and knuckles. However, it is crucial to monitor your body’s signals; if you experience sharp or persistent pain, stop the exercise immediately. Equipment can assist with alignment, but it cannot cure underlying injuries, so consult a physical therapist or physician if pain continues.
Can I use resistance bands with any push-up board?
No, you should not attempt to use resistance bands with just any push-up board. Only boards that are explicitly designed with reinforced, built-in metal anchors or heavy-duty plastic loops can safely accommodate resistance bands. Attempting to loop bands under a standard board without dedicated anchors can cause the board to slide, tilt, or flip unexpectedly during a repetition, potentially leading to injury. Before each workout, perform a quick safety inspection: check the bands for micro-tears or discoloration, and ensure the anchor points on the board are free of cracks and securely fastened.
How do I maintain and clean my push-up board?
Proper maintenance is essential to prolong the lifespan of your fitness equipment, especially in humid climates. After every workout, wipe down the board’s surface and the handle grips with a damp microfiber cloth and a mild, non-abrasive soap to remove sweat, body oils, and dust. Avoid using harsh chemical solvents or bleach, as these can degrade the ABS plastic and cause rubber grips to become sticky or peel off. Regularly inspect the handle pegs and the board’s slots for any signs of hairline cracks or stress whitening. Store your board in a cool, dry indoor space away from direct sunlight, as prolonged exposure to ultraviolet rays can make the plastic brittle and prone to cracking under load.
Community discussion
Share your experience or ask a question. Comments are reviewed before publication.