
Mastering the roman chair exercise requires a strict focus on controlled movement, precise body alignment, and personalized equipment adjustment. This specialized piece of fitness equipment is designed to isolate and strengthen your posterior chain—including your lower back, glutes, and hamstrings—as well as your core muscles. However, executing these movements safely depends entirely on your form rather than how fast or how high you can lift your torso. By understanding the mechanics of your body in relation to the machine, you can build a resilient back and core from the comfort of your home gym.
In tropical environments like the Philippines, home workouts present unique challenges such as high humidity and sweat buildup, which can affect your grip and stability on fitness equipment. Ensuring you perform each repetition with deliberate control is the key to preventing slips and avoiding unnecessary spinal strain. Whether you are looking to improve your posture, support your daily functional movements, or complement a broader strength training routine, learning the correct setup and execution of these exercises is your first and most important step.
Setting Up Your Roman Chair for Safe Use
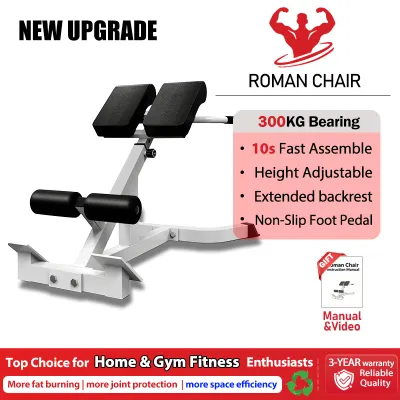
Before placing your weight on a roman chair, you must adjust the machine to match your specific body proportions. Proper alignment prevents joint strain and ensures that the target muscles perform the actual work. Start by adjusting the height of the main thigh pad. When you stand in the machine, the top edge of this pad should rest just below your hip crease. This specific positioning allows your pelvis to tilt forward freely during the descent without restricting your range of motion or pinching your upper thighs.
Products mentioned in this guide


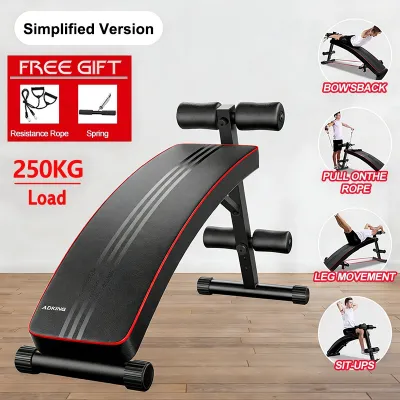
Prices are valid at publication and may change. Please refer to the product page for the latest price.
If the pad is positioned too high, your lower back will be forced to round over the top of the cushion, which places dangerous pressure on your lumbar spine. Conversely, if the pad is too low, you will struggle to maintain leverage, and your thighs will bear the brunt of the pressure, reducing the effectiveness of the exercise. Take the time to test the height by performing a practice hinge before committing to a full workout session.
Once the pad height is set, secure your ankles and feet firmly between the roller pads. Your heels should press back against the rear rollers, while your calves or lower shins rest securely against the front support. This snug fit is what keeps your lower body anchored, allowing you to pivot safely. In humid conditions, sweat can make vinyl rollers slippery, so wearing athletic shoes with a reliable grip is essential to prevent your feet from sliding out of place mid-exercise.
Finally, verify the physical stability of the equipment on your floor. Place the roman chair on a flat, non-slip surface, such as a rubber gym mat, to prevent it from rocking or sliding during use. Always check the manufacturer’s manual to confirm the maximum weight capacity of your specific model. Inspect the frame for any loose bolts or wobbling parts before you begin, as a stable base is your primary defense against tipping or structural failure.
Step-by-Step Guide to Core and Back Exercises
The roman chair is a highly versatile tool that targets the entire midsection, focusing heavily on the erector spinae of the lower back, the gluteus maximus, and the rectus abdominis. To get the most out of these movements, you must prioritize a slow, controlled tempo rather than relying on momentum. Rushing through repetitions bypasses the target muscles and subjects your joints to sudden, jarring forces.

Back Extensions for Lower Back and Glutes
To begin a standard back extension, position yourself face down in the roman chair with your feet secured and your hips resting against the pad. Start with your body in a straight line from your head to your heels, keeping your spine neutral and your core fully engaged. Relax your shoulders down and away from your ears, and place your hands gently across your chest or behind your head without pulling on your neck.
Slowly lower your torso by hinging at the hips, keeping your back completely flat as you descend. Lower yourself only as far as your hamstring flexibility allows, which typically stops when your torso is roughly perpendicular to the floor. Avoid letting your upper back round or collapse at the bottom of the movement, as this shifts the load away from your muscles and onto your spinal ligaments.
Engage your glutes and hamstrings to initiate the upward phase, lifting your torso back to the starting position. Stop lifting the moment your body forms a straight, diagonal line from your ankles to your head. A common and dangerous error is hyperextending the back by arching past this straight line, which compresses the lumbar vertebrae and can lead to severe discomfort.
Keep your gaze directed slightly downward throughout the entire movement to maintain a neutral neck. Jerking your head upward or looking at a mirror in front of you strains the cervical spine. Focus on a smooth tempo, taking two to three seconds to lower your body and another two seconds to return to the top, pausing briefly at the peak of the movement to maximize muscle activation.
Roman Chair Sit-Ups for Core and Abs
To target your abdominal muscles, you will position yourself facing upward on the roman chair. Adjust the seat or thigh pads so they support your upper thighs and glutes, allowing your hips to hang slightly off the edge. Secure your feet firmly under the ankle rollers to counteract the weight of your upper body as you lean backward.
Begin the movement with your torso upright and your hands crossed over your chest. Slowly lower your upper body backward in a highly controlled manner, stopping when your torso is parallel to the floor or slightly above it. Going too deep into a backbend puts extreme stress on your hip flexors and lower back, so keep the range of motion moderate and manageable.
As you rise back to the starting position, focus on contracting your abdominal muscles to pull your torso upward. Avoid the temptation to pull on your head or neck with your hands, which can strain your cervical muscles. Instead, keep your chin slightly tucked toward your chest and let your core do the lifting.
To minimize hip flexor dominance—which is a common issue where the front of the thighs do more work than the abs—keep your torso slightly rounded as you rise. This slight curve helps isolate the rectus abdominis. If you feel a pulling sensation or pinching in the front of your hips, reduce the depth of your descent and focus on a shorter, more concentrated abdominal crunch.
Form Checks and Safety Boundaries for Home Workouts
Working out at home means you do not have a spotter or trainer to correct your form, making self-assessment incredibly important. You must learn to distinguish between normal muscle fatigue and warning signs of injury. Normal fatigue feels like a warm, dull burn in the target muscles, such as your glutes or lower back, which gradually intensifies as your set progresses. This sensation should subside quickly once you stop exercising.
In contrast, sharp, shooting, joint-focused, or nerve-related pain is a clear signal that something is wrong. If you feel a pinching sensation in your lower back, a sharp pull in your hips, or tingling radiating down your legs, stop the exercise immediately. These sensations often indicate spinal compression or nerve irritation, which can be aggravated by continuing the movement.
Other immediate stop conditions include dizziness, lightheadedness, or a sudden loss of neutral spine alignment. In warm, humid climates like the Philippines, dehydration can set in quickly during home workouts, leading to muscle cramps or sudden fatigue. Keep a water bottle nearby, ensure your workout space has adequate ventilation or fan airflow, and never attempt to push through a set if you feel your form collapsing.
Safety also depends on the physical condition of your equipment. Regularly consult your roman chair’s instruction manual for specific maintenance guidelines. Check that all adjustment pins are fully engaged and locked into place before you climb onto the machine. Periodically tighten all bolts, inspect the vinyl upholstery for tears that could cause slipping, and wipe down the pads after every session to prevent sweat and moisture from degrading the materials.
Progressing Your Routine Safely
Once you can perform basic roman chair exercises with perfect form, you can progress the difficulty without immediately reaching for heavy weights. Adding external resistance too quickly can compromise your alignment and increase the risk of injury. Instead, focus on manipulating your body weight and leverage to challenge your muscles.
One of the most effective progression methods is slowing down the eccentric, or lowering, phase of the exercise. By taking four to five seconds to lower your torso, you increase the time under tension for your lower back and glutes. This forces your muscles to work harder to control your descent, building deep stability and strength without adding extra load to your spine.
Another excellent technique is incorporating isometric pauses at the peak of the movement. When you reach the top of a back extension—where your body forms a straight line—hold that position for two to three seconds while actively squeezing your glutes and core. This pause eliminates momentum and builds muscular endurance in the fully contracted position.
You can also alter your leverage by changing your arm position. Crossing your arms over your chest is the easiest variation. To increase the difficulty, place your hands behind your ears, or extend your arms straight out past your head. Extending your arms moves your center of gravity further from your hips, significantly increasing the resistance your lower back and core must overcome to lift your torso.
Frequently Asked Questions (FAQ)
Can I use a roman chair if I have existing lower back pain?
Using a roman chair when you have active or chronic lower back pain is generally not recommended without professional guidance. If your back pain is caused by a herniated disc, spinal stenosis, or joint inflammation, the loading and pivoting forces of a roman chair can easily aggravate these conditions. It is crucial to obtain clearance from a physical therapist or doctor before attempting these exercises, as they can assess whether your spine is ready to handle extension movements. While you are recovering or building foundational stability, consider low-impact alternatives such as bird-dogs, glute bridges, or standard planks on a flat mat. These exercises strengthen your core and posterior chain without placing compressive loads on your lumbar spine.
How often should I include roman chair exercises in my routine?
For most fitness enthusiasts, performing roman chair exercises two to three times per week is sufficient to build strength and endurance. Because the lower back muscles consist of highly resilient postural fibers, they respond well to frequent training, but they still require adequate rest to repair and grow. Avoid training these muscles on consecutive days; always allow at least 48 hours of recovery between intense sessions. You can easily integrate these movements into a lower-body workout day or a dedicated core routine. Always listen to your body’s feedback; if your lower back feels excessively tight, sore, or fatigued from daily activities, reduce your training volume or skip the roman chair session entirely to prevent overtraining.
Community discussion
Share your experience or ask a question. Comments are reviewed before publication.