
Equipping a lightweight inflatable boat or kayak with an electric trolling motor transforms your time on the water, turning exhausting paddling sessions into efficient, relaxing trips. In the Philippines, where diverse marine environments range from the calm waters of inland lakes like Laguna de Bay to choppy coastal bays, choosing the right makina pang bangka requires careful planning. Unlike rigid fiberglass or aluminum boats, inflatable hulls and narrow kayaks have strict physical limitations regarding weight distribution, structural rigidity, and mounting space. Selecting an incompatible motor can compromise your vessel’s stability, damage the hull material, or leave you stranded against strong tropical currents.
To make an informed decision, you must evaluate how a motor’s weight, shaft length, thrust, and power requirements align with your specific watercraft. This guide provides a practical framework to help you assess your vessel’s limits, calculate your power needs, and establish a safe, reliable setup for your local boating adventures.
Core Selection Criteria for Inflatable and Kayak Motors
When dealing with lightweight, non-rigid watercraft, weight is your primary constraint. Every kilogram added to the stern or bow affects how the vessel sits in the water, directly impacting draft, tracking, and overall safety. Inflatable boats, particularly those with air-deck or slat floors, can flex under heavy loads, while narrow kayaks can become dangerously unstable if too much weight is concentrated at one end. Therefore, your choice of motor must prioritize a high power-to-weight ratio to ensure you do not exceed the maximum weight capacity specified on your vessel’s capacity plate.
Products mentioned in this guide
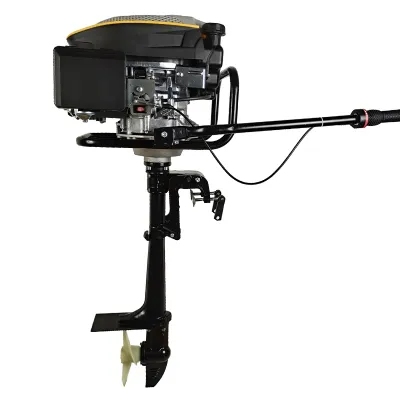
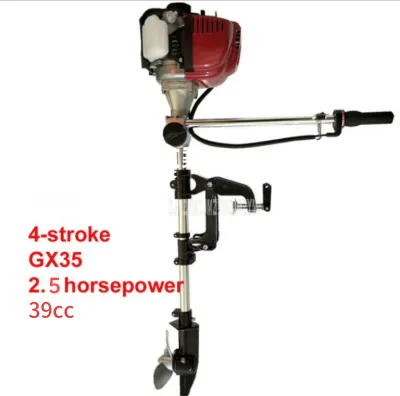
Prices are valid at publication and may change. Please refer to the product page for the latest price.
Shaft length is another critical factor that dictates both performance and safety. If the shaft is too short, the propeller will draw in air from the surface—a phenomenon known as cavitation—which severely reduces thrust and increases noise. If the shaft is too long, it increases drag, makes steering more difficult, and risks striking shallow reefs, rocks, or sandbars common in Philippine coastal waters. To find the correct length, measure the distance from the top of your motor mount to the waterline, then add approximately 15 to 20 inches to ensure the propeller remains fully submerged even in wavy conditions.
Limited deck space on kayaks and small inflatables also dictates your choice of control mechanism. Standard tiller handles are highly reliable and intuitive, but they require you to sit near the rear of the boat, which can negatively affect weight distribution. Some motors feature extendable or tilting tillers that allow you to sit slightly further forward to keep the bow down. Alternatively, bow-mounted motors with wireless remote controls or foot pedals offer excellent maneuverability and free up hands for fishing, though they require a more complex mounting setup and additional deck space for the foot console.
Mounting Compatibility and Hull Safety Checks
Before purchasing any motor, you must verify how it will attach to your watercraft without causing structural damage. Most inflatable boats designed for motors feature a built-in marine plywood or fiberglass transom. For these vessels, a standard transom-mount trolling motor clamps directly onto the board. However, you must inspect the transom thickness and ensure the clamp screws can tighten securely without crushing the material. If your inflatable lacks a rigid transom, you will need to install a removable transom kit, which typically secures to pre-installed rubber D-rings or grommets on the stern. Always verify that these attachment points are securely glued and free of dry rot or peeling before mounting the motor.

Kayaks present a different set of mounting challenges due to their narrow beams and varied deck profiles. While some modern fishing kayaks come with integrated transom plates or molded-in brass inserts for motor mounts, older or more basic models require aftermarket brackets. Side-mount brackets clamp across the kayak’s cockpit, positioning the motor to one side, which can make steering asymmetrical and affect lateral stability. Stern-mount brackets that attach to the kayak’s rudder lines or accessory tracks offer a more balanced centerline thrust but require a steering linkage system, such as foot pegs or hand-operated cables, to control your direction.
Regardless of the mounting style, hull safety checks are paramount before every launch. Check for any signs of material fatigue, such as hairline cracks in plastic kayak hulls or lifting seams on PVC inflatables. The torque generated by even a small electric motor can twist a weak mount, potentially tearing the fabric of an inflatable or cracking the rotomolded plastic of a kayak. If you observe any flexing or movement in the mount when applying manual pressure, reinforce the area with backing plates or adjust the mounting hardware before heading out.
Calculating Thrust and Battery Needs
Determining how much thrust your motor needs is essential for safe navigation, especially when facing local tides, river currents, or sudden afternoon winds. A standard industry guideline suggests a minimum of 2 pounds of thrust for every 100 pounds of total weight, which includes the boat, motor, battery, tackle, safety gear, and all passengers. For example, if your fully loaded inflatable boat weighs 600 pounds, you would require a motor with at least 12 pounds of thrust. However, this is a baseline for calm waters; for coastal areas or rivers with noticeable currents, increasing this baseline by 50 percent provides a crucial safety margin to prevent being swept off course.
Trolling motors generally operate on 12-volt, 24-volt, or 36-volt electrical systems. For most kayaks and small inflatables under 12 feet, a 12-volt system is highly preferred because it only requires a single battery, keeping weight and space requirements to a minimum. Larger inflatables or heavy-duty multi-passenger rafts may benefit from the increased efficiency and sustained power of a 24-volt system, but this requires wiring two batteries in series, doubling the onboard battery weight. Carefully weigh the benefits of extended runtime against the physical space and load capacity limits of your vessel.
The choice of battery chemistry significantly impacts your boat’s performance and your physical effort when transporting gear. Traditional deep-cycle lead-acid or AGM (Absorbed Glass Mat) batteries are widely available and cost-effective, but they are extremely heavy, often weighing between 20 to 30 kilograms. In contrast, Lithium Iron Phosphate (LiFePO4) batteries offer a modern alternative, providing up to 60 percent weight savings for the same capacity, a flatter discharge curve for consistent motor performance, and a longer overall lifespan. While the initial investment for lithium is higher, the reduction in physical strain and the improved buoyancy of your lightweight boat make it a compelling option for frequent boaters.
Building Your Shortlist: Features to Evaluate
When comparing different motor models on local online marketplaces or in specialty marine shops, look closely at the propeller design. Shallow coastal flats and inland lakes in the Philippines are often thick with seagrass, water hyacinths, or algae. A motor equipped with a weedless propeller—featuring swept-back blades—helps slice through vegetation without wrapping weeds around the shaft, preventing motor stalls and potential damage to the internal seals. If you plan to fish in these environments, verify that replacement propellers and shear pins are easily accessible locally, as these are common wear items.
Another key feature to evaluate is the speed control mechanism. Basic, budget-friendly motors typically offer fixed speed steps, such as five forward speeds and three reverse speeds. While functional, these systems waste energy through heat resistors when running at lower speeds. Advanced models utilize digital variable speed controllers, often marketed as digital maximizers or step-less speed controls. These systems deliver precise power adjustments, allowing you to match the exact speed of the current, and can extend your battery runtime by up to five times at lower speeds, making them highly efficient for long days on the water.
Finally, prioritize local service availability and warranty support. Marine environments are incredibly harsh on electrical components, and even the most reliable motors can experience issues due to saltwater intrusion or electrical surges. Purchasing from brands that have authorized service centers or established distributors in the Philippines ensures you can source replacement parts, such as carbon brushes, switches, and seals, without waiting weeks for international shipping. While basic 12-volt motors may range from ₱5,000 to ₱12,000, advanced models with digital maximizers can cost significantly more, requiring you to balance upfront costs against long-term battery savings and local parts availability before making your final selection.
Pre-Launch and Post-Use Maintenance Routines
Operating any electrical equipment in water, especially saltwater or brackish coastal areas, demands a strict maintenance routine to prevent premature failure. Before launching, always inspect the propeller for any wrapped fishing line, which can migrate past the prop and destroy the motor’s watertight seals, leading to internal flooding. Check all electrical connections for signs of corrosion, which presents as a greenish or white powdery buildup. Ensure the battery terminals are clean and tight, as loose connections create high resistance, leading to power loss, heat buildup, and potential melting of the plastic connectors.
Immediately after every trip, rinse the entire motor thoroughly with clean freshwater to remove salt deposits, sand, and organic debris. Pay special attention to the area behind the propeller and the telescoping handle mechanism. Wipe down the shaft and motor housing with a soft, dry cloth, and store the unit in a cool, dry place out of direct sunlight to protect the plastic components from UV degradation. If your motor is equipped with a sacrificial zinc anode on the shaft or propeller, inspect it regularly; this anode is designed to corrode first to protect the motor’s metal housing, and it must be replaced once it has worn down by half.
While on the water, remain alert to any changes in the motor’s operation. If you experience unusual vibrations, a sudden drop in speed, or if the motor housing feels excessively hot to the touch, turn off the power immediately. These are clear stop conditions indicating a bent propeller shaft, a damaged blade, or water ingress into the motor lower unit. Continuing to operate a malfunctioning motor can cause irreversible damage or lead to a complete electrical short, leaving you stranded. Always carry a pair of oars or paddles as a primary safety backup, regardless of how reliable your motor setup is.
Frequently Asked Questions (FAQ)
Can I use a standard outboard motor instead of a trolling motor on a kayak?
Using a standard gas-powered or high-thrust electric outboard motor on a kayak is generally unsafe and not recommended. Kayak hulls are designed for low-speed displacement paddling; they lack the structural rigidity, transom strength, and hull width required to handle the weight and torque of a heavy outboard motor. Mounting a heavy motor on the stern shifts the center of gravity dangerously backward, raising the bow and making the kayak highly susceptible to flipping or swamping from behind. Additionally, excessive speed can cause a kayak to become uncontrollable, posing a severe safety risk to the operator.
How do I secure the battery on an inflatable boat?
Securing a heavy marine battery on an inflatable boat requires careful placement to maintain vessel stability and protect the hull. Always place the battery inside a heavy-duty, waterproof battery box to shield the terminals from water splashes and prevent accidental short circuits. Position the box along the centerline of the boat, ideally near the middle or slightly forward, to balance the weight of the motor on the stern. Secure the battery box to the boat’s floor or structural frames using heavy-duty tie-down straps or webbing loops to prevent it from sliding around when navigating waves or making sharp turns.
Community discussion
Share your experience or ask a question. Comments are reviewed before publication.