
Selecting the right therapy putty resistance level is essential for building hand strength, improving dexterity, and supporting recovery without straining your joints. While these pliable training tools are highly effective for targeted finger and grip exercises, choosing a tension that is too light will stall your progress, while one that is too heavy can lead to joint irritation or muscle strain. Finding the ideal starting point requires understanding how different color-coded systems work, evaluating your current physical baseline, and aligning the material’s resistance with your specific fitness or rehabilitation goals.
Decoding Therapy Putty Color Codes and Resistance Levels
Therapy putty is a specialized silicone material designed to provide consistent resistance when squeezed, pinched, stretched, or twisted. To help users navigate the progression of difficulty, manufacturers typically organize their product lines using a color-coded system. This system generally transitions from highly pliable, low-resistance options to firm, high-resistance formulas. For example, a common progression starts with tan or yellow for extra-soft tension, moves through red and green for medium levels, and finishes with blue or black for firm and extra-firm resistance.
However, there is no universal industry standard governing these colors. A yellow putty from one brand might feel significantly firmer or softer than a yellow putty from another manufacturer. Because of these variations, you must always verify the specific resistance chart and specifications provided on the product packaging or the manufacturer’s official documentation before making a purchase.
Products mentioned in this guide

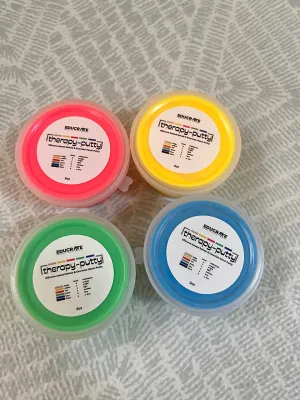
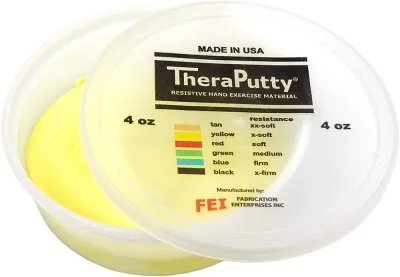
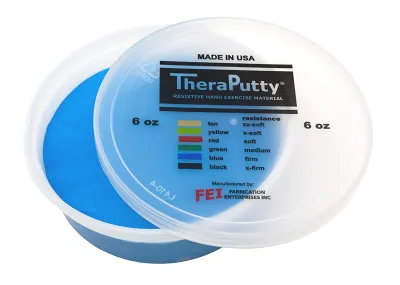
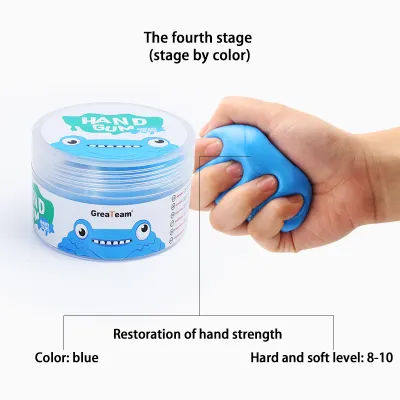
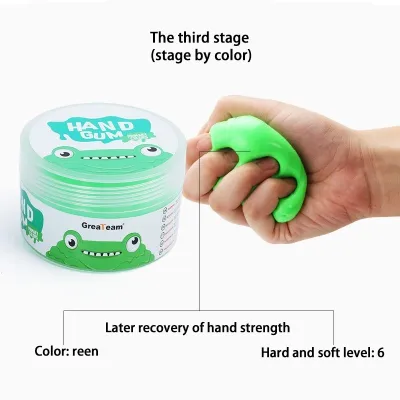
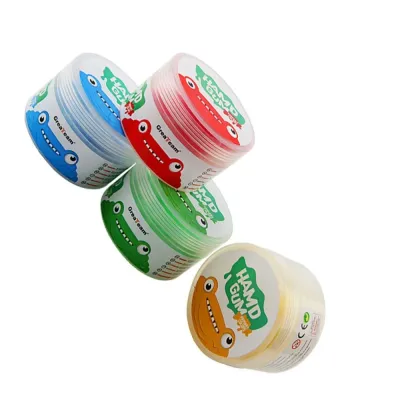
Prices are valid at publication and may change. Please refer to the product page for the latest price.
Environmental factors also play a subtle role in how the putty behaves during your training sessions. In warm, humid tropical conditions, such as typical afternoons in the Philippines, the silicone material can become slightly softer and more pliable. Conversely, storing the putty in an air-conditioned room or allowing it to age over several months can make it feel noticeably firmer. Keeping your putty stored in its airtight container away from direct sunlight helps maintain its intended physical properties and ensures consistent resistance during use.
Assessing Your Baseline Grip and Finger Strength
Before selecting a specific color or resistance level, you must evaluate your current hand strength and joint health. A safe starting point is determined by your ability to perform daily functional tasks without discomfort. If you routinely experience hand fatigue when opening jars, holding a pen, or carrying groceries, your baseline strength may require a softer, highly compliant putty to prevent overexertion.

Your physical history is a critical factor in this assessment. If you are recovering from a recent hand injury, managing joint conditions like arthritis, or dealing with chronic finger stiffness, your primary focus must be on joint safety rather than rapid strength gains. If you experience active pain, swelling, or numbness in your fingers or wrists, stop immediately and consult a healthcare professional or physical therapist before beginning any resistance training program.
To gauge your baseline comfort at home, you can perform simple, low-risk checks using everyday household items. Try squeezing a soft, rolled-up towel or a low-resistance foam stress ball. Pay close attention to how your finger joints and wrists feel during and after the movement. If these basic actions cause stiffness or mild discomfort, you should begin with the lowest resistance level available, such as an extra-soft or soft putty, to build mobility before attempting heavier loads.
Matching Putty Resistance to Your Training Goals
Your choice of therapy putty tension should directly align with what you want to achieve in your fitness or recovery routine. Different training objectives require distinct physical adaptations, which are best supported by specific resistance levels. Matching the material’s firmness to your goals ensures that your hand muscles are stimulated correctly without risking repetitive strain injuries.
If your primary goals are high-repetition endurance training, warming up your hands before a climbing session, or active recovery, lower resistance levels are highly effective. Soft putties allow you to perform fluid, continuous movements that promote blood flow and joint lubrication without fatiguing the muscles too quickly. These lighter tensions are also ideal for fine motor coordination exercises, where precision and control are more important than raw power.
For building maximum grip, crush, and pinch strength, you will need to transition to medium-firm or firm resistance levels. These denser putties provide the necessary counterforce for low-repetition, high-effort exercises that challenge the deep muscles of the forearm and hand. When training for strength, the resistance should be firm enough that your muscles feel thoroughly worked after a few focused sets, yet pliable enough to allow a complete range of motion.
To achieve long-term progress, apply the principle of progressive overload to your hand training. Rather than immediately jumping to a harder putty, you can progressively overload your muscles by increasing the number of repetitions, extending the duration of your squeezes, or adding extra sets to your routine. Once you can easily complete your target routine with perfect form and zero joint discomfort, you can confidently transition to the next resistance level in the manufacturer’s progression.
Testing and Adjusting Your Putty Tension Safely
When you begin working with a new container of therapy putty, always start your session with a brief testing phase to ensure the tension is appropriate for your current physical state. Begin with a lighter resistance or perform a few gentle warm-up squeezes to prepare your tendons and joints. This initial check allows you to assess your range of motion and ensure that your fingers can move through their full path without restriction.
As you perform your exercises, closely monitor your body’s feedback. Muscle fatigue is a normal response to strength training, but joint pain, sharp twinges, numbness, or tingling are clear warning signs. Establish a strict stop condition for your workouts: if you experience any of these symptoms, cease the exercise immediately, set the putty aside, and allow your hand to rest.
Upgrading to a higher resistance level should be a deliberate, criteria-based decision. You are ready to move to a firmer putty when you can complete your entire target routine—such as three sets of fifteen repetitions of a specific pinch or squeeze—with complete control, perfect form, and absolutely no lingering joint soreness the following day. If your form breaks down or your fingers begin to compensate by twisting awkwardly, return to the lighter putty to protect your joints and reinforce proper movement patterns.
Frequently Asked Questions (FAQ)
Can I mix different colors of therapy putty to change the resistance?
Mixing different colors of therapy putty is not recommended if you want to achieve a specific, reliable resistance level. Combining two different putties does not create a predictable intermediate tension, and the physical blending process can compromise the material’s structural integrity over time. Additionally, once mixed, the putties cannot be separated, making it impossible to return to your original training levels. To ensure consistent, measurable progress, it is best to purchase the next official resistance level specified by the manufacturer.
How do I know when it is time to upgrade my therapy putty?
You will know it is time to upgrade your therapy putty when your current resistance level no longer challenges your muscles. If you can easily complete your target sets and repetitions with perfect form, minimal muscle fatigue, and zero joint discomfort, your hands have adapted to that specific tension. When this occurs, check the manufacturer’s progression chart on the packaging to identify the next color level, and transition to it gradually to continue building your grip and finger strength safely.
Community discussion
Share your experience or ask a question. Comments are reviewed before publication.