
Living in a high-rise condominium in metropolitan areas like Manila or Cebu often means balancing a passion for cycling with the realities of limited square footage. When the rainy season hits or traffic makes outdoor rides impractical, an indoor bike trainer becomes an essential tool for maintaining fitness. However, cramming a full-sized bicycle and a training rig into a compact living room or studio unit requires careful planning. A suitable setup must not only fit within your available floor space but also respect the peace of your neighbors and integrate seamlessly into your daily living routine.
Choosing the right indoor bike trainer for a condo is not just about finding the most advanced model on the market. It is a practical decision that hinges on storage convenience, noise levels, and how easily you can set up and pack away your gear. By understanding the physical footprint of different trainer types and assessing your specific living space, you can create a highly functional home gym setup that does not compromise your comfort or your floor plan.
Comparing Trainer Form Factors for Limited Floor Plans
To find a suitable fit for a small condo, you must first understand how the three primary trainer form factors—wheel-on trainers, direct-drive trainers, and compact rollers or foldable models—differ in physical size, weight, and storage capability. Each design presents distinct trade-offs between riding stability, setup complexity, and the amount of space it occupies when both active and stored.
Products mentioned in this guide
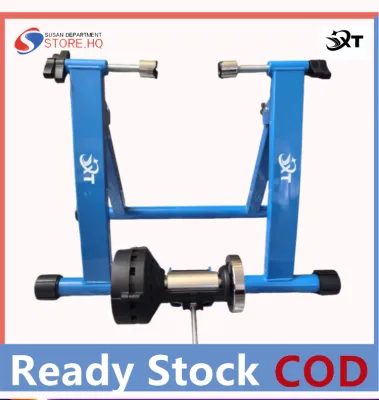
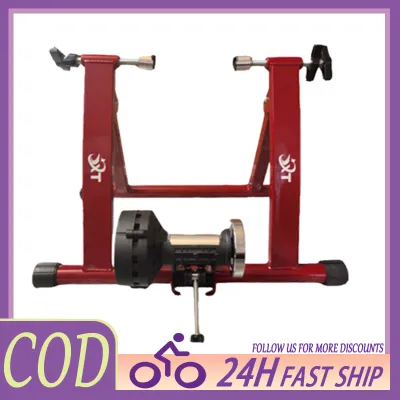
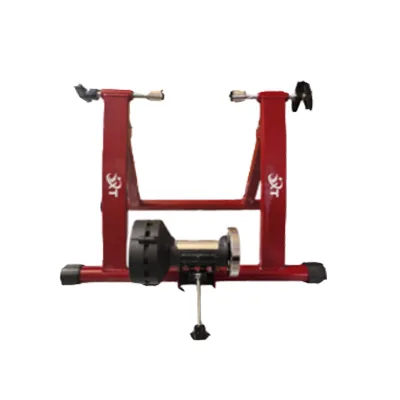
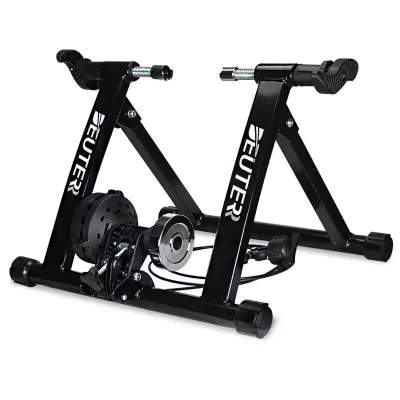
Prices are valid at publication and may change. Please refer to the product page for the latest price.
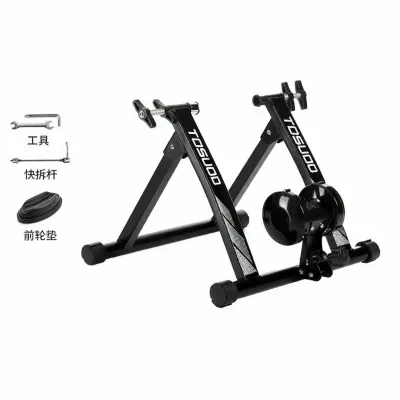
Wheel-on trainers are traditionally the most common entry point for indoor cycling. These units function by clamping onto your bike’s rear quick-release axle or thru-axle, pressing a small roller against the rear tire to create resistance. From a spatial perspective, wheel-on trainers are relatively lightweight and highly mobile, often featuring frames that fold flat. This makes them easy to slide under a bed or tuck into a narrow closet when not in use. However, the requirement to keep the rear wheel on the bike means you must manage the overall length of the fully assembled bicycle, and you may need to swap your outdoor tire for a specific trainer tire to prevent excessive wear and black rubber dust from accumulating on your condo floor.
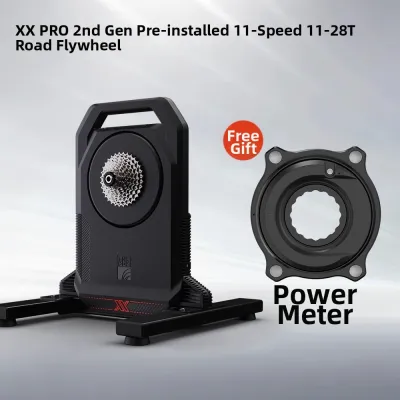
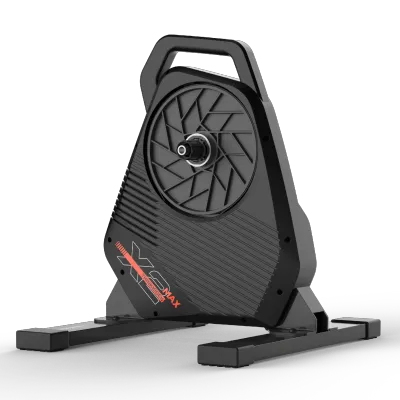
Direct-drive trainers require you to remove your bicycle’s rear wheel and mount the frame directly onto a cassette pre-installed on the trainer itself. While direct-drive units offer a realistic road feel and stable resistance, they are significantly heavier and bulkier than wheel-on models. They often weigh upwards of 15 to 25 kilograms, making them difficult to move frequently. The active footprint is also larger, requiring a dedicated floor area. While some direct-drive models feature folding legs to reduce their storage width, their sheer weight and bulk mean they are best suited for setups where the trainer can remain in a semi-permanent position.
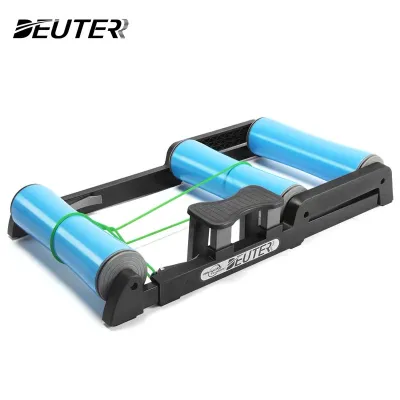
Foldable and compact models, including modern smart rollers and ultra-compact folding trainers, prioritize space-saving design above all else. These units often feature telescoping frames or minimalist footprints that fold down to the size of a small briefcase. While they are incredibly easy to store in tight condo spaces, they may have limitations in maximum resistance levels, lack advanced smart connectivity, or require a higher level of balance and skill to ride safely. Additionally, you must verify their compatibility with your specific bike frame, as some compact designs do not support modern disc-brake frames or non-standard axle widths.
Measuring Your Active Riding and Storage Footprint
Before purchasing any indoor bike trainer, you must accurately measure both your active riding zone and your intended storage area. A trainer that looks compact in online photos can quickly overwhelm a studio condo once you attach a full-sized road or mountain bike.

To determine your active riding zone, start by measuring the total length of your bicycle from the front edge of the front tire to the rear edge of the trainer. You must also account for lateral clearance. Your handlebars require a clear width of at least 40 to 46 centimeters, but you should allow for at least 1 meter of total width to accommodate elbow movement, natural bike sway, and the placement of a cooling fan. Do not forget to measure vertical clearance as well; mounting a bike on a trainer raises your riding position by several centimeters, so ensure your head has ample clearance from low-hanging light fixtures or ceiling fans.
Transporting your equipment is another critical spatial consideration in condo living. Measure the width of your doorways, narrow hallways, and even your building’s elevator if you plan to transport the trainer to a communal area or balcony. A heavy direct-drive trainer without a built-in handle can be incredibly awkward to maneuver through tight corners, increasing the risk of scuffing your walls or damaging your bike frame.
Finally, evaluate your vertical storage options. If floor space is at a premium, look for trainers that can stand vertically when folded. Some modern folding trainers are designed to stand upright against a wall or fit inside standard wardrobe compartments. If you plan to use a wall-mounted rack to store your bicycle above the trainer when not in use, verify that the wall structure can support the combined weight of the rack and the bike, especially if your condo partitions are made of lightweight drywall rather than concrete.
Managing Noise and Vibration in Multi-Unit Buildings
In a multi-unit condominium, your workout space is separated from your neighbors by thin concrete slabs or shared walls. Managing the noise and structural vibrations generated by your indoor trainer is essential for maintaining good relations with your neighbors and complying with building regulations.
The noise profile of an indoor trainer depends heavily on its internal mechanism. Wheel-on trainers tend to be the loudest option because they rely on physical friction between the rear tire and the metal roller. This friction produces a high-pitched whine that can easily penetrate walls and floors, especially at high speeds. In contrast, direct-drive trainers are generally much quieter because the chain interacts directly with the cassette, eliminating tire noise entirely. The primary sound from a direct-drive unit is the hum of your bicycle’s drivetrain and the internal flywheel, which is much easier to mask with a closed door or a television at moderate volume.
However, the most disruptive sound in a condo building is often not the airborne noise, but the low-frequency structural vibration transmitted through the floor. As you pedal, the spinning flywheel and your body movement create vibrations that travel down the trainer’s legs and resonate through the building’s concrete structure, sounding like a low drone to the neighbors downstairs. To mitigate this, you should invest in a high-density, vibration-dampening equipment mat. Placing a thick rubber or closed-cell foam mat under your entire setup helps absorb these vibrations before they reach the floor, while also protecting your tiles or laminated wood flooring from sweat and chain grease.
Before setting up your indoor gym, review your condominium association’s guidelines regarding noise limits and acceptable hours for physical activity. Some buildings restrict heavy equipment usage during early morning or late evening hours. To minimize complaints, position your trainer away from shared bedroom walls, place it on a solid concrete floor section rather than hollow wooden flooring, and schedule your high-intensity sessions during daytime hours when ambient building noise is higher.
Designing a Flexible Setup and Storage Workflow
If you do not have the luxury of a dedicated spare room, your condo’s living room or bedroom must serve a dual purpose. Designing a highly efficient workflow for setting up and packing away your training gear is the key to maintaining a clutter-free living space.
To minimize the time and effort required to start a workout, look for trainers that feature quick-release clamping mechanisms or tool-free folding legs. If you use a wheel-on trainer, keeping a dedicated trainer skewer installed on your rear wheel allows you to mount and dismount the bike in seconds. For direct-drive setups, keeping the trainer plugged in near your designated workout spot reduces cable clutter and setup friction. If you must move the trainer after every ride, consider placing it on a small, heavy-duty rolling utility cart or choosing a model with integrated transport wheels.
A successful compact setup also requires a dedicated storage zone for your cycling accessories. Keep your riser block, sweat guard, training mat, and cooling fan organized in a single storage bin or basket that can be easily tucked away. Sweat guards are particularly important in humid tropical climates like the Philippines, as sweat can quickly corrode your bike’s headset and frame bolts if not managed properly. Hanging a clean towel and keeping a spray bottle of mild frame cleaner nearby will help you quickly wipe down your equipment before storing it.
Establishing a safe and consistent routine for moving your gear prevents accidental damage and tripping hazards in tight spaces. Always disconnect power cables before moving a smart trainer, and secure any loose cables with hook-and-loop straps. When lifting heavy direct-drive units, use proper lifting techniques to avoid back strain, and ensure the trainer is placed on a stable, level surface before mounting your bicycle.
Verifying Manufacturer Specifications Before You Buy
To avoid the hassle of returning a heavy piece of fitness equipment, you must carefully verify the manufacturer’s official specifications against your physical measurements before making a purchase.
Start by checking the manufacturer’s product manual or official website for the exact dimensions of the trainer in both its active and folded states. Pay close attention to the width of the support legs when fully extended, as some high-end trainers have wide footprints designed for maximum stability during sprints, which may exceed your available floor space. Compare these dimensions directly with the active riding zone you measured in your condo.
Next, verify the technical compatibility of the trainer with your bicycle. Check the supported axle standards, such as 130mm or 135mm quick-release axles, or 142mm and 148mm thru-axles. If you ride a modern disc-brake road bike or mountain bike, you may need to purchase additional adapters to mount the frame securely. Additionally, check the maximum weight limit of the trainer, which must accommodate the combined weight of both the rider and the bicycle.
Finally, confirm the return policies and restocking fees of the local bike shop or online marketplace where you plan to purchase the trainer. Because shipping heavy fitness equipment in the Philippines can be costly, ensuring you can return or exchange the unit if it does not fit your space is a crucial safety net. If possible, visit a local showroom to see the trainer folded and unfolded in person, giving you a realistic sense of its physical bulk and ease of handling before you commit to the purchase.
Frequently Asked Questions (FAQ)
Can I leave my bike attached to the trainer permanently in a small room?
While leaving your bike permanently attached to the trainer saves setup time, it significantly reduces your usable floor space and can make a small condo feel cluttered. If you have a dedicated corner or a spacious balcony protected from the elements, a permanent setup can be highly convenient. However, in a multi-use studio or living room, detaching the bike and folding the trainer flat is usually the better option to maintain a clean, comfortable living environment. If you choose to leave it set up, consider using a decorative screen or room divider to visually separate your workout area from your living space.
Do I need a specific type of mat for condo floors?
Yes, using a high-density, water-resistant equipment mat is highly recommended for condo setups. Standard yoga mats are typically too thin and soft, allowing the trainer’s heavy feet to sink through and damage your flooring while failing to absorb structural vibrations. Look for a dedicated cycling or treadmill mat made of dense PVC or rubber, which provides excellent vibration dampening, prevents the trainer from slipping during hard efforts, and protects your tiles or laminated wood from sweat and chain lubricants. Ensure the mat is easy to wipe clean and can be rolled up tightly for convenient storage.
Community discussion
Share your experience or ask a question. Comments are reviewed before publication.