
Building or upgrading a mountain bike on a tight budget can feel like a constant compromise between safety, weight, and cost, especially when navigating the diverse and often demanding trail conditions found across the Philippines. Promax MTB components are highly worth buying for non-critical cockpit parts like stems, handlebars, and rigid seatposts where standard aluminum alloy construction provides reliable, predictable durability at a low cost, but you should exercise extreme caution and verify strict riding limits before relying on their entry-level braking systems or mechanical dropper posts for technical trail riding. By understanding where to save and where to invest, you can assemble a safe, capable bike without overspending.
Why Consider Promax Components for a Budget Mountain Bike Build?
You should consider Promax components primarily because they offer an affordable, standardized entry point for riders needing original equipment manufacturer (OEM) replacements or basic aftermarket upgrades without the premium price tag of high-end racing brands. They are widely available on online marketplaces and in local bike shops, making them a convenient choice for quick repairs or budget-conscious custom builds.
Brand Positioning and OEM Heritage
Promax has long established itself as a staple in the entry-level and OEM segments. Many complete bicycles from major manufacturers come equipped with Promax parts from the factory. This widespread adoption means their designs are highly standardized to fit common frame and fork specifications, reducing the risk of compatibility issues during assembly.
Products mentioned in this guide
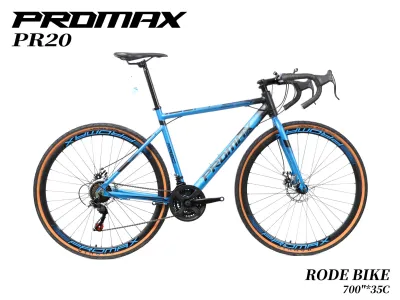
Prices are valid at publication and may change. Please refer to the product page for the latest price.
The Budget Trade-Off: Weight versus Cost
The primary trade-off when choosing budget-oriented components is weight and material refinement. Promax parts typically utilize standard 6061 or 2014 aluminum alloys. These materials are robust and structurally sound when manufactured correctly, but they lack the extensive butting (varying wall thickness) and advanced CNC machining that allow premium components to shed weight while maintaining strength. For a budget build, this extra weight is often an acceptable trade-off for a significantly lower purchase price.
Material Expectations
When purchasing these components, expect utilitarian finishes, straightforward mechanical designs, and standard hardware. The anodizing or paint may wear faster under muddy conditions than on premium parts, but the underlying structural integrity remains reliable for standard riding. Understanding these material limits helps set realistic expectations for long-term wear and cosmetic durability.
Which Promax Handlebars and Stems Offer Reliable Value?
Promax aluminum handlebars and stems offer reliable value when you need to adjust your cockpit geometry—such as changing your reach, rise, or handlebar width—without spending a fortune, provided you verify exact clamp diameters and torque specifications during installation. Because these are static structural parts, they are excellent candidates for saving money on a budget build.

Selecting the Right Handlebar Dimensions
When evaluating Promax handlebars, focus on the specific dimensions that match your body size and riding style. Look at the rise, upsweep, backsweep, and total width of the bar. For modern trail riding, wider bars (typically 740mm to 800mm) offer better leverage and control, but you must ensure your local trails and physical size accommodate them. Always verify that the handlebar’s clamp diameter matches your stem exactly, with 31.8mm being the most common standard for budget trail bikes.
Stem Compatibility and Faceplate Security
Stems must match both the fork’s steerer tube diameter (usually 1-1/8 inches) and the handlebar clamp diameter. When inspecting a Promax stem, look closely at the faceplate design. A four-bolt faceplate is highly recommended over a two-bolt design for off-road riding, as it distributes clamping forces more evenly across the handlebar, reducing stress risers that can lead to sudden handlebar failure. Ensure the threads in the stem body are clean and free of burrs before installation.
Performance Trade-offs and Trail Feedback
Budget aluminum cockpits are inherently stiffer and heavier than carbon fiber or high-end alloy alternatives. They do not damp trail vibrations as effectively, which can lead to hand fatigue on long, rocky descents. If you ride highly technical terrain or suffer from wrist pain, you may eventually need to upgrade to handlebars designed specifically for compliance, or use softer, vibration-damping grips to offset the stiffness of budget alloy.
Are Promax Seatposts a Practical Choice for Budget MTB Builds?
Promax rigid aluminum seatposts are an exceptionally practical and low-risk choice for budget builds due to their simple mechanical design, whereas their entry-level dropper posts require careful evaluation of your riding style, maintenance capacity, and frame routing compatibility. Choosing a rigid post is a safe way to keep costs down, while a dropper post introduces mechanical complexity that requires closer inspection.
Standard Rigid Seatposts
A standard rigid seatpost has very few failure points, making it a highly reliable component. When selecting a Promax rigid seatpost, you must verify the exact outer diameter required by your frame (common sizes include 27.2mm, 30.9mm, and 31.6mm) using a caliper or checking your frame’s specifications. Look for a model with a two-bolt micro-adjust clamp mechanism; this design offers much finer saddle angle adjustments and greater security against slipping than older, single-bolt designs.
Entry-Level Dropper Posts
Entry-level mechanical or hydraulic dropper posts from Promax provide the convenience of on-the-fly saddle height adjustments, which can significantly improve control on steep descents. However, before purchasing, you must check if your frame supports internal cable routing (stealth) or if you must run external routing along the frame tubes. Verify the travel length (such as 100mm or 125mm) to ensure that when the post is fully extended, the saddle sits at your correct pedaling height and does not extend too far out of the frame.
When to Invest in Premium Seating Options
If you engage in aggressive trail riding, jump lines, or frequent wet-weather riding, entry-level dropper posts may develop side-to-side play or slow return speeds more quickly than premium options. In these scenarios, investing in a more established dropper post brand with easily serviceable cartridges and robust sealing is advisable to prevent mid-ride failures. For casual trail riding or cross-country use, however, a budget dropper post can perform adequately if kept clean and properly lubricated.
Should You Rely on Promax Brakes for Mountain Biking?
You should only rely on Promax brakes for light cross-country trails, commuting, or casual recreational riding, as demanding technical descents require the superior heat dissipation and modulation offered by specialized, high-performance braking systems. Because brakes are a critical safety component, saving money here requires a strict understanding of your equipment’s physical limits.
Safety First on the Trail
Mountain biking carries inherent risks, and your brakes are your primary safety device. Equipment cannot replace proper braking technique, trail judgment, and formal training. Before riding, you must understand your personal skill limits and the physical limits of your equipment. Never attempt to ride steep, technical, or high-speed descents if you are unsure of your braking system’s capabilities.
Matching Brakes to Your Riding Style
Check the manufacturer’s documentation for the specific Promax brake model you are considering. Many of their mechanical and entry-level hydraulic disc brakes are rated strictly for trekking, leisure, or light off-road use. Do not use them for downhill, enduro, or steep, sustained mountain descents where extreme heat buildup can occur. Overheating can lead to sudden brake failure, putting you in immediate danger.
Essential Specification and Compatibility Checks
Before purchasing, verify rotor size compatibility; larger rotors (such as 180mm) offer better leverage and heat dissipation than standard 160mm rotors. Check the availability of replacement brake pads in your local bike shops, as some budget brakes use proprietary pad shapes that are difficult to find, while others are compatible with common Shimano-style pads. For hydraulic models, verify the fluid type; mineral oil is standard for Promax and is generally easier and safer to handle during bleeds than DOT fluid.
Critical Stop-Riding Conditions
Establish a strict pre-ride and mid-ride inspection routine. Stop riding immediately and seek professional assistance if you experience any of the following conditions:
- Brake fade: A sudden, noticeable loss of stopping power during long descents due to heat buildup.
- Inconsistent lever feel: The brake lever pulling all the way to the handlebar grip without engaging the pads.
- Sponginess: A soft, mushy feeling indicating air bubbles in the hydraulic lines, requiring a full system bleed.
- Fluid leaks: Any visible mineral oil around the lever reservoir, hose connections, or caliper pistons.
Budget Allocation Strategy for Safety
Because braking is a critical safety function, it is often wiser to allocate a larger portion of your budget to established, specialized braking brands if you plan to tackle steep, technical, or wet terrain. Saving money on a stem or seatpost is safe because a failure is rare and predictable; saving money on brakes can compromise your physical safety on the trail.
How to Mix Promax Parts with Other Brands for a Balanced Build?
To build a balanced and reliable mountain bike on a budget, you should strategically combine cost-effective Promax cockpit and seating components with higher-tier, specialized brands for your drivetrain, suspension, and braking systems. This approach ensures that your money is spent where it has the greatest impact on safety, performance, and durability.
Strategic Budget Allocation
Think of your bike build as a hierarchy of performance and safety. You can safely save money on static structural parts like handlebars, stems, rigid seatposts, and seat clamps, where extra weight is the only real penalty for choosing a budget option like Promax. This allows you to invest more of your budget into high-impact areas: high-quality tires for grip, a reliable suspension fork for traction, and a dependable drivetrain and braking system for control.
Ensuring Cross-Brand Compatibility
When mixing brands, double-check all interface standards to avoid assembly headaches. For example, you can easily use a Promax handlebar and stem alongside a Shimano or SRAM drivetrain. Ensure that your brake levers and shifters have compatible clamp bands or adapters if you plan to mount them to the same space on your Promax handlebar. Never force a component onto a handlebar or stem that does not share the exact matching diameter.
Pre-Assembly Checklist
Before you begin assembling your mixed-brand build, go through this pre-purchase and installation checklist:
- Interface Verification: Confirm handlebar clamp diameter (31.8mm vs 35mm), seatpost diameter (e.g., 30.9mm), and steer tube diameter (1-1/8").
- Torque Specifications: Always use a torque wrench during assembly. Aluminum components can crack or slip if over-tightened or under-tightened. Standard torque values (often 5-6 Nm for stem faceplates and seatpost clamps) must be verified against the manufacturer's markings.
- Required Tools: Ensure you have high-quality hex keys, a torque wrench, assembly paste (for aluminum-to-aluminum interfaces to prevent seizing and creaking), and appropriate cable cutters if routing new cables.
- Final Safety Check: Before your first trail ride, perform a backyard test to ensure the steering is aligned, the brakes engage fully, and there is no play in the headset or seatpost.
Community discussion
Share your experience or ask a question. Comments are reviewed before publication.