
A slipping bicycle seatpost is a frustrating issue that disrupts your riding rhythm, compromises your bike fit, and poses a safety hazard. When your saddle drops or twists mid-ride, the culprit is almost always a loss of friction or clamping force between the seatpost, the frame, and the seat clamp. Resolving this requires a systematic approach to identify whether the problem stems from incorrect torque, contamination, mismatched sizes, or worn-out hardware.
By understanding how these components interact, you can quickly diagnose the root cause and apply the correct fix. Whether your bicycle features a carbon fiber frame or a classic steel build, maintaining the correct clamping force is essential for protecting your equipment from structural damage. This guide walks you through the diagnostic process, step-by-step repair methods, and preventive habits to keep your saddle securely in place.
Identifying Why Your Seatpost Keeps Slipping
When your seatpost fails to stay in position, the symptoms are usually immediate. The most common sign is a gradual or sudden drop in saddle height while riding, forcing your knees into an inefficient angle. Alternatively, the saddle might twist sideways when you hit a bump, indicating that the seat clamp is no longer preventing rotational movement.
Products mentioned in this guide
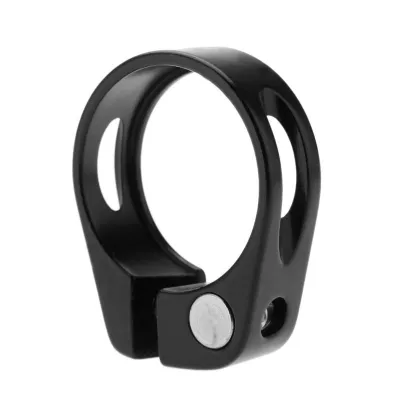
5 Lazada user ratings
this one i think the price was same to other one
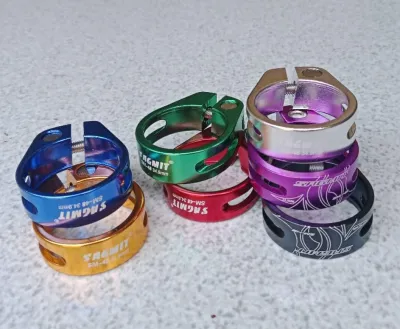
8 Lazada user ratings
Safety:Great for safety,
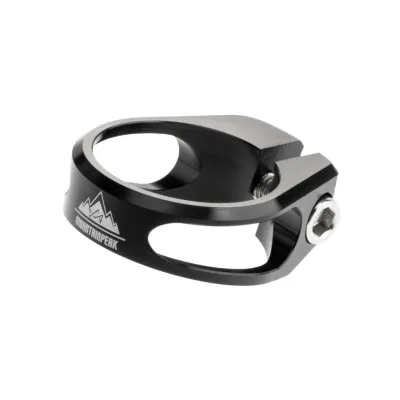
5 Lazada user ratings
It's quite bad tbh, most Seatclamp of mountainpeak is very tight and ends up scratching the frame....
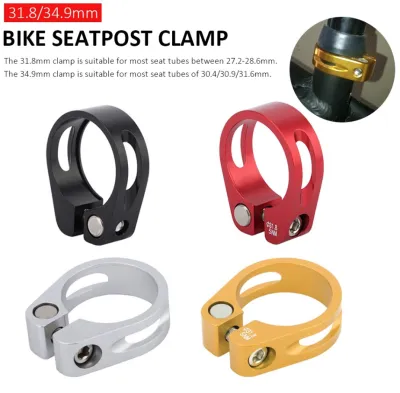
102 Lazada user ratings
High-quality steel material, Adds a stylish touch to my bike, Durable and long-lasting, Available in multiple colors, Fits perfectly on my b…Read full reviewShow less
High-quality steel material, Adds a stylish touch to my bike, Durable and long-lasting, Available in multiple colors, Fits perfectly on my bike, Excellent customer service, Great value for the price, Secure and sturdy seatpost clamp,
Available in multiple colors, Smooth and precise adjustment, Durable and long-lasting, High-quality steel material,
Quality: goooooood Appearance: goooooood goooooood goooooood goooooood Performance: gooooo ood goooooood goooooood
Fits perfectly on my bike, oks lang Yung item at walang sira o kung ano man Maya bili na kayo hehe.
Fits perfectly on my bike, Smooth and precise adjustment, Easy and quick installation,
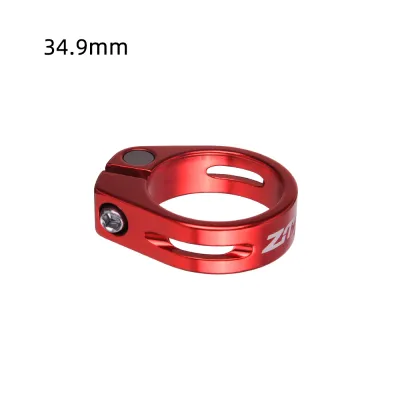
583 Lazada user ratings
Securely holds the seatpost in place, Enhances the overall look of the bike, Provides a stable and comfortable ride, Easy to install and adj…Read full reviewShow less
Securely holds the seatpost in place, Enhances the overall look of the bike, Provides a stable and comfortable ride, Easy to install and adjust, Fits perfectly on my bike,
Provides a stable and comfortable ride, Securely holds the seatpost in place, Durable and lightweight design, Easy to install and adjust,
🔨Durability:10/10 🔌Compatibility:10/10 🛠️Ease of Installation:10/10 very nice items.. tnx seller.. tnx much LAZADA
Nice quality, as expected with brand.
Thank you so much seller 100/100
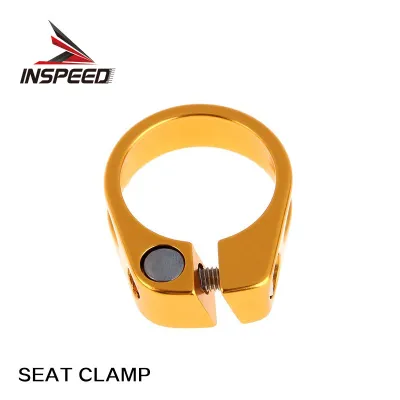
444 Lazada user ratings
Enhances the overall look of the bike, Durable and lightweight seatpost clamp, Available in various sizes and colors, Made of high-quality a…Read full reviewShow less
Enhances the overall look of the bike, Durable and lightweight seatpost clamp, Available in various sizes and colors, Made of high-quality aluminum alloy, Made of high-quality aluminum alloy, Available in various sizes and colors, Sturdy construction for long-lasting use,
Perfect ! The product really really great!Its really reccommendable and you will never regret buying to this brand.thanks topthe seller and …Read full reviewShow less
Perfect ! The product really really great!Its really reccommendable and you will never regret buying to this brand.thanks topthe seller and to the delivery man. You've done a great job.thank you.👍
Durable and lightweight seatpost clamp, Made of high-quality aluminum alloy, Available in various sizes and colors,
thanks seller order received na po tama ang dumating na item walang damage at kumpleto good job
Securely holds the seat tube in place, Easy to install and adjust, Easy to install and adjust,
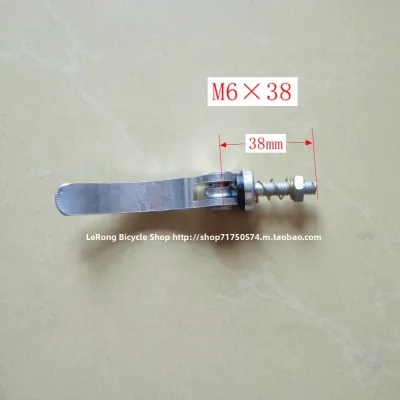
41 Lazada user ratings
This bike quick-release screw is a game-changer for cycling enthusiasts! It has a solid metal feel, is sturdy and durable, and makes assembl…Read full reviewShow less
This bike quick-release screw is a game-changer for cycling enthusiasts! It has a solid metal feel, is sturdy and durable, and makes assembly and disassembly a breeze—no more struggling with screws! Plus, the size is just right, fitting my bike perfectly, which makes riding much more secure. Whether for daily commutes or long rides, it stands strong and keeps you going. I highly recommend it to every rider!
Nice item and is doing its job to replace the missing quick release on a scooter for kids. Can't wait for the other leases to arrive and fin…Read full reviewShow less
Nice item and is doing its job to replace the missing quick release on a scooter for kids. Can't wait for the other leases to arrive and finish the repair of the handlebars...
Quality:10/10 Appearance:10/10 Performance:10/10 maganda cia and saktong sakto cia cia sa bike. makikita noo naman sa pic na walang problem
The seller provides great service, the product is well-made, and it's easy to use. I'm quite satisfied with my purchase.
The seller was timely, and the product quality is great and easy to use. I'm very satisfied. Thumbs up!
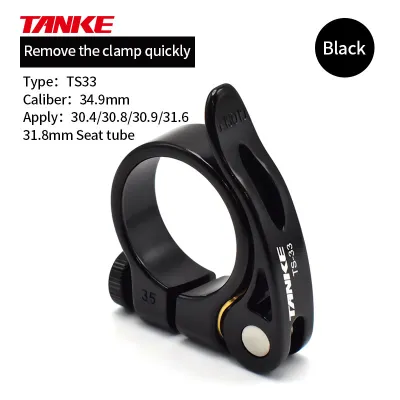
1,514 Lazada user ratings
🔨Durability:10/10 🔌Compatibility:10/10 🛠️Ease of Installation:10/10 Great value for the price, Easy to install and adjust, Affordable price a…Read full reviewShow less
🔨Durability:10/10 🔌Compatibility:10/10 🛠️Ease of Installation:10/10 Great value for the price, Easy to install and adjust, Affordable price and solid material
legit para sa aking mtb seatpost... alloy po at brand new talaga. salamat po ng marami. tanke brand... bago brand siguro ito. next time ulit…Read full reviewShow less
legit para sa aking mtb seatpost... alloy po at brand new talaga. salamat po ng marami. tanke brand... bago brand siguro ito. next time ulit.
maganda Yung quality Ng helmaet Yung size niya one size fits all all goods Naman lahat Walang damage
Prices are valid at publication and may change. Please refer to the product page for the latest price.
To pinpoint the exact issue, perform a series of visual and physical checks. The table below maps common symptoms to their likely causes and recommended actions.
| Observable Symptom | Likely Cause | Recommended Action |
|---|---|---|
| Saddle gradually slides down | Insufficient torque or contaminated surfaces | Clean seatpost and seat tube, then tighten to spec |
| Saddle twists sideways | Loose clamp or incorrect clamp size | Verify clamp diameter and tighten using a torque wrench |
| Bolt spins without tightening | Stripped threads on bolt or collar | Inspect threads; replace clamp if stripped |
| Seatpost slips despite high torque | Mismatched diameters or worn clamp | Measure components; inspect clamp for hairline cracks |
Start with a low-risk visual inspection of the clamping area. Examine the seat clamp collar for visible cracks, particularly around the bolt holes. A cracked collar cannot hold tension, no matter how tightly you turn the bolt.
Next, inspect the bolt threads for signs of stripping, rust, or debris. If the threads are dry or packed with grit, the friction within the threads can trick you into thinking the bolt is tight when it is actually failing to apply sufficient clamping force.
Finally, look closely at the frame slot—the vertical slit at the top of the seat tube that allows the metal to compress around the seatpost. Ensure that the slot is clean, aligned correctly with the gap in your seat clamp, and free of sharp burrs that could score your seatpost.
Step-by-Step Fixes for a Slipping Seatpost
Resolving a slipping seatpost involves a straightforward workflow that progresses from cleaning and inspection to precise reassembly. Skipping any of these steps—such as tightening a dirty seatpost or applying grease to carbon fiber—can lead to recurring slippage or permanent damage.

Before you begin, always consult the manufacturer guidelines for your specific frame, seatpost, and seat clamp. Different materials have vastly different tolerances for physical force and chemical exposure. Carbon fiber components are particularly sensitive to over-tightening and require specialized assembly compounds, while metal frames have their own torque limits and lubrication requirements that must be verified before applying tools.
Adjusting and Tightening the Seat Clamp
The most critical tool for securing your seatpost is a high-quality torque wrench. Using a standard Allen key makes it difficult to gauge how much force you are applying, which often leads to either an under-tightened clamp that slips or an over-tightened clamp that damages your bike. Set your torque wrench to the exact value printed on your seat clamp or specified in your manual, typically between 4 and 6 Newton-meters (Nm).
Over-tightening a seat clamp to stop a slip is a dangerous shortcut that can cause component failure. Excessive force can crush a lightweight aluminum or carbon fiber seat tube, pinch and ruin an expensive seatpost, or strip the threads inside the seat clamp bolt. If your seatpost continues to slip when tightened to its maximum recommended torque, the issue points to contamination, incorrect sizing, or worn parts.
Verify that your seat clamp size matches the external diameter of your frame’s seat tube. Note that the seat clamp size is different from your seatpost diameter, as it must account for the thickness of the frame tubing. If the clamp is even slightly too large, it will bottom out against itself before it can compress the seat tube sufficiently.
Cleaning and Degreasing the Contact Surfaces
Accumulated road grime, water, and old, degraded lubricants inside the seat tube are primary causes of seatpost slippage. To resolve this, begin by marking your current saddle height with electrical tape, then loosen the seat clamp and pull the seatpost completely out of the frame. Inspect the submerged portion of the post for any signs of deep scratching, corrosion, or structural wear.
Using a clean, lint-free rag and a mild bicycle-safe degreaser, thoroughly wipe down the entire exterior of the seatpost to remove all traces of old grease, dirt, and grit. Next, wrap a clean rag around a long wooden dowel or an old seatpost brush, spray it with degreaser, and insert it into the frame’s seat tube. Scrub the inner walls of the seat tube repeatedly, changing the rag as necessary, until it comes out clean.
Once the cleaning is complete, allow both the seatpost and the inside of the seat tube to dry completely. Any remaining liquid degreaser or moisture left inside the frame can break down your fresh lubricant or assembly paste, leading to premature slippage and potential corrosion over time.
Applying the Correct Lubricant or Friction Paste
The choice of compound applied to your seatpost depends entirely on the materials of your frame and seatpost. For metal-on-metal connections—such as an aluminum seatpost inside an aluminum or steel frame—apply a thin layer of standard bicycle grease. This prevents the metal surfaces from seizing or galling over time due to galvanic corrosion, while still allowing the seat clamp to achieve a secure hold.
For carbon fiber components—whether it is a carbon seatpost or a carbon frame—you must never use standard bicycle grease. Instead, use carbon assembly paste, often referred to as friction paste. This specialized compound contains tiny, non-abrasive silica particles that increase friction between the smooth carbon surfaces, allowing you to secure the seatpost safely at a much lower torque.
Before applying any compound, read the product label to verify material compatibility. Apply a thin, even layer of the appropriate grease or carbon paste to the lower section of the seatpost that sits inside the frame. Avoid applying an excessive amount, as the excess compound will simply squeeze out of the top of the seat tube when you insert the post, creating a sticky mess that attracts dirt and trail debris.
When to Replace the Seat Clamp or Seatpost
While cleaning and correct tightening solve the majority of slipping issues, physical wear sometimes makes a complete replacement necessary. Inspect your seat clamp collar closely for stripped threads, a bent bolt, or hairline cracks along the aluminum body. If the clamp is deformed or cannot hold tension, replace it immediately with a new seat clamp of the exact same diameter.
Riding with a compromised seat clamp or a damaged seatpost carries significant safety risks. Attempting to mask structural damage by over-tightening the bolt risks a sudden, catastrophic failure while riding, which could cause you to lose control of the bicycle. A deformed seatpost can also cause permanent damage to the inside of your frame’s seat tube, turning a simple component replacement into an expensive frame repair.
If you discover cracks in your frame’s seat tube, or if your seatpost has become completely seized inside the frame, stop riding immediately. Do not attempt to force the components apart with heavy tools, as this can easily ruin the frame. Instead, take your bicycle to a professional bike shop in the Philippines, where experienced mechanics have the specialized tools to safely extract seized parts and assess the structural integrity of your frame.
Preventing Future Seatpost Slippage
To keep your seatpost secure and protect your components, integrate simple checks into your routine bicycle maintenance. Periodically check the tightness of your seat clamp bolt with a torque wrench, especially after washing your bike, riding in heavy rain, or tackling muddy off-road trails. Vibrations from rough roads and trails can gradually loosen bolts over time, even if they were originally tightened correctly.
Keeping the area around the seat clamp clean is another effective way to prevent slippage and creaking noises. After muddy or dusty rides, wipe down the seat clamp and the junction where the seatpost enters the frame to prevent fine grit from migrating down into the seat tube. If you use a pressure washer to clean your bike, avoid spraying water directly at the seat clamp, as high-pressure water can force its way past the clamp and wash away your grease or friction paste.
Finally, make it a habit to remove, clean, and reapply the appropriate lubricant or carbon assembly paste to your seatpost at regular servicing intervals, such as once or twice a year. Over time, grease can break down and carbon paste can dry out, reducing their effectiveness. Taking a few minutes to service this area during your seasonal bike tune-up will ensure a quiet, slip-free ride all year round.
Community discussion
Share your experience or ask a question. Comments are reviewed before publication.