
Squeezing a stress ball is a highly accessible way to build hand endurance, improve finger dexterity, and support active recovery. To get the most out of this simple tool, you must focus on proper squeezing techniques, finger isolation, and a structured routine that balances active work with recovery. While a stress ball is excellent for active recovery, muscular endurance, and joint mobility, it must be used with correct alignment and posture to avoid repetitive strain.
Understanding the Benefits and Limitations of Stress Ball Training
Integrating a stress ball into your fitness regimen requires a clear understanding of what this tool can realistically achieve. A stress ball is primarily designed for low-resistance, high-repetition movements. This makes it highly effective for building muscular endurance in the fingers, hands, and forearms, as well as promoting active recovery and joint mobility. If you are recovering from a long day of typing or preparing your hands for a climbing session, the repetitive squeezing action increases local blood flow and helps keep the tendons in your hands sliding smoothly.
However, a stress ball is not a substitute for heavy grip-strengthening equipment if your primary goal is to build maximal crushing strength. Building elite grip strength, such as that required for heavy deadlifts or competitive powerlifting, requires progressive mechanical tension that a pliable ball simply cannot provide. For those advanced goals, specialized tools like spring-loaded metal grippers, plate pinches, or hanging exercises are necessary. A stress ball serves as an excellent warm-up or complementary tool rather than the primary driver of maximum force production.
Products mentioned in this guide
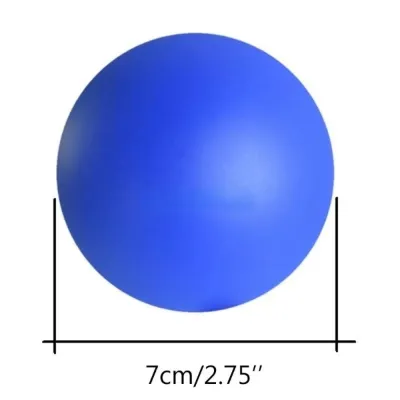
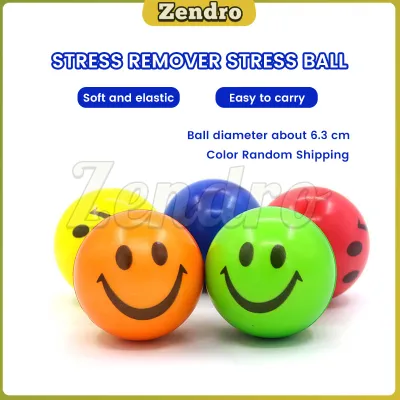
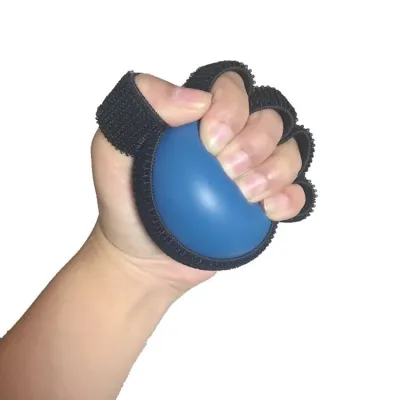
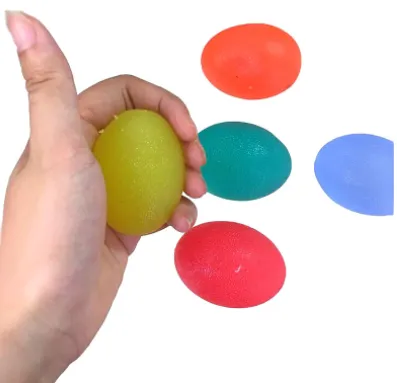
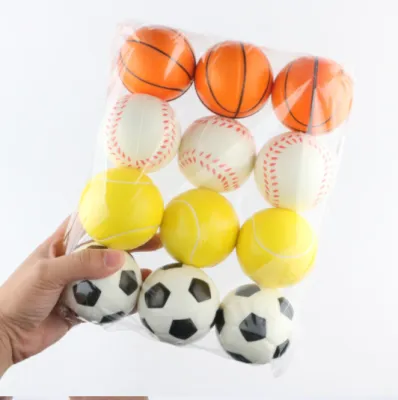
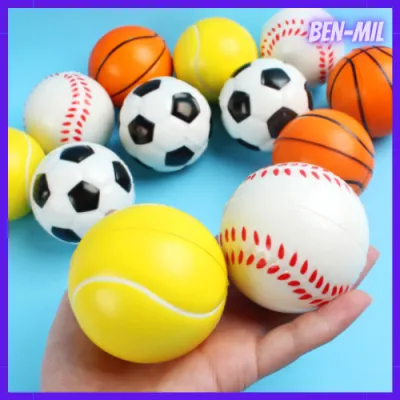


Prices are valid at publication and may change. Please refer to the product page for the latest price.
Knowing when your current training tool has served its purpose is key to continuous physical progression. If you can squeeze your stress ball fifty times in a single set without feeling any muscular fatigue or warmth in your forearms, the resistance is no longer sufficient to stimulate muscle adaptation. At this stage, the ball transitions from a strengthening tool to a purely therapeutic or stress-relief accessory, indicating that you need to increase the resistance level or incorporate more challenging grip implements.
Choosing the Right Stress Ball for Your Fitness Level
Selecting the appropriate stress ball involves evaluating both the resistance level and the physical material of the product. When testing a new ball, the initial squeeze should feel firm but comfortable, allowing your hand to close completely without forcing your finger joints into painful angles. If the ball is too stiff, you risk straining the small tendons in your fingers before your muscles have warmed up; if it is too soft, you will not generate enough tension to stimulate any strength gains.

The material of the stress ball significantly impacts its durability and usability, especially in warm and humid environments. Traditional open-cell foam balls tend to absorb sweat, moisture, and oils from your hands, which can cause the material to degrade, crumble, or develop unpleasant odors over time. For a more hygienic and long-lasting option, look for solid silicone balls or gel-filled balls covered in a washable, non-slip fabric. These materials resist moisture, are easy to sanitize with mild soap and water, and maintain their structural integrity through thousands of compressions.
Before making a purchase, always check the product labels and specifications to ensure the tool matches your fitness requirements. Some items sold as stress balls are designed merely as novelty promotional items and lack the consistent density needed for structured exercise. Look for products explicitly labeled for hand therapy, physical rehabilitation, or grip training, as these are manufactured to provide uniform resistance and withstand the repetitive high-pressure squeezing of a daily workout routine.
Step-by-Step Squeezing Techniques for Grip Improvement
To maximize the physical benefits of stress ball training and prevent repetitive strain injuries, you must execute each movement with deliberate form and control.
The Standard Full-Hand Squeeze The foundation of stress ball training is the full-hand squeeze, which targets the overall flexor muscles of the fingers and forearm. Place the ball securely in the center of your palm and wrap all four fingers and your thumb around it. Squeeze the ball slowly, concentrating on compressing it evenly from all sides rather than just pushing with your fingertips. Keep your wrist in a neutral, straight alignment throughout the movement; bending your wrist upward or downward while squeezing increases pressure on the carpal tunnel and can lead to nerve irritation. Hold the maximum compression for two to three seconds, then slowly release the tension over another two seconds to emphasize the eccentric phase of the movement.
Finger-Isolation Squeezes To build targeted strength in individual digits, incorporate finger-isolation squeezes into your routine. This technique is highly beneficial for activities requiring independent finger control, such as playing musical instruments, typing, or rock climbing. Hold the stress ball between your thumb and the tip of your index finger, then press them together to compress the ball. Hold for a moment, release slowly, and then repeat the process with your middle, ring, and pinky fingers in turn. Because your pinky and ring fingers are naturally weaker, you may need to apply less pressure initially to maintain proper control and avoid straining the delicate tendons along the back of your hand.
Proper Arm and Shoulder Posture Your body alignment during grip exercises directly influences the strain placed on your upper body. Sit or stand upright with your shoulders relaxed, rolled back, and down away from your ears. Keep your elbow bent at approximately a ninety-degree angle, holding your forearm parallel to the floor and close to your torso. Avoid the common habit of hunching your shoulders forward or tensing your neck muscles as the squeezing repetitions become more difficult. Keeping your upper body relaxed ensures that the mechanical work remains isolated to your hand and forearm muscles, reducing the risk of tension headaches or shoulder stiffness.
Recognizing Stopping Conditions Safety must always take priority during any strength-training exercise. If you experience any sharp pain, sudden joint discomfort, or a clicking sensation in your fingers or wrist, stop the exercise immediately. Muscle fatigue—characterized by a mild, warm burn in the forearm—is a normal response to exercise, but joint pain or nerve sensations are clear warning signs of overload. Continuing to squeeze through pain can lead to tendonitis or chronic inflammation, so always allow your hands to rest and recover if any unusual discomfort arises.
Building a Structured Grip Training Routine
A successful grip training routine relies on consistency, progressive challenge, and adequate recovery rather than random, mindless squeezing throughout the day.
To build muscular endurance and active joint mobility, structure your workouts into defined sets and repetitions. A highly effective starting point is to perform three sets of fifteen to twenty controlled repetitions per hand, three times a week. If your goal is to warm up your hands before a heavy gym workout or a climbing session, reduce the volume to one or two sets of ten light squeezes to stimulate blood flow without fatiguing the muscles. Always perform the exercises at a slow, deliberate pace, focusing on the quality of each compression rather than trying to complete the set as quickly as possible.
Just like any other muscle group in your body, the muscles of your hands and forearms require rest to repair and grow stronger. Avoid training your grip every single day; squeezing a stress ball continuously without rest can lead to overuse injuries like tendinopathy. Schedule at least one full day of rest between dedicated grip training sessions. If your hands feel stiff or tired from daily tasks like typing or manual labor, use your rest days for gentle, non-resistive movement and light stretching rather than active squeezing.
To maintain a healthy balance in your forearms, always pair your squeezing exercises with complementary stretches for the wrist flexors and extensors. After completing your stress ball routine, extend one arm straight in front of you with your palm facing down. Use your opposite hand to gently pull your fingers downward toward your forearm until you feel a comfortable stretch along the top of your wrist, holding the position for twenty seconds. Next, flip your hand so the palm faces up, and gently pull your fingers back toward your body to stretch the underside of your forearm. These stretches help prevent muscle tightness and ensure your wrists remain flexible and resilient.
Tracking Progress and Knowing When to Upgrade
Monitoring your progress allows you to make informed decisions about when to adjust your training volume or transition to more challenging equipment.
A practical way to track your improvement is by monitoring subjective muscle fatigue and your maximum repetition counts over time. When you first begin training, you might find that your forearms feel tired after just twelve repetitions with a medium-resistance ball. After a few weeks of consistent practice, you should notice that performing twenty repetitions feels relatively easy and no longer produces that familiar muscular warmth. Keeping a simple training log of your completed sets and how difficult they felt on a scale of one to ten will provide clear, objective evidence of your physical adaptation.
There are several physical indicators that your current stress ball is no longer providing enough resistance for effective muscle stimulation. If you can easily compress the ball completely flat using only your ring and pinky fingers, or if you can hold a full squeeze for thirty seconds without any effort, the tool has become too soft for your current strength level. Continuing to use a ball that offers no resistance will help maintain your current joint mobility, but it will not contribute to further strength gains.
When your progress stalls, plan a structured transition to higher-resistance tools to keep challenging your muscles. You can upgrade to a firmer stress ball within a color-coded resistance set, or transition to adjustable spring-loaded grip strengtheners that allow you to dial in precise weight settings. For those looking to challenge their grip in different ways, incorporating pinch-grip blocks or finger-extension bands will target different muscle groups in the hand, ensuring well-rounded forearm development and long-term joint health.
Frequently Asked Questions (FAQ)
Can using a stress ball help prevent carpal tunnel syndrome?
Using a stress ball can help maintain joint mobility and healthy blood flow in the hands, but it is not a proven preventative measure for carpal tunnel syndrome. Carpal tunnel syndrome is caused by the compression of the median nerve as it passes through the wrist, often due to repetitive typing, poor ergonomics, or chronic inflammation. Repetitive squeezing can actually increase pressure within the carpal tunnel if performed with a bent wrist or when the tendons are already inflamed. If you are already experiencing symptoms such as numbness, tingling, or radiating pain in your thumb and fingers, avoid grip exercises and consult a healthcare professional for a proper diagnosis and treatment plan.
How long should I squeeze the stress ball in a single session?
Rather than focusing on a strict time limit, you should guide your session duration by listening to your muscle fatigue and maintaining proper form. A typical, structured grip training session should take no more than five to ten minutes per hand, including rest intervals between sets. If you notice your wrist beginning to sag, your fingers slipping, or your shoulder tensing up, your muscles are overfatigued, and you should end the session immediately. Adjust your hold times and rest intervals based on your personal comfort, ensuring that every squeeze is performed with the same high level of control and alignment.

Community discussion
Share your experience or ask a question. Comments are reviewed before publication.