
Riding a bicycle without built-in threaded eyelets, commonly known as braze-ons, does not mean you have to compromise on your hydration needs during long rides. Whether you are riding a vintage steel road bike, a modern carbon fiber racing machine, or a full-suspension mountain bike, you can expand your carrying capacity by using aftermarket extra bottle mounts. These solutions primarily include clamp-on adapters, heavy-duty strap-on mounts, adhesive-backed brackets, and specialized bags that mount directly to your frame, fork, or handlebars. Selecting the right mounting system depends on your frame material, tube shape, and where you want to carry the extra weight.
By matching these aftermarket options to your specific riding style and bicycle geometry, you can secure your water bottles safely without risking damage to your bicycle frame. Understanding the physical forces at play, such as vibration and leverage, will help you choose a mount that stays secure on rough terrain. With the right preparation and installation techniques, you can enjoy long-distance rides with ample hydration, regardless of your bike’s original mounting configuration.
Understanding Your Frame and Mounting Constraints
Before purchasing any aftermarket mounting solution, you must carefully evaluate your bicycle’s frame material, as different materials react differently to external clamping forces and adhesives. Carbon fiber frames are highly optimized for specific directional loads but are exceptionally vulnerable to crushing forces. Applying a rigid metal clamp to a carbon tube can easily crack the composite structure if overtightened. Aluminum and thin-walled steel or titanium frames are more resilient, but they can still suffer from localized denting or crimping if clamps are applied without proper pressure distribution.
Products mentioned in this guide
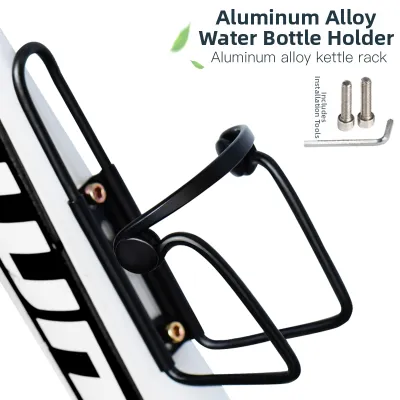
29 Lazada user ratings
The water bottle is a bit wobbly, but when you lay it on its side, the drinks fit snugly in place.
Yes, the craftsmanship is really detailed, and I'm happy with this purchase.
The price is reasonable, the quality is good, and it's easy to install.
It's really lightweight, but I wonder if it can handle heavier loads.
The craftsmanship is really detailed, I'm happy with this purchase.
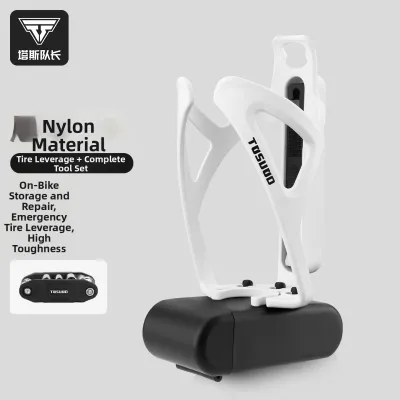
43 Lazada user ratings
🔨Durability:100 🔌Compatibility:100 🛠️Ease of Installation:100
you have to remove the tool compartment to access inside
The little box can't fit two bottle holders.
🛠️Ease of Installation:Perfect for cycling,
Easy to install, Fast shipping,
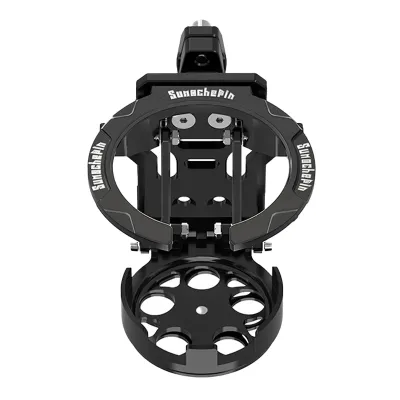
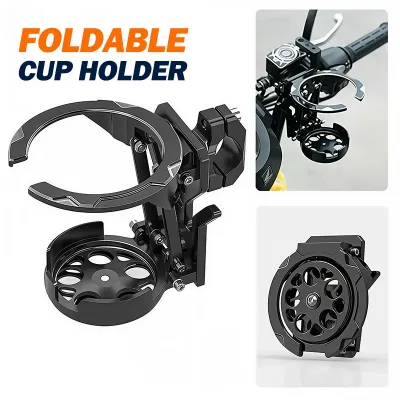
40 Lazada user ratings
Received in good order well pack thank you seller and delivery personnel
🔨Durability: 5 🔌Compatibility: 6 Universal cup compatibility
maganda pag ka balit pati item ,,,🫡
Prices are valid at publication and may change. Please refer to the product page for the latest price.
Tube shapes also present a significant compatibility hurdle for standard circular clamps. While traditional bicycles feature round tubes, modern frames often utilize oval, squared, hydroformed, or aerodynamic profiles. A standard round clamp cannot distribute pressure evenly on an irregular tube shape, leading to localized stress points and a high likelihood of the mount slipping. For non-round tubes, flexible strap-on mounts or adhesive solutions are generally safer and more secure because they conform directly to the unique contours of the frame.
Finally, you must measure the physical clearance around your proposed mounting locations before committing to a setup. A full water bottle requires a specific amount of clearance to allow you to slide the bottle in and out of the cage without hitting the frame or other components. On full-suspension mountain bikes, you must account for the movement of the rear shock and linkage, ensuring the bottle will not contact moving parts during suspension compression. Additionally, check that front-fork mounts do not interfere with the sweep of your front wheel, your shoes during cornering, or the movement of your suspension fork sliders.
Clamp-On Bottle Cages: The Versatile Standard
Clamp-on bottle cage adapters represent the most common and mechanically secure method for adding hydration capacity to round frame tubes, seatposts, and stems. These adapters typically consist of a split metal or high-strength plastic collar that wraps around the tube, tightened by one or two bolts to create a solid mounting platform. Once the adapter is clamped in place, it provides standard threaded holes spaced to fit any traditional bottle cage. A standard clamp-on mount is designed to support the weight of a full 500ml to 750ml water bottle, which typically weighs between 0.5 and 0.8 kilograms when completely filled.

While these mounts are highly effective on round seatposts and frame tubes, they require specialized designs when applied to aerodynamic or oversized tubing. Standard circular clamps will not fit aero seatposts; instead, you must look for adapters that utilize flexible, high-tension straps or articulated joints designed specifically to grip non-round profiles. These specialized aero-clamps distribute the clamping force along the flat edges of the aerodynamic profile, preventing the mount from twisting or sliding down the post during high-frequency road vibrations.
The primary advantage of clamp-on adapters is their exceptional structural rigidity and reusability. Once tightened to the correct specification, they provide a rock-solid hold that resists slipping, even when riding over rough gravel or descending steep, bumpy roads. However, they do add a small amount of weight to the bicycle and can scratch or mar the frame’s paint if installed incorrectly. Furthermore, if the clamp is not tightened sufficiently, the leverage of a heavy water bottle can cause the mount to rotate, potentially swinging the bottle into your path of travel or into the spinning rear wheel.
To mitigate the risk of frame damage and slippage, always use protective rubber or silicone shims between the clamp and the frame. These shims serve two critical purposes: they act as a protective barrier that prevents the hard metal or plastic clamp from scratching your paint or clear coat, and they significantly increase friction. This added friction helps distribute the clamping force more evenly around the circumference of the tube, allowing you to achieve a secure, slip-free hold without having to overtighten the bolts.
Adhesive and Strap-On Mounts: For Tight Spaces
Adhesive-backed bottle mounts and heavy-duty strap-on systems offer excellent alternatives for bicycles with limited clearance, complex frame shapes, or delicate frame materials. Adhesive mounts utilize high-strength, pressure-sensitive adhesive pads to bond a lightweight mounting base directly to the frame surface. This method is particularly useful on small frames, step-through designs, or full-suspension mountain bikes where there is simply no physical space to wrap a mechanical clamp around the tubes. Because they do not rely on clamping pressure, adhesive mounts eliminate the risk of crushing delicate frame tubes.
However, adhesive mounts carry specific risks regarding your bike’s finish. The chemical bonds formed by high-strength adhesives can react with certain paint types, particularly matte finishes, raw carbon clear coats, or custom decals. When removing an adhesive mount, there is a risk of peeling away the clear coat or leaving behind a stubborn residue that requires harsh solvents to clean. To minimize this risk, always perform a spot test on an inconspicuous area of the frame, such as the underside of the bottom bracket, before applying the adhesive to a highly visible section.
Strap-on bottle cages, which utilize hook-and-loop (Velcro) straps or textured silicone bands, provide a lightweight, non-marring alternative that works exceptionally well on irregular tube shapes. These mounts can be wrapped around almost any part of the frame, including oversized down tubes and tapered top tubes. The flexible nature of the straps allows them to conform to complex geometries while absorbing trail vibrations. While they may not feel quite as rigid as a bolted metal clamp, high-quality strap-on mounts with textured rubber backings offer surprising stability on rough terrain without scratching your paint.
If you decide to use an adhesive-backed mounting solution, proper surface preparation is absolutely critical to ensure a long-lasting bond. You can use the following checklist to guide your installation process:
- Clean the Surface: Thoroughly clean the mounting area with isopropyl alcohol to remove all traces of grease, road grime, wax, and polish.
- Dry Completely: Ensure the frame surface is completely dry and free of lint or dust particles.
- Check Temperature: Apply the adhesive in a moderate temperature environment, ideally between 20°C and 30°C, as extreme cold or heat can prevent the adhesive from bonding correctly.
- Apply Firm Pressure: Press the adhesive pad firmly onto the frame, holding pressure for at least 60 seconds to activate the bond.
- Allow to Cure: Let the adhesive cure completely without any weight attached; most high-strength adhesives require a full 24 hours to reach maximum bonding strength before you mount a bottle.
Fork, Handlebar, and Frame Bag Solutions
When the main triangle of your bicycle frame is already fully occupied by frame bags, suspension components, or existing bottles, you must look to alternative mounting locations. The front fork is an excellent location for carrying extra water, especially for long-distance touring or bikepacking. For rigid forks without built-in braze-ons, you can use specialized fork-mounting brackets that attach via heavy-duty hose clamps or flexible strap systems. These brackets allow you to mount standard bottle cages or larger cargo cages directly to the fork blades, keeping the weight low to the ground.
Handlebar-mounted bottle brackets offer another highly accessible alternative, placing your hydration directly in front of you for easy access while riding. These systems typically clamp onto the handlebars or the stem faceplate, holding one or two bottles within arm’s reach. Handlebar mounts are highly favored by triathletes and casual cruisers alike, as they allow you to grab your bottle without bending down or taking your eyes off the road. However, because they position the weight high up on the steering axis, they can noticeably alter the handling characteristics of your bicycle.
For riders who prefer a completely zero-modification approach, frame bags with integrated external bottle pockets or bungee cord attachments are an outstanding choice. These bags strap securely to your top tube, handlebars, or saddle rails using soft fabric straps, completely eliminating the need for mechanical clamps or adhesives. Many modern bikepacking stem bags, often called “feedbags,” sit directly behind your handlebars and are designed to hold a standard water bottle securely while providing insulated padding to keep your drink cool.
Each of these alternative mounting locations has a distinct impact on your bicycle’s handling, steering weight, and aerodynamics. Mounting heavy water bottles to your front fork increases the steering inertia, making the steering feel slower and more deliberate, which can be beneficial for stability on long gravel descents but cumbersome on tight singletrack. Handlebar mounts raise your center of gravity, which can make the bike feel slightly unstable when you stand up to pedal. Frame bags and saddle-mounted systems keep the weight centered along the bike’s centerline, preserving natural handling but increasing the aerodynamic profile of the bike in crosswinds.
How to Choose the Right Mount for Your Ride
To select the most effective extra bottle mount for your specific setup, you should match the mounting style to your primary riding discipline and the terrain you frequent. Road cyclists generally benefit most from aerodynamic clamp-on mounts positioned behind the saddle or on the seatpost, where they remain shielded from the wind. Mountain bikers, who subject their bikes to intense vibrations and sudden impacts, should prioritize highly secure strap-on mounts or frame-bag feedbags that prevent bottles from launching on rough descents. Gravel riders and bikepackers often require a combination of fork mounts and stem bags to maximize their carrying capacity for multi-day adventures.
To help you compare the primary options, the matrix below evaluates each mount type across key performance and usability criteria:
| Mount Type | Security Level | Weight | Frame Compatibility | Installation Difficulty |
|---|---|---|---|---|
| Clamp-On Adapter | High | Moderate | Limited to round/specific profiles | Moderate (requires tools) |
| Strap-On Mount | Moderate to High | Low | Universal (conforms to shapes) | Easy (no tools required) |
| Adhesive Mount | Moderate | Very Low | Flat or slightly curved surfaces | Moderate (requires curing time) |
| Frame/Stem Bag | High | High | Universal (attaches via straps) | Very Easy (no tools required) |
| Fork Clamp Mount | High | High | Rigid forks only | Moderate (requires tools) |
| Handlebar Mount | Moderate | Moderate | Standard handlebar diameters | Easy (requires basic tools) |
When sourcing these components, it is highly recommended to check local specialty bike shops and trusted online marketplaces in the Philippines to verify specific bracket sizing and compatibility. Many local shops carry specialized adapters designed for the unique riding conditions found in the country, where high humidity and rough road surfaces demand durable, corrosion-resistant mounting hardware. Ensuring you have the correct metric measurements of your frame tubes before purchasing will save you time and prevent compatibility issues.
Installation and Safety Checks
Proper installation is the single most important factor in ensuring your aftermarket bottle mount remains secure and does not cause damage to your bicycle. When installing clamp-on mounts, especially on carbon fiber or thin-walled aluminum components, always use a high-quality torque wrench. Tighten all fasteners gradually and evenly, alternating between bolts if the clamp uses a multi-bolt system. Always refer to the manufacturer’s specified torque limits, which are typically measured in Newton-meters (Nm); exceeding these limits can crush your frame or strip the threads on the adapter.
Once the mount is installed, perform a physical security test before heading out on the road. Grab the mounted bottle cage firmly and attempt to twist or slide it along the tube. If the mount moves or rotates under moderate hand pressure, do not ride the bike; instead, loosen the fasteners, check the alignment of your protective rubber shims, and re-tighten the system. After your first few rides, inspect the mount closely to check for any signs of slippage, rotation, or loosening of the bolts caused by road vibrations.
Routine maintenance is essential to protect your frame’s finish and ensure long-term safety. Over time, fine road grit and dust can work their way underneath clamp-on and strap-on mounts. If left uncleaned, this grit acts like sandpaper under the vibration of riding, slowly wearing away your paint or clear coat. Periodically remove the mounts, clean the frame and the protective shims thoroughly, and inspect the underlying material for any signs of wear. For adhesive mounts, regularly inspect the edges of the adhesive pad to ensure they are not peeling or lifting away from the frame.
Finally, establish clear stop conditions to prevent catastrophic equipment failure or frame damage. You must remove or replace the mounting system immediately if you observe any of the following warning signs:
- Hairline cracks or stress whitening in plastic clamps or carbon fiber frame tubes.
- Deep gouges, scratches, or paint wear that penetrates down to the raw metal or composite material.
- Repeated slipping or rotation of the mount, even when tightened to the maximum recommended torque.
- Peeling, cracking, or loss of adhesion on adhesive-backed mounting pads.
- Fraying, tearing, or degraded elasticity in strap-on mounting bands or Velcro straps.
Frequently Asked Questions (FAQ)
Can I use a standard hardware store hose clamp for a DIY bottle mount?
Using a bare metal hose clamp from a hardware store is highly discouraged for bicycle frame applications. Bare metal clamps have sharp edges that can easily slice through your bicycle’s paint, clear coat, and underlying frame material under the high vibration of riding. Furthermore, hose clamps exert highly concentrated point-load stress rather than distributing pressure evenly, which can easily crush or dent thin-walled aluminum, steel, or carbon fiber tubes. If you must use a hose-clamp style system, always choose purpose-built cycling adapters that feature integrated rubber padding, rounded edges, and pressure-distributing bands designed specifically to protect bicycle frames.
Will clamp-on mounts damage my carbon fiber frame?
Clamp-on mounts can safely be used on carbon fiber frames only if you strictly adhere to the frame manufacturer’s guidelines, torque limits, and designated clamping zones. Carbon fiber tubes are engineered to withstand specific riding forces but are highly susceptible to structural failure when subjected to radial crushing forces from external clamps. Before applying any clamping force to a carbon frame, consult your specific bicycle’s owner’s manual or contact the manufacturer directly to verify if aftermarket clamps are permitted. If clamping is not recommended, you should utilize non-clamping alternatives such as strap-on silicone mounts, frame bags, or stem-mounted feedbags to carry your extra water safely.

Community discussion
Share your experience or ask a question. Comments are reviewed before publication.