
Quick Answer: Choosing Your NatureHike 1-Person Tent
Selecting the ideal NatureHike 1-person tent for solo camping in the Philippines requires balancing pack weight against the demands of a tropical climate. If your primary goal is long-distance trail hiking where every gram matters, an ultralight, semi-freestanding model is your best option. For those who prioritize interior space, easy pitching on diverse terrain, and comfort during extended rainstorms, a fully freestanding double-wall dome tent is highly recommended.
Because the Philippine climate is characterized by high humidity and sudden downpours, a double-wall construction with generous mesh ventilation is essential to manage interior condensation. Before making a purchase, always cross-reference current model specifications, fabric options, and prices in ₱ directly on official brand stores or authorized local distributors, as product lineups and material coatings are updated regularly.
Identifying Your Solo Camping Style and Environment
Before diving into technical specifications, you must define where and how you plan to camp. Solo camping in the Philippines spans a wide range of environments, from the cool, wind-swept ridges of high-altitude peaks to the humid, sandy shores of coastal beaches. Your shelter must be matched to these specific conditions to ensure safety and comfort.
Products mentioned in this guide
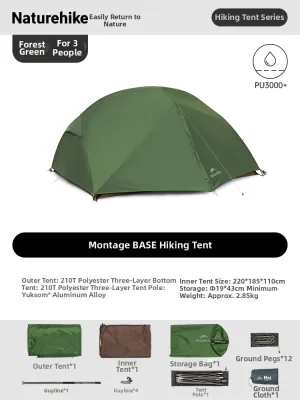
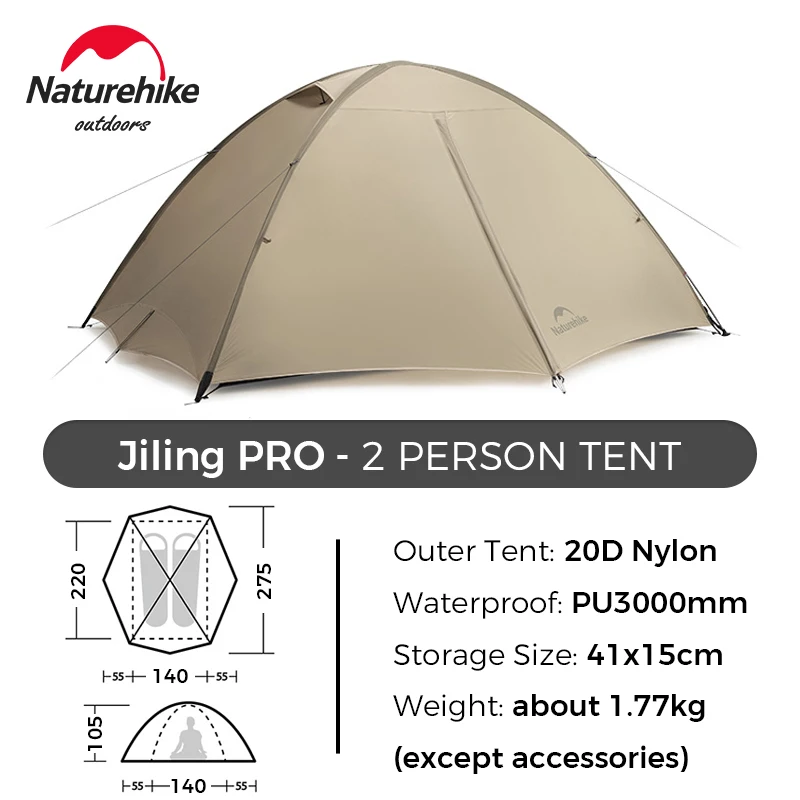
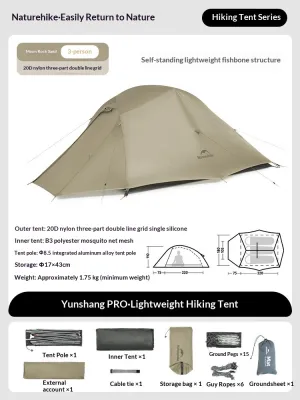
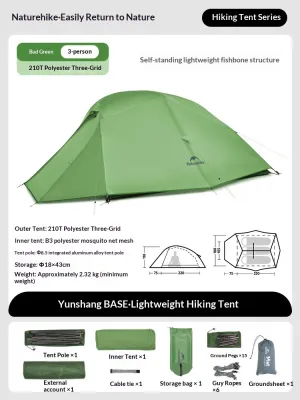
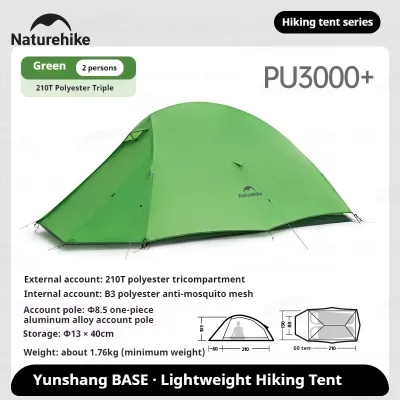
Prices are valid at publication and may change. Please refer to the product page for the latest price.

Backpacking vs. Basecamping
If you are a backpacker tackling multi-day treks, your tent is one of the heaviest items in your pack. For these adventures, minimizing weight and packed size is critical to reducing physical fatigue on steep, muddy ascents. Every hundred grams saved allows you to carry more water, food, or safety gear.
Conversely, if you prefer basecamping, car camping, or motorcycle touring, pack weight is less of a concern. In these scenarios, you should prioritize interior volume, peak height, and ease of setup. A tent that allows you to sit upright comfortably without your head brushing the ceiling makes waiting out a tropical thunderstorm much more tolerable.
Tropical Weather Variables
Tropical climates present unique challenges that standard tent designs do not always address. Heavy rainfall during the monsoon season requires a highly waterproof rainfly and a deep bathtub-style floor to prevent ground moisture from seeping in. High humidity levels mean that your breath will quickly saturate the air inside the tent, making excellent ventilation a safety priority rather than just a comfort feature.
Wind is another critical factor, especially on exposed ridges or open beaches. Coastal breezes and high-altitude gusts can easily deform a poorly structured tent. You need a shelter with a stable pole geometry and robust guyline attachment points to distribute wind forces evenly across the structure.
Personal Space and Gear Storage
Consider how much gear you need to keep protected from the elements. A minimalist 1-person tent may only offer enough floor space for your sleeping pad and sleeping bag, requiring you to store your backpack in the external vestibule. If you prefer keeping your expensive camera gear, electronics, or pack inside the tent body with you, you must look closely at the floor dimensions or consider a model with an oversized vestibule.
Essential Specs to Check on Any NatureHike 1-Person Tent
When browsing NatureHike’s extensive catalog, technical jargon can be overwhelming. Understanding how to read and verify these specifications on product labels will help you make an informed decision based on objective material performance.
Fabric and Waterproofing
Tent fabrics are typically categorized by their denier (D) rating, which indicates the fiber thickness of the thread. A lower denier, such as 15D or 20D, indicates a lighter, thinner fabric that is highly packable but requires careful site selection to avoid punctures. Higher denier fabrics, like 210T polyester, are heavier and bulkier but offer superior abrasion resistance against sharp rocks, twigs, and rough ground.
Waterproof performance is measured by the hydrostatic head rating in millimeters (mm). This rating indicates the amount of water pressure the fabric can withstand before moisture penetrates. For tropical camping, look for the following specifications:
- Rainfly Waterproof Rating: A minimum of 2000mm is recommended to withstand heavy tropical downpours.
- Floor Waterproof Rating: Look for 3000mm or higher, as your body weight concentrates pressure on the floor, making it easier for ground moisture to push through thinner coatings.
- Fabric Coatings: Silicone-coated nylon (often labeled as Sil-Nylon) offers excellent water shedding and strength-to-weight ratios, while polyurethane (PU) coatings are common on budget-friendly polyester models.
Pole Materials
Tent poles provide the structural skeleton of your shelter. Most NatureHike tents utilize either 7001 aluminum alloy poles or fiberglass poles. Aluminum alloy is highly recommended for outdoor adventures because it is lightweight, exceptionally strong, and can flex significantly under wind loads without snapping. Fiberglass poles are heavier, more brittle, and prone to splintering over time, especially when exposed to high heat and humidity.
Tent Architecture
Understanding the difference between single-wall and double-wall construction is crucial for tropical camping. Single-wall tents combine the canopy and rainfly into a single layer of fabric. While incredibly light, they are highly susceptible to condensation buildup in humid environments, as moisture from your breath condenses directly on the inside of the walls and drips onto your gear.
Double-wall tents feature an inner tent made largely of breathable mesh and a separate, waterproof outer rainfly. This design creates an insulating air gap that allows warm, moist air to escape through the mesh, where it condenses on the underside of the rainfly and drains safely to the ground. For solo camping in the Philippines, a double-wall tent with a high-density B3 mesh inner body is the standard choice for comfort and moisture control.
Matching Tent Structures to Your Adventure Type
NatureHike designs various tent geometries to suit different outdoor activities. Matching the structure of the tent to your specific adventure type ensures you do not carry unnecessary weight or struggle with a difficult setup on the trail.
Ultralight Trekking
For long-distance hikers and fastpackers, semi-freestanding or trekking-pole-supported tents are highly efficient. Semi-freestanding designs use a single hubbed pole system that runs down the center of the tent, requiring you to stake out the foot corners to fully expand the interior space. This design significantly reduces pole weight while maintaining a stable structure.
These tents pack down incredibly small, easily fitting into a 40-liter to 50-liter backpack. The trade-off is that they require secure ground anchors to pitch correctly, which can be challenging on solid rock or loose sand. If you choose this style, ensure you carry appropriate stakes for the terrain you expect to encounter.
Weekend Basecamping
If your camping trips involve shorter walks to a designated campsite, a fully freestanding dome tent is highly practical. Freestanding tents use a multi-pole crossing design that supports itself entirely without the need for stakes, allowing you to pitch the tent on wooden platforms, concrete pads, or hard-packed dirt.
These models typically feature vertical side walls and a higher peak height, maximizing the usable interior volume. They often include convenient features such as dual entry doors, spacious vestibules for gear storage, and multiple interior pockets to organize your headlamp, phone, and personal items. While heavier than semi-freestanding models, the added comfort and ease of setup make them excellent for relaxed weekend getaways.
Exposed or High-Altitude Camping
When camping on exposed mountain ridges where weather conditions can deteriorate rapidly, you need a low-profile, aerodynamic tent. Tents with a lower height and a sloped profile shed wind much more effectively than tall, boxy designs. Look for models that feature reinforced pole intersection points and multiple external guyline loops.
In high-wind environments, the quality of your stakes and guylines is just as important as the tent itself. Ensure the model you select includes reflective, high-strength guylines with tension adjusters, allowing you to secure the rainfly tightly to the ground and prevent the fabric from flapping violently in the wind.
Buying Safely and Maintaining Your Tent in Humid Climates
Investing in a quality tent requires proper purchasing verification and diligent maintenance to ensure the gear performs reliably and lasts for years.
Purchasing Verification
To avoid counterfeit products and ensure you receive a genuine NatureHike tent, purchase directly from official brand storefronts or authorized distributors on major online marketplaces. When your tent arrives, perform a thorough inspection before taking it into the field:
- Seam Taping: Check the inside of the rainfly and floor to ensure the waterproof seam tape is applied smoothly without bubbles, peeling, or gaps.
- Poles and Elastic: Assemble the pole set to verify that all segments slide together easily and that the internal shock cord is tight and elastic.
- Zippers and Stitching: Test all zippers to ensure they run smoothly without catching on the fabric, and inspect the stitching at high-stress points like guyline loops and pole attachments.
Pre-Trip Preparation
Never take a brand-new tent directly to the campsite without pitching it at home first. Set up the tent in your living room or backyard to familiarize yourself with the pole configuration and staking points. This practice run ensures that all necessary components, including stakes, guylines, and the footprint, are present and functioning. It also allows you to identify if any additional seam sealing is required on high-wear areas before you face a real storm.
Post-Trip Care
Tropical humidity and moisture are the primary causes of tent degradation. Storing a tent while it is even slightly damp will trigger the growth of mold and mildew, which quickly ruins the fabric and destroys the waterproof polyurethane coatings through a chemical process called hydrolysis. Follow these steps after every trip:
- Dry Completely: Pitch the tent in a shaded, well-ventilated area at home until every portion of the fabric, mesh, and webbing is completely dry. Avoid leaving the tent in direct sunlight for extended periods, as ultraviolet rays degrade nylon and polyester fibers.
- Clean Gently: Wipe away dirt, mud, and sand using a soft sponge and clean, lukewarm water. Never use harsh household detergents, bleach, or washing machines, as these will strip away the waterproof coatings.
- Store Loosely: Once dry, store the tent loosely in a breathable mesh bag or a pillowcase rather than stuffing it tightly into its original compression sack. Keep it in a cool, dry closet away from extreme heat and humidity.
Frequently Asked Questions (FAQ)
Is a 1-person tent too small for most solo campers?
A standard 1-person tent typically features a floor width of 80 to 90 centimeters, which is designed to fit a single standard sleeping pad with minimal extra space on the sides. If you are broad-shouldered, tall, or prefer keeping all your gear inside the tent body, you may find a 1-person tent feels cramped. Upgrading to a lightweight 2-person tent offers significantly more room and comfort for a minor weight penalty, but a true 1-person tent remains the best choice for minimizing pack weight and finding small, flat pitching spots on crowded trails.
How can I prevent condensation inside my tent during rainy seasons?
To minimize condensation in humid and rainy conditions, maximize airflow by keeping all rainfly vents fully open, even during heavy downpours. Pitch your tent in a location that catches natural breezes rather than in low-lying hollows where damp, cold air pools overnight. Ensure the outer rainfly is tensioned tightly using guylines so that it does not touch the inner mesh wall, which prevents condensed moisture on the inside of the fly from transferring directly onto your inner tent and sleeping gear.

Community discussion
Share your experience or ask a question. Comments are reviewed before publication.