
Carabiner specifications—including strength ratings, shapes, and gate types—are not mere design choices; they are precise engineering indicators that dictate how a connector manages loads, resists environmental wear, and interfaces with other climbing gear. Understanding these markings and designs allows you to select the correct equipment for specific rigging, belaying, or hauling tasks, ensuring your setup matches the demands of your climbing environment.
In tropical climbing environments, such as the humid limestone crags found across the Philippines, high humidity and salt air can accelerate gear wear. This makes a precise understanding of your gear’s technical specifications and maintenance needs even more critical. Equipment cannot replace proper training, sound judgment, and regular inspection, but knowing how to read your gear is the first step toward building a reliable climbing system.
Reading Carabiner Strength Ratings and Spine Markings
Every climbing carabiner features technical markings stamped or laser-etched onto its spine. These markings indicate the minimum breaking strength of the connector under specific test conditions, measured in kilonewtons (kN). One kilonewton represents approximately 100 kilograms of static force, but dynamic forces generated during a fall can multiply rapidly, making these ratings vital for safety verification.
Products mentioned in this guide
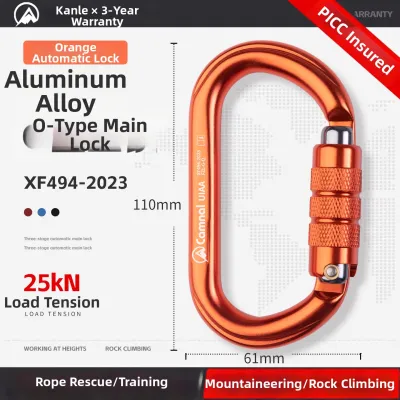
Prices are valid at publication and may change. Please refer to the product page for the latest price.
Carabiners typically display three distinct strength ratings on the spine. The major axis rating indicates the strength of the carabiner when loaded end-to-end with the gate fully closed and locked. This is the strongest possible orientation for the connector. The minor axis rating, often referred to as the cross-loaded rating, shows the strength when force is applied sideways against the gate, which significantly reduces the load capacity.
The third rating is the open-gate strength, which measures the load limit when the gate is not fully closed. This rating is always the lowest of the three, as a carabiner relies on a closed gate to complete its structural loop and distribute force efficiently. You must check your manufacturer’s documentation for the exact kN thresholds of your specific model rather than assuming a universal safe number across different brands.
In addition to strength ratings, look for certification marks such as the CE (Conformité Européenne) or UIAA (International Climbing and Mountaineering Federation) logos on the spine. These marks verify that the carabiner has undergone standardized testing and meets strict international safety requirements. Higher numbers on the spine indicate structural limits under laboratory test conditions, not a blanket guarantee against misuse, cross-loading, or severe shock loading in the field.
How Carabiner Shapes Affect Load and Handling
The structural profile of a carabiner determines how it distributes weight along its frame and how easily it handles ropes and rigging hardware. The four primary shapes used in climbing are D-shape, asymmetric D, oval, and HMS (pear-shaped) profiles. Each shape is engineered to optimize performance for specific tasks.

Standard D-shape carabiners are designed to direct the majority of the load along the stronger, non-gated spine. This makes them highly efficient for heavy, straight-line loads, though they typically have a smaller gate opening compared to other designs. Asymmetric D carabiners modify this profile by tapering one end, which maintains the strength-to-weight advantages of the D-shape while providing a wider gate clearance for easier clipping.
Oval carabiners feature a symmetrical top and bottom, which centers loads perfectly along the middle of the basket. While they generally offer lower major-axis strength than D-shapes of similar weight, their symmetry makes them ideal for centering pulleys, organizing gear on a harness, and aid climbing. The even curve prevents gear from shifting abruptly under load.
HMS or pear-shaped carabiners feature a wide, exaggerated top basket designed specifically for accommodating bulky knots, such as the Munter hitch, or multiple ropes. They are the standard choice for belaying and rigging anchors because the wide top allows ropes to glide smoothly with minimal friction. Always ensure that your shape selection aligns with the intended use specified by the manufacturer to prevent dangerous cross-loading.
Gate Types and Locking Mechanisms Explained
Selecting the right gate type requires balancing the need for operational speed, weight savings, and security. Non-locking carabiners generally feature solid straight gates, bent gates, or wire gates. Straight gates are durable and easy to clip into metal hangers, while bent gates feature a curved profile that guides the rope into the basket smoothly, making them ideal for the rope-end of quickdraws.
Wire gate carabiners utilize a loop of stainless steel wire instead of a solid aluminum gate. This design reduces overall weight and minimizes the risk of “gate flutter,” a phenomenon where inertia from a fall or a strike against the rock causes a solid gate to vibrate open momentarily. Wire gates are also less prone to clogging with dirt or freezing in cold conditions, though in tropical climates, their primary advantage is weight reduction and simplicity.
Locking carabiners are essential for critical connections where an accidental opening could be catastrophic. Manual screwgates require you to thread a sleeve over the gate gate-latch manually, offering high reliability but requiring diligent user verification. Auto-locking carabiners use spring-loaded sleeves that automatically twist and lock upon closing, which adds convenience but requires regular cleaning to prevent grit from jamming the mechanism.
In highly humid or coastal climbing areas, salt and moisture can cause aluminum oxidation or make locking sleeves sticky. Locking mechanisms require manual verification before every pitch and specific maintenance, such as rinsing with fresh water and applying dry lubricants, as detailed in your product manual.
Matching Carabiner Specs to Climbing Tasks
Pairing the right carabiner specifications with your climbing application is essential for building a safe, efficient system. For building anchors, you should prioritize locking carabiners—typically large asymmetric D-shapes or HMS profiles—to secure master points and shelf connections. These shapes accommodate multiple slings and knots without crowding the basket.
When assembling or using quickdraws, non-locking carabiners are the standard choice. Use a straight-gate carabiner on the bolt-side to prevent damage to the gate from metal hangers, and a bent-gate or wire-gate carabiner on the rope-side for effortless clipping. Ensure the rope runs straight through the quickdraw without twisting the carabiners sideways.
For belaying and rappelling, always use an HMS locking carabiner. The wide basket prevents the belay device from binding and allows the rope to feed smoothly during pay-out or take-in. Always verify that your gear choices respect the specific routing, rope diameter, and manufacturer warnings for your setup. Remember that equipment choices do not replace proper climbing training, knot-tying skills, and professional judgment.
Pre-Use Inspections and Retirement Conditions
Establishing a strict visual and physical inspection routine before every climb is vital for identifying hidden wear and damage. Begin by checking the carabiner body for deep grooves worn into the metal by ropes; many manufacturers recommend retiring a carabiner if rope wear exceeds one millimeter in depth. Inspect the entire surface for hairline cracks, sharp edges, or deep gouges that could damage your rope.
Test the gate action repeatedly to ensure it snaps shut quickly and aligns perfectly with the nose key. If a locking sleeve is sticky, gritty, or fails to lock automatically, clean it according to the manufacturer’s instructions. Check for signs of corrosion, especially pitting or white powdery oxidation, which can compromise structural integrity in humid environments. If the spine stamps or certification markings are completely worn away and unreadable, the gear should be retired.
If a carabiner has sustained a severe shock load, such as a major fall, or shows any visible structural deformation, stop using it immediately. When in doubt, consult the manufacturer or a qualified professional for guidance. Always follow the specific retirement timeline and care instructions provided in your product documentation to ensure your safety on the rock.
Frequently Asked Questions (FAQ)
Can I use a locking carabiner for every climbing connection?
While locking carabiners offer maximum security against accidental opening, using them for every single connection introduces significant weight and operational complexity. Managing multiple screwgates or auto-lockers during a fast-paced climb can slow down transitions and increase physical fatigue. However, specific connections—such as your belay device attachment, anchor master points, and personal tethers—absolutely require locking gates, often specifically in an HMS shape to accommodate ropes and hitches safely.
Does a wire gate carabiner hold less weight than a solid gate?
No, a wire gate carabiner does not inherently hold less weight than a solid gate model. A carabiner’s ultimate strength is primarily determined by the material, heat treatment, and cross-sectional design of its spine and basket, rather than the gate material itself. To confirm the load capacity of any specific model, always verify the stamped major-axis, minor-axis, and open-gate kilonewton (kN) ratings on the spine rather than relying on assumptions about gate construction.

Community discussion
Share your experience or ask a question. Comments are reviewed before publication.