
Improving your football skills does not require access to a full-sized pitch. With the right selection of home training accessories, you can develop sharp ball control, rapid footwork, and precise passing accuracy right in your backyard, garage, or even a small living room. Solo training at home allows you to maximize your touches on the ball, building muscle memory and coordination at your own pace. By focusing on compact, versatile tools like training cones, agility ladders, and rebounders, you can transform any limited space into a highly effective personal training ground.
How to Choose Football Accessories for Small Spaces
Training in a restricted environment presents unique challenges, primarily involving spatial constraints and safety hazards. Before purchasing any gear, you must carefully evaluate your available training area to ensure you can move freely without risking injury or property damage. Start by measuring the clear zone, keeping in mind your full body swing radius when kicking and the potential trajectory of the ball. A space that feels large when standing still can quickly feel cramped once you begin dynamic movements.
Floor surface compatibility is another critical factor that dictates which accessories will perform safely. In tropical climates like the Philippines, home training spaces often consist of smooth indoor tiles, polished hardwood, outdoor concrete carports, or small patches of backyard grass. Hard, smooth surfaces require accessories with rubberized grips or non-slip backings to prevent sliding during high-intensity drills. Conversely, outdoor grass or dirt surfaces demand equipment that can be securely anchored with stakes or weighted bases to withstand uneven terrain and sudden gusts of wind.
Products mentioned in this guide
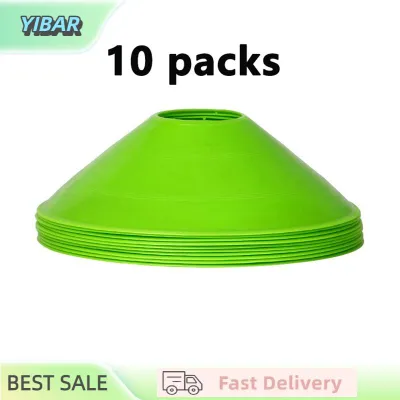
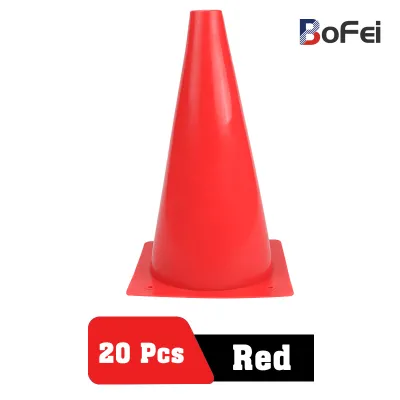
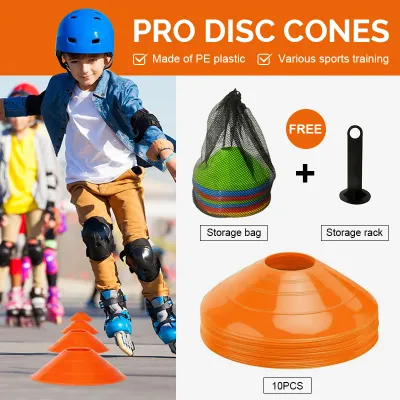
Prices are valid at publication and may change. Please refer to the product page for the latest price.
Storage and portability should also influence your purchasing decisions, especially if you live in a compact townhouse or apartment. Prioritize collapsible, foldable, or highly stackable designs that can be easily packed away when not in use. Lightweight materials like high-density polyethylene or flexible nylon are ideal because they are easy to carry and store, yet durable enough to withstand regular impact. Choosing gear that is quick to set up and tear down ensures that your training sessions remain convenient and consistent.
Training Cones and Markers for Dribbling and Agility
Cones are the foundation of any close-control dribbling routine, helping you map out precise pathways and simulate defenders in tight spaces. When selecting cones for home use, the material composition is paramount for safety. Soft, flexible low-profile disc cones are highly recommended over rigid, tall plastic cones. If you accidentally step on a flexible disc cone during a rapid change of direction, it will simply collapse under your weight, minimizing the risk of rolled ankles or slips. Rigid plastics, on the other hand, can crack under pressure, creating sharp edges and causing sudden loss of balance.

Visibility is another key factor, particularly when training in varied lighting conditions or against busy backgrounds. Choose high-contrast colors like neon orange, bright yellow, or vibrant green that stand out clearly against your specific floor surface. If you are training on a green backyard lawn, yellow or orange cones will offer the best contrast, whereas blue or white markers might be more visible on dark concrete or wooden floors. The height of the markers also matters; low-profile disc cones (usually around two inches high) are excellent for close-control dribbling because they do not obstruct the ball’s path if you make a slight error.
Finally, verify the base design of the cones to ensure they remain stable during your drills. A wider, slightly weighted base prevents the cones from being easily blown away by the wind during outdoor sessions or displaced by the draft of a passing ball. For indoor use on smooth tiles, look for cones with textured undersides that provide a small amount of friction, preventing them from sliding across the floor when brushed by your foot or the ball.
Agility Ladders for Footwork and Coordination
An agility ladder is an exceptional tool for developing rapid footwork, coordination, and lateral quickness, all of which are vital for escaping tight situations on the pitch. When shopping for an agility ladder, look for models that feature adjustable rung spacing. This adjustability allows you to customize the distance between rungs to match your stride length, skill level, or specific drill requirements. Tangle-free straps are also highly beneficial, saving you valuable training time that would otherwise be spent untangling knotted nylon bands before every session.
Safety during high-speed footwork drills depends heavily on the profile and design of the rungs. Flat, low-profile plastic rungs are far safer than round, raised tubes because they lie flush against the ground. If your foot accidentally clips a flat rung, the ladder will simply slide slightly without catching your toe and causing a trip or fall. Ensure the rungs are made of shatterproof plastic that can withstand being stepped on repeatedly by athletic shoes without cracking.
Stability is the final piece of the puzzle when evaluating agility ladders. If you plan to train outdoors on grass, confirm that the ladder package includes metal anchor stakes to pin the ends securely into the soil. For indoor training on concrete, hardwood, or tile, anchor stakes are unusable, so you must look for ladders with non-slip rubber backings or consider placing a heavy yoga mat underneath the ladder to keep it from sliding around as you perform rapid footwork sequences.
Rebounders and Passing Nets for Ball Control
A rebounder is one of the most dynamic solo training tools available, simulating a passing partner by returning the ball to you at various angles and speeds. Because a rebounder must absorb the force of repeated kicks, verifying the frame weight and base width is essential. A frame that is too light or has a narrow base will tip over or shift backward with every strong pass, disrupting your rhythm and potentially damaging nearby walls or fences. Look for heavy-duty steel or robust fiberglass frames with wide, stable bases, and consider adding sandbags or weight plates to the frame for extra stability.
The quality of your training session depends heavily on the rebounder’s net tension and adjustability. Look for models with adjustable tension mechanisms, such as heavy-duty bungees or spring systems, which allow you to control how fast and far the ball bounces back. Additionally, an adjustable angle frame is highly valuable; tilting the net backward allows you to practice receiving lofted passes and mastering your first touch with your chest, thigh, or instep, while a vertical angle is highly suitable for ground passes and quick one-touch returns.
Before setting up a rebounder, you must calculate a safe buffer zone around the equipment to prevent property damage and injuries. Even the most skilled players will occasionally misdirect a pass, causing the ball to fly off at an unexpected angle. Ensure there is a clear clearance zone of several meters behind and to the sides of the rebounder, keeping it far away from glass windows, parked vehicles, potted plants, or fragile household items. If training in a backyard, positioning the rebounder against a solid brick wall or a sturdy fence can provide an extra layer of containment for errant balls.
Building Your Solo Home Training Setup
Creating an effective home training routine does not require a massive financial investment. For beginners or those working with tight budgets, a simple starter setup consisting of a set of flexible disc cones and an agility ladder is highly effective and can easily be purchased for under ₱1,500. This combination allows you to perform hundreds of different dribbling, coordination, and fitness drills without requiring a large footprint. As your skills progress and your budget allows, you can invest in an advanced setup by adding a rebounder, which typically ranges from ₱3,000 to ₱8,000 depending on the frame size and material quality.
Safety must always remain your top priority when setting up your training area. Establish clear boundaries and define strict stop conditions before you begin. For example, if your training space overlaps with a household walkway, a driveway used by family vehicles, or areas with fragile items, agree to stop training immediately whenever someone enters the zone or when lighting conditions deteriorate. Always inspect your training gear before use, checking for frayed straps on your ladder, loose bolts on your rebounder, or cracks in your cones that could cause trips or cuts.
To maximize your development, structure a balanced weekly routine that targets different aspects of your game. You might dedicate Mondays and Thursdays to high-intensity footwork and agility using the ladder, Tuesdays and Fridays to close-control dribbling patterns through the cones, and Wednesdays and Saturdays to passing and first-touch control with the rebounder. Keep your sessions short and focused—20 to 30 minutes of high-quality, concentrated practice is far more beneficial than an hour of distracted play. Always allow at least one full day of rest to let your muscles recover, especially when training on hard surfaces like concrete.
Frequently Asked Questions (FAQ)
Can I use these football accessories indoors on hard floors?
Yes, most of these accessories can be adapted for indoor use on hard floors like tile, concrete, or hardwood, provided you take a few safety precautions. To prevent agility ladders and rebounder frames from sliding, place them on non-slip rubber mats or a large yoga mat. Additionally, it is highly recommended to swap your standard outdoor match ball for a softer, low-bounce indoor training ball or a foam ball. This simple adjustment significantly reduces the noise of impacts, protects your walls and furniture from scuffs, and lowers the risk of breaking household items during indoor drills.
How much space do I realistically need for a rebounder?
To use a rebounder safely and effectively, you need to measure both the physical footprint of the equipment and your own operational space. A standard home rebounder typically occupies a ground area of about 1 to 1.5 meters in width and depth. However, you must also factor in a player stepping-back distance of at least 2 to 3 meters to allow room for passing, receiving, and moving dynamically. Always check the manufacturer’s specifications for the recommended clearance zone, and ensure you have a total clear length of at least 4 to 5 meters from the net to your starting position to accommodate ball deflection safely.

Community discussion
Share your experience or ask a question. Comments are reviewed before publication.