
To set the correct tire pressure on a 29er mountain bike, you must determine a baseline pressure based on your weight, tire volume, and trail conditions, then use a floor pump with an accurate gauge or a standalone digital pressure gauge to measure and adjust the air. For most riders on 29-inch wheels, this baseline typically ranges between 18 and 26 PSI for tubeless setups, and 25 to 35 PSI for tubed tires. Finding the sweet spot is an ongoing process of measurement, trail testing, and minor adjustments rather than a single fixed number.
Because 29er wheels have a larger overall diameter and air volume than older 26-inch or 27.5-inch wheels, they require lower overall pressure to achieve the same level of tire casing support and trail compliance. This increased volume allows the tire to conform to trail obstacles more effectively, but it also means that even a minor pressure change of 1 or 2 PSI can dramatically alter how your bike handles. Understanding how to manage this air volume is one of the most cost-effective ways to improve your bike’s performance, comfort, and safety on rough terrain.
Why Tire Pressure Matters for 29er Mountain Bikes
Tire pressure is the single most critical factor influencing how your 29er mountain bike interacts with the trail. Because the tires are your only contact points with the ground, their inflation level directly dictates your traction, steering precision, and overall control. A 29er wheel naturally creates a longer, narrower contact patch compared to smaller wheel sizes, which inherently improves rolling momentum and grip. However, if your tire pressure is too high, this contact patch shrinks dramatically, causing the tire to bounce off trail obstacles rather than absorbing them, leading to a harsh ride and unpredictable cornering.
Products mentioned in this guide
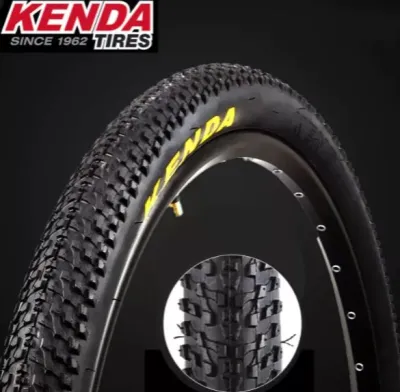
27 Lazada user ratings
Suitable for off-road adventures, Durable and long-lasting, Enhanced stability and grip, Easy to install and fit perfectly,
ok sya at sakto lang. mabilis din sya madeliver. hoping na magtagal. thank you seller at rider
good Good quality sya original Performance:good Durability:good
Quality:good. Appearance:good Performance:tba
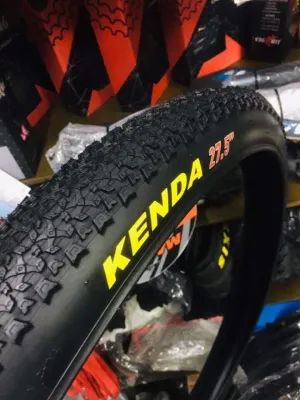
48 Lazada user ratings
mganda nman sia kea lng blis nia pmutok 2 kc inorder ko ung isa wla pa 1week pmutok agd dna kyang gwan ng praan ng mgvvulcanizing .. pro ung…Read full reviewShow less
mganda nman sia kea lng blis nia pmutok 2 kc inorder ko ung isa wla pa 1week pmutok agd dna kyang gwan ng praan ng mgvvulcanizing .. pro ung isa un nggamit pa nman nmin gang ngaun
Size:sakto Performance:ayos na ayos Durability:kalidad no picture, ginamit na bike Provides excellent traction, Perfect fit for my bike,
Item received properly packed, as ordered and in good condition. thanks to seller, courier and speedy delivery by the courier/ rider.
Mali Ang Pina dala nyo gago ayosen nyo nag babayad nmn kami Ng maayos ahh bakit iba Ang ibigay nyo😤😤😤😤
parcel recieved complete and in good condition hope it durable tnx seller lazada and rider.
9 Lazada user ratings
Durable and reliable tires, Excellent traction and control, High-quality material used, Enhances the overall look of my bike,
Durable and reliable tires, Impressive performance on trails,
Durable and reliable tires,
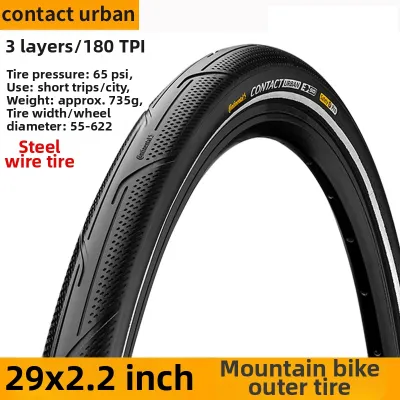
8 Lazada user ratings
The quality is really good. It is an easy rolling tire. I like the reflector line. It adds visibility in the evening and even in the afterno…Read full reviewShow less
The quality is really good. It is an easy rolling tire. I like the reflector line. It adds visibility in the evening and even in the afternoon. I put it on the front wheel of my bike.
waiting for my dream tire for too long,at last it came,very happy man!did not out it yet but for sure it will be amazing!
Size: perfect fit 29er Performance: fast rolling Durability: thin and light. Looks durable
Size:29 Performance:excellent Durability:99.9% anganda .good na good .nagustohan ko .
Size:perfect Performance:perfext Durability:perfext
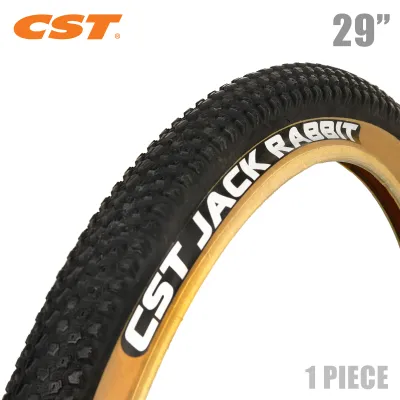
78 Lazada user ratings
Looks stylish on my bike., Durable and long-lasting., Great tire for off-road biking., Impressive grip on loose surfaces., Excellent tractio…Read full reviewShow less
Looks stylish on my bike., Durable and long-lasting., Great tire for off-road biking., Impressive grip on loose surfaces., Excellent traction on various terrains., Perfect fit for my bike., Perfect fit for my bike., High-quality construction.,
ok sn kaso pangit pagkabalot lukot lukot yung gulong kc nakatupi
Quality:Excellent traction on various terrains.,
Quality:nice Appearance:nice Performance:nice
maganda ang porma. at matibay mman sya.
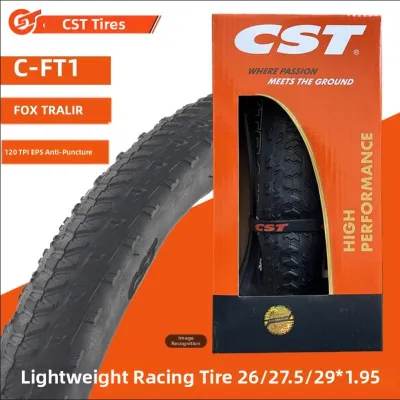
90 Lazada user ratings
Easy to install, Excellent grip on trails, Fast shipping service, Excellent grip on trails, No warranty but reliable, No warranty but reliab…Read full reviewShow less
Easy to install, Excellent grip on trails, Fast shipping service, Excellent grip on trails, No warranty but reliable, No warranty but reliable, Puncture-resistant design, High quality material,
Size:true to size, even though it's 29er its soo light Performance:very lightweight Durability:it's durable since this was my tire for a yea…Read full reviewShow less
Size:true to size, even though it's 29er its soo light Performance:very lightweight Durability:it's durable since this was my tire for a year and made me change it cause it's thinner now
This is really great! It totally exceeded my expectations! The seller was super thoughtful, and the product itself is awesome!
I bought it for the second time, and it's really great. I'm definitely coming back for more!
legit. nabili ko ng 1,647 kala ko scam pero ito yung dumating
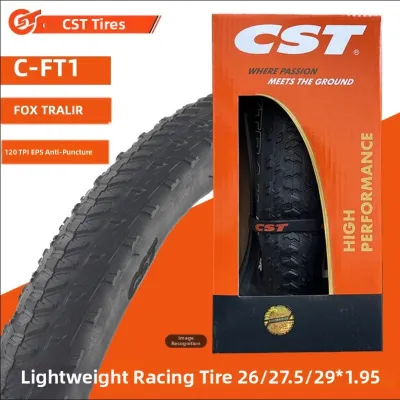
14 Lazada user ratings
I replaced my original 225 tires with these! Compared to those, these 195 tires are noticeably narrower! The outer diameter seems to be abou…Read full reviewShow less
I replaced my original 225 tires with these! Compared to those, these 195 tires are noticeably narrower! The outer diameter seems to be about a finger’s width smaller! I feel like the bike shifts gears a bit easier now too! Overall, they fit the frame pretty well! I’ve been riding on them for a few days and they feel really light and responsive! They seem like a solid choice! Durability will just have to be seen over time!
Thanks seller. Great item, wonderful experience. Amazing deal from an amazing seller. Thanks Lazada! More power and more deals
Performance:10/10 Durability:havent tried yet looks 10/10 overall experience buy this ill recommended it Size:true to size
Prices are valid at publication and may change. Please refer to the product page for the latest price.
Finding the correct balance between rolling resistance and shock absorption is essential for maintaining speed and reducing rider fatigue. On smooth, paved surfaces, higher tire pressure reduces rolling resistance by minimizing tire deformation. On actual off-road trails, however, a slightly lower pressure allows the tire casing to flex and conform to rocks, roots, and loose gravel. This flexibility prevents the bike from being deflected upward and backward by trail debris, preserving your forward momentum and providing a smoother, more comfortable ride that saves your energy over long distances.
Furthermore, maintaining proper tire pressure is vital for protecting your expensive equipment from severe damage. If you run your pressure too low, the tire can easily bottom out against the rim when hitting sharp rocks or square-edge obstacles at speed. For riders using traditional inner tubes, this compression results in immediate pinch flats, often referred to as “snakebites.” For tubeless riders, a severe rim strike can dent or crack alloy or carbon fiber rims, leading to expensive repairs, sudden air loss, and potential loss of control on high-speed descents.
Essential Tools for Checking and Adjusting Pressure
To achieve consistent and accurate tire pressure adjustments, you must use the right tools rather than relying on the unreliable “thumb test.” A high-quality floor pump equipped with a stable base, an ergonomic handle, and a dual-valve head that fits both Presta and Schrader valves is the foundation of your home workshop. When selecting a floor pump for mountain biking, look for one specifically designed for high-volume, low-pressure tires. These pumps typically feature a gauge that tops out at 60 PSI rather than 160 PSI, providing much larger, easier-to-read increments in the critical 15 to 35 PSI range.

While a floor pump is excellent for adding volume, built-in analog gauges can suffer from calibration drift over time or read inaccurately due to internal friction. To ensure absolute consistency, serious riders use a standalone digital pressure gauge for cross-verification. These compact, pocket-sized devices provide highly accurate, digital readouts down to a tenth of a PSI. Using the same digital gauge before every ride ensures that your measurements remain identical, regardless of which floor pump or trailside hand pump you happen to use.
For riders running modern tubeless setups, a few additional small tools are highly beneficial for long-term pressure maintenance. A valve core removal tool allows you to unscrew the delicate inner core of your Presta valves to clear out dried sealant clogs or inject fresh liquid sealant. Keeping a dedicated sealant injector syringe in your toolbox makes it easy to replenish your tire’s puncture-preventing fluid directly through the valve stem without unseating the tire bead, ensuring a reliable airtight seal.
Step-by-Step Guide to Setting Your 29er Tire Pressure
Setting your 29er tire pressure accurately requires a systematic approach that combines manufacturer safety guidelines with your specific riding variables. By establishing a reliable baseline and executing a consistent measurement routine, you can eliminate guesswork and optimize your bike’s handling characteristics for any trail.
Finding Your Baseline Pressure
Before inflating your tires, you must locate and interpret the manufacturer’s pressure recommendations molded directly into the tire’s sidewall. These markings typically display a minimum and maximum pressure range, such as 30 to 50 PSI. While these numbers represent the safety boundaries tested by the manufacturer, modern tubeless riders often find that the optimal trail pressure is actually slightly below the printed minimum. However, you must never exceed the maximum pressure limit, as doing so can cause the tire bead to violently blow off the rim, damaging your wheel and risking severe injury.
Your total riding weight—which includes your body weight plus the weight of your helmet, shoes, riding gear, and loaded hydration pack—is the primary factor in determining your starting baseline. A heavier rider requires more air pressure to support the tire casing and prevent the tire from squirming or bottoming out under load. Conversely, a lighter rider must run lower pressures to allow the tire to flex and grip the trail properly. A helpful starting point for a 75-kilogram (165-pound) rider on a standard 2.3-inch 29er tire is approximately 20 PSI in the front tire and 23 PSI in the rear tire for tubeless setups.
Tire casing volume and internal rim width also heavily influence your baseline calculations. A wider 29er tire, such as a 2.4-inch or 2.6-inch trail tire, holds a larger volume of air than a narrow 2.2-inch cross-country tire, allowing you to safely run lower pressures without risking rim strikes. Additionally, wider modern rims provide better lateral support to the tire’s sidewalls, preventing the tire from folding over or “burping” air during hard cornering at lower pressures. If you are running narrower rims, you will need to run slightly higher pressures to maintain lateral stability.
Measuring and Adjusting the Air
To begin adjusting your pressure, position your bike so that the tire valve is located at either the three o’clock or nine o’clock position, which prevents any liquid sealant from pooling near the valve and clogging your pump head. If your bike uses Presta valves, unscrew the small brass locking nut at the very tip of the valve stem and press it down briefly with your finger to ensure the valve is not stuck. For Schrader valves, simply remove the plastic dust cap to expose the valve threads.
Push your floor pump head firmly onto the valve stem, ensuring it is fully seated and aligned straight to avoid bending the delicate valve core. Flip the locking lever on the pump head to secure the connection, and check that you do not hear any air leaking from the interface. Pump the tire until the analog gauge reads slightly higher than your target baseline pressure, then carefully disengage the pump head by flipping the lever back and pulling the head straight off the valve stem in one swift motion.
Finally, press your standalone digital pressure gauge firmly onto the valve stem to get an accurate, high-resolution reading. If the pressure is too high, use the gauge’s built-in bleed valve to release air in small, controlled bursts until you reach your exact target pressure. If the pressure is too low, reattach the pump and add a few more strokes of air before measuring again. Once you have set the pressure, tighten the Presta valve locking nut securely and replace the dust cap to protect the valve from trail mud and debris.
Fine-Tuning Pressure for Trail Conditions and Rider Weight
Once you have established your baseline pressure, you must learn to adjust it to match the specific trail conditions and terrain you plan to ride. When riding on wet, muddy, or highly technical trails covered in slippery roots and loose rocks, traction is your primary concern. Dropping your tire pressure by 1 to 2 PSI below your standard baseline increases the tire’s contact patch and allows the tread blocks to wrap around obstacles, significantly improving your grip and reducing the likelihood of slipping. However, you must ride with increased awareness to avoid hard, direct impacts on sharp rocks when running these lower pressures.
Conversely, if you are riding on smooth, fast-rolling hardpack clay, flow trails with high-speed berms, or jump lines, your tires will experience much higher G-forces and heavy compression loads. In these environments, increasing your tire pressure by 2 to 3 PSI above your baseline provides the necessary sidewall support to prevent the tire from folding or squirming under heavy cornering forces. This extra pressure also protects your rims from bottoming out during hard or imperfect landings on jump lines, while reducing rolling resistance on smooth surfaces.
You must also make proportional adjustments to your baseline pressure as your riding weight or carrying method changes. As a general guideline, you can adjust your tire pressure by approximately 1 PSI for every 5 to 7 kilograms (11 to 15 pounds) of weight variance from your baseline. If you are carrying a heavy multi-tool, spare parts, and a full hydration bladder for an all-day epic ride, remember to add 1 to 2 PSI to compensate for the extra load. Always document your pressure settings and how they felt on specific trail sections to build a personalized reference guide for different riding venues.
Tubeless vs. Tube-Type Tire Considerations
The type of tire system you run on your 29er—either a modern tubeless setup or a traditional inner tube system—fundamentally dictates how low you can safely set your tire pressure. In a tubeless system, the inner tube is completely eliminated, and the tire forms an airtight seal directly with the rim, aided by a liquid latex sealant. Because there is no inner tube to get pinched between the tire casing and the metal rim, tubeless setups allow you to safely run significantly lower pressures, often down to 18 to 22 PSI. This low-pressure capability dramatically enhances traction, comfort, and rolling efficiency over rough terrain.
If your 29er utilizes traditional inner tubes, you must maintain higher pressures, typically ranging from 25 to 35 PSI, to protect the tube from pinch flats. When a low-pressure tubed tire strikes a sharp rock or root, the tire casing compresses completely, pinching the inner tube against the sharp metal edges of the rim. This results in two small, parallel punctures—commonly called a snakebite flat—that instantly deflate your tire. While inner tubes are simple to install and replace, they severely limit your ability to run the low pressures required for optimal off-road performance.
Maintaining a tubeless system also requires regular physical checks that directly impact your tire pressure consistency. Liquid sealant naturally dries out over three to six months, especially in warm, tropical climates like the Philippines, where high ambient temperatures accelerate evaporation. When adjusting your pressure, inspect the tire sidewalls and tread for any signs of wet sealant weeping from small punctures, which indicates the sealant is actively doing its job. Additionally, verify that the tire bead is fully and evenly seated into the rim hook to prevent sudden air loss, known as “burping,” when cornering hard.
Frequently Asked Questions (FAQ)
How often should I check my mountain bike tire pressure?
You should check your tire pressure before every single ride. Bicycle tires hold a relatively small volume of air at low pressures compared to car tires, meaning even a minor loss of air represents a massive percentage drop in pressure. Bicycle tires naturally lose air over time through microscopic pores in the rubber and tubeless tape, and a tubeless setup can slowly weep air through the sidewalls or valve stem over a few days. Additionally, significant ambient temperature changes can alter your tire pressure, so a quick pre-ride check ensures consistent handling and protects your rims.
Why do my front and rear tires need different pressures?
Your front and rear tires serve entirely different primary functions and support different weight loads. When you are seated or standing in a neutral descending position, approximately 60% to 70% of your total weight rests on the rear wheel. Consequently, the rear tire requires higher pressure (typically 2 to 3 PSI more than the front) to support this load, prevent rim strikes, and handle pedaling forces. The front tire carries less weight and is responsible for steering and braking traction, allowing you to run lower pressure to maximize grip and control.
What should I do if my tire loses pressure rapidly on the trail?
If you experience rapid pressure loss while riding, safely pull over to the side of the trail immediately to inspect the wheel. First, check if the valve core is loose or if sealant is bubbling around the valve stem. For tubeless setups, look for escaping sealant along the tread; if you find a puncture that is too large for the sealant to close on its own, insert a tubeless tire plug into the hole and pump the tire back up. If the tire cannot hold air or you are running inner tubes, you will need to install a spare inner tube to ride back safely.

Community discussion
Share your experience or ask a question. Comments are reviewed before publication.