
Choosing the best 1-person tent for solo hiking in the Philippines requires balancing high humidity, sudden tropical downpours, and rugged trail conditions. A solo hiker needs a shelter that is highly ventilated to manage condensation, sufficiently waterproof to withstand heavy rains, and light enough to carry over steep, muddy terrain.
There is no single “perfect” tent for every trail. A hiker climbing Mount Pulag in cold, windy conditions needs a different setup than someone camping on a humid beach in Batangas or a muddy ridge in Mount Cristobal. The decision comes down to verifying specific manufacturer specifications against your planned route, physical limits, and camping style.
By understanding how to evaluate weather resistance, weight, packability, and structural design, you can select a reliable shelter that keeps you safe and comfortable. This guide breaks down the essential technical specifications and design features to look for when building your solo hiking gear list.
Products mentioned in this guide
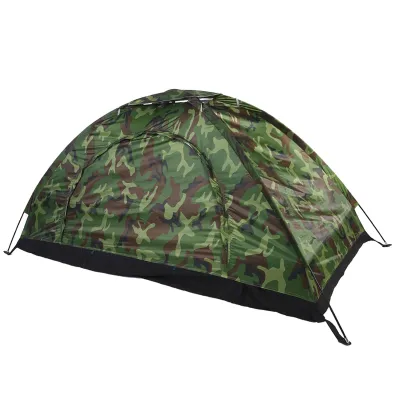
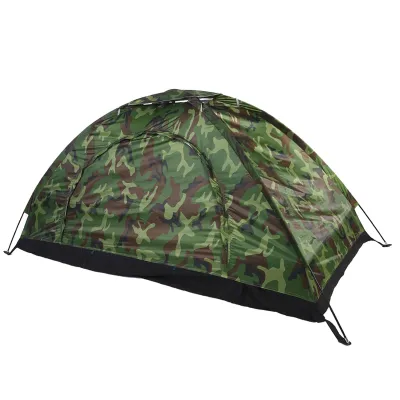
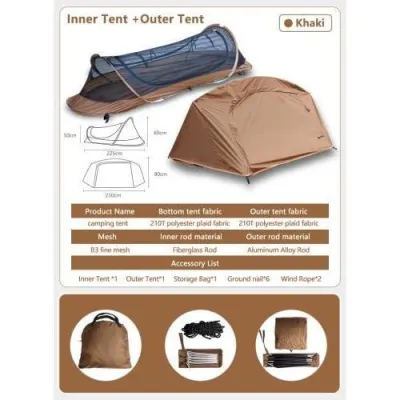
Prices are valid at publication and may change. Please refer to the product page for the latest price.
Evaluating Weather Resistance for Philippine Trails
Tropical weather in the Philippines is notoriously unpredictable. A sudden afternoon downpour can quickly flood a poorly prepared campsite. To evaluate a tent’s waterproof capability, look at the hydrostatic head rating, which is measured in millimeters (mm). For tropical rainstorms, a rainfly rating of at least 1,500mm is generally recommended, while the tent floor should ideally have a higher rating, such as 3,000mm or more, to resist water being forced through the fabric when you sit or lie down.
Beyond the fabric rating, inspect the construction details. Factory-taped seams are essential to prevent water from seeping through needle holes. Look for a full-coverage rainfly that extends all the way to the ground rather than a partial “cap” style fly, which leaves the inner tent walls exposed to wind-driven rain.
Ventilation is just as critical as waterproofing in hot, humid climates. High humidity means your breath and body heat will easily condense on the inside of a cold rainfly. Double-wall tents with a generous amount of micro-mesh on the inner canopy allow air to circulate freely, carrying moisture away before it can drip onto your sleeping bag. Look for rainflies with adjustable vents near the peak to encourage a chimney effect, drawing warm, moist air up and out.
The forest floors and mountain ridges of local trails are often littered with sharp volcanic rocks, roots, and abrasive clay. A tent’s floor durability is indicated by its denier (D) rating. Lower denier fabrics (like 15D or 20D) are incredibly light but require careful site preparation and a protective footprint. Higher denier fabrics (such as 40D or 70D) offer much better puncture resistance but add noticeable weight to your pack.
Balancing Weight and Packability for Solo Carry
When you are hiking solo, you carry 100 percent of your shelter, food, and safety gear. Every gram matters on steep ascents like Mount Apo or Mount Dulang-Dulang. When comparing product specifications, pay close attention to the distinction between “minimum trail weight” and “packaged weight.” The trail weight typically includes only the tent body, rainfly, and poles, while the packaged weight includes stakes, guylines, stuff sacks, and any included repair kits. Always plan your pack weight around the total packaged weight unless you intend to swap out heavy components.

The choice of fabric directly influences both the weight and the packed size of your tent. Nylon is highly popular for its excellent strength-to-weight ratio and elasticity, which helps the tent fabric tension beautifully under wind loads. However, standard nylon absorbs water and sags when wet, requiring you to re-tension the guylines during a prolonged downpour. Polyester is slightly heavier than nylon but resists water absorption and UV damage much better, maintaining its taut pitch even in wet conditions.
Silnylon (silicone-coated nylon) and silpoly (silicone-coated polyester) represent premium options that offer superior waterproofing and weight savings. These fabrics are incredibly slick and pack down exceptionally small, allowing you to slide the tent easily into tight spaces inside your backpack. However, they require specialized silicone-based seam sealers if they do not come pre-taped from the factory, and they can be quite slippery on sloped campsites.
Packed dimensions are just as critical as weight. A tent that is lightweight but has long, rigid pole sections can be difficult to pack horizontally inside a standard 40-liter to 50-liter backpacking pack. Check the packed length of the pole set. If the poles are too long, you may need to carry them vertically in an exterior side pocket, securing them with compression straps, while packing the fabric components tightly inside your main pack body.
Choosing the Right Shelter Design and Setup
The structural design of your tent dictates how and where you can pitch it. Freestanding tents use a dedicated pole system that supports the tent structure entirely without the need for stakes. This design is highly versatile for local campsites, allowing you to set up on wooden platforms, rocky ridges, or hard-packed clay where driving stakes is nearly impossible. You can easily lift and shake out dirt from a freestanding tent before packing it away.
Semi-freestanding tents use a modified pole hub that requires a few stakes to fully tension the footbox or vestibule. This hybrid design saves weight by eliminating extra pole segments while retaining much of the setup convenience of a fully freestanding model. Non-freestanding tents, on the other hand, rely entirely on stakes and guylines to remain upright. While they are incredibly light, they require excellent staking technique and can be highly challenging to pitch securely on loose sand or solid rock.
Trekking pole shelters are a popular subcategory of non-freestanding tents among ultralight hikers. By utilizing your existing trekking poles as the primary support structure, these shelters eliminate heavy tent poles entirely. However, pitching a trekking pole tent requires practice to achieve the correct tension, especially in high winds. You must ensure your trekking poles are adjusted to the exact height recommended by the manufacturer and that your stakes are anchored deeply into the ground.
The choice between single-wall and double-wall construction is a classic trade-off between weight and comfort. Single-wall tents integrate the canopy and rainfly into a single layer of fabric, making them exceptionally light and fast to pitch. However, they are highly prone to condensation in warm, humid environments. Double-wall tents feature a separate inner mesh tent and an outer waterproof rainfly. This physical separation keeps condensation on the underside of the rainfly away from your body and gear, making it the more forgiving choice for most tropical solo adventures.
Building Your Shortlist: Essential Specs to Verify
Before finalizing your purchase, create a shortlist of candidate tents and verify their physical dimensions against your body size and gear volume. A 1-person tent can feel incredibly cramped if you do not have enough headroom to sit up comfortably. Check the interior peak height; a minimum of 95 to 100 centimeters is generally comfortable for most hikers to sit up, change clothes, and organize gear. Ensure the floor length is at least 15 to 20 centimeters longer than your height to prevent your sleeping bag from pressing against wet tent walls.
Do not overlook vestibule space. A 1-person tent rarely has enough interior room to store a muddy 50-liter backpack and wet hiking boots. A spacious vestibule—the covered area outside the tent door created by the rainfly—is essential for keeping your gear protected from the elements while keeping the interior living space clean and dry. Look for tents with vestibules that offer secure zippered closures and multiple tie-out points.
Examine the quality of the included hardware. Cheap, heavy steel stakes are difficult to carry and bend easily in hard clay. Look for tents that include lightweight aluminum Y-stakes or V-stakes, which offer excellent holding power in various soil types. High-visibility reflective guylines are also a valuable safety feature, preventing you and other campers from tripping over your tent lines in the dark. Ensure the tent package includes an emergency pole repair sleeve, which can save your trip if a pole segment cracks under wind stress.
Finally, research the manufacturer’s warranty terms, care instructions, and the local availability of replacement parts. In the humid climate of the Philippines, tents must be stored completely dry to prevent mold, mildew, and polyurethane hydrolysis, which ruins waterproof coatings. Verify if the brand offers replacement pole segments, rainflies, or footprints locally, as shipping replacement parts internationally can be costly and time-consuming.
Frequently Asked Questions (FAQ)
Do I need a footprint for my 1-person tent?
A footprint or groundsheet is highly recommended if your tent has a lightweight, low-denier floor (such as 15D or 20D) and you frequently camp on rocky, root-filled, or muddy terrain. It acts as a sacrificial barrier against abrasion, punctures, and moisture seepage, extending the lifespan of your tent. However, if your tent floor is made of a heavy-duty, high-denier fabric (40D or higher) and you are highly conscious of your pack weight, you may choose to skip the footprint, provided you carefully clear your campsite of sharp debris before pitching.
How do I prevent condensation inside a single-wall tent?
To minimize condensation in a single-wall tent, prioritize campsite selection and airflow. Avoid pitching your tent in low-lying, damp areas near rivers, lakes, or wet grass where humidity is naturally higher. Instead, choose slightly elevated sites that catch a gentle breeze. Keep all built-in vents fully open, and if weather permits, leave the vestibule doors partially unzipped to maximize cross-ventilation. Additionally, avoid bringing wet gear inside the main tent body; store damp clothes and boots in the vestibule to keep interior moisture levels as low as possible.

Community discussion
Share your experience or ask a question. Comments are reviewed before publication.