
Selecting the right diving flashlight board ensures your light stays securely attached to your gear, providing reliable illumination without the risk of losing it underwater. A proper fit depends on matching your flashlight’s physical dimensions, choosing a compatible attachment mechanism, and verifying that the materials can withstand the marine environment. This guide walks you through the essential checks and installation steps to build a safe and accessible dive light setup.
In the tropical waters of the Philippines, where high humidity and warm saltwater accelerate corrosion, choosing the right mounting board is a critical safety step. Equipment alone cannot replace proper dive training and situational awareness, but a secure setup ensures your hands remain free to manage your buoyancy, check your pressure gauge, or signal your buddy. To find the right fit, you must systematically evaluate your flashlight’s physical dimensions, compare mounting mechanisms, inspect material durability, and verify compatibility with your existing dive gear.
Identify Your Dive Light's Dimensions and Shape
Before purchasing a diving flashlight board, you must measure your primary or backup dive light with precision. Use a caliper or a flexible measuring tape to find the exact outer diameter of the flashlight’s body tube. Even a millimeter of difference can cause the light to slip out under water pressure or during a giant stride entry.
Products mentioned in this guide
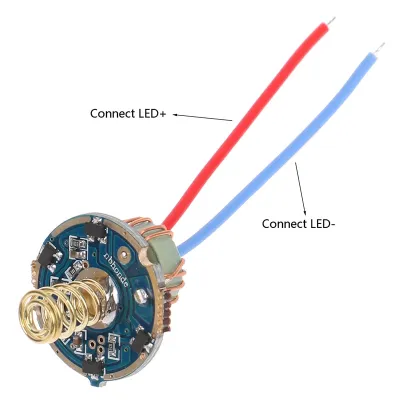
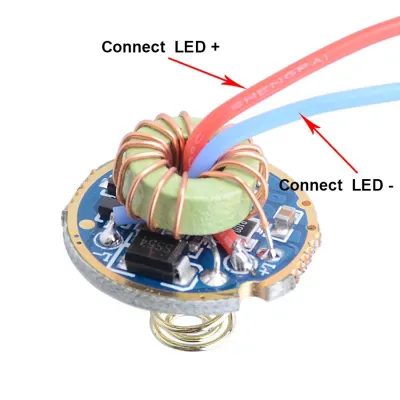
Prices are valid at publication and may change. Please refer to the product page for the latest price.
Pay close attention to the shape of the flashlight body. Many modern dive lights feature tapered ends, textured rubber grips, or integrated cooling fins. These uneven surfaces can prevent a standard cylindrical mount from making full contact. If your light has a flared bezel or a battery compartment that is wider than the middle section, you must ensure the mounting board’s cradle or rings can accommodate these transitions without pinching or scratching the housing.
Consult your flashlight manufacturer’s specifications sheet to see if they recommend a specific mount size or proprietary cradle. Some brands design their lights with dedicated mounting grooves or screw threads that align only with their own proprietary brackets.
Determine whether your light requires a specific ring size, a contoured cradle, or a Goodman-style handle. A Goodman handle style board sits flat against the back of your hand, allowing you to use your fingers while keeping the light pointed in your direction of gaze. If you prefer a wrist-mounted or hand-mounted setup, the board must feature a curved base that matches the contour of your hand or forearm.
Evaluate Mounting Mechanisms and Attachment Styles
The way your flashlight attaches to the board determines how easy it is to operate, adjust, and remove during a dive. You must choose between adjustable strap mounts and fixed-size rigid cradles. Adjustable straps, often made of heavy-duty webbing or silicone bands, offer excellent versatility because they can stretch to fit various flashlight diameters. However, they may allow more movement or vibration than a rigid mount.

Fixed-size rigid cradles, typically made of machined aluminum or molded plastic, provide a highly secure, custom fit. These cradles hold the light firmly in place with minimal play, but they lack flexibility. If you upgrade or change your dive light in the future, you will likely need to replace the rigid cradle as well.
Evaluate quick-release systems and pivot joints if you need to adjust your light angle or hand the light to a buddy underwater. A quick-release mechanism allows you to detach the light from the board with a single squeeze or slide of a button. When selecting a quick-release board, verify that the locking mechanism clicks audibly and cannot be accidentally triggered by brushing against a wreck, a cave wall, or your own buoyancy compensator device (BCD).
Check the tightening mechanism, such as thumb screws, buckles, or tension knobs. In the warm waters of the Philippines, you might dive barehanded, but for deeper or technical dives where you wear thick neoprene or dry gloves, these controls must be large and textured enough to operate by feel alone. Avoid tiny screws or smooth plastic knobs that are difficult to grip when wet or when your manual dexterity is reduced by cold or depth.
Check Material Durability and Corrosion Resistance
The marine environment is incredibly harsh on dive gear. Saltwater, intense tropical sun, and physical impacts against boat ladders or rocky entries can quickly degrade inferior materials. When choosing a diving flashlight board, inspect the product labels and manufacturer specifications for marine-grade materials.
Look for components made from marine-grade anodized aluminum, 316 stainless steel hardware, or high-density polymers like Delrin or glass-filled nylon. Anodized aluminum resists saltwater corrosion but must be checked regularly for scratches that expose the raw metal underneath. Stainless steel hardware is highly durable but can still suffer from galvanic corrosion if it remains in contact with different metals without proper rinsing.
Whether you are purchasing a replacement stainless steel bolt for ₱150 at a local dive shop or investing in a complete mounting system, choosing marine-grade hardware saves you from costly gear losses. Verify that any plastic or polymer parts feature UV stabilizers. Prolonged exposure to the tropical sun on dive boats can cause non-UV-resistant plastics to become brittle, warp, or crack under the pressure of a deep dive.
Plan a regular maintenance routine based on the manufacturer’s care instructions. After every dive, soak the entire mounting board and flashlight assembly in clean, warm freshwater to dissolve salt crystals. Pay special attention to the threads of thumb screws, pivot joints, and the areas where different materials meet, as these are primary sites for salt buildup and corrosion.
Match the Board to Your Dive Gear and Placement
Your diving style and the type of environment you explore should dictate where you mount your flashlight. Common carry locations include a shoulder D-ring, a waist belt, a wrist strap, or a helmet mount. The mounting board you choose must be designed specifically for your preferred placement to ensure stability and comfort.
Check the mounting board’s attachment points to ensure they are compatible with your existing dive gear. If you plan to mount the board on your harness webbing, verify that the slots on the board match the standard two-inch width of scuba webbing. If you prefer to clip the board to a D-ring, look for integrated holes or slots that accommodate bolt snaps, double-enders, bungee cords, or retractor reels.
Evaluate the overall profile and bulkiness of the assembled mount. A bulky, protruding mounting board increases your profile and creates a significant entanglement hazard, especially when diving near guidelines, inside shipwrecks, or around delicate reef structures. Choose a low-profile design that keeps the flashlight tucked close to your body or hand, minimizing the risk of snagging on underwater obstacles.
Consider how the placement affects your buoyancy and trim. While a single dive light and board may seem light on land, adding multiple accessories to one side of your BCD can affect your balance in the water. Distribute your gear evenly and ensure that the mounted light does not interfere with your ability to quickly reach your inflator hose, dump valves, or weight release pockets.
Step-by-Step Installation and Pre-Dive Safety Checks
Properly installing your flashlight onto the mounting board is essential for preventing underwater gear failure. Start by cleaning both the flashlight body and the mounting board to remove any sand, salt, or grease. If your mount uses rubber inserts or O-rings to increase friction, ensure they are clean, dry, and correctly seated in their designated grooves.
Align the flashlight within the cradle or straps, ensuring that the beam points directly forward and does not cast a shadow on your hand or gear. Tighten the mounting screws or straps gradually, alternating sides if using a dual-ring system, to apply even pressure. Avoid overtightening, which can crush the flashlight’s aluminum housing, strip the threads of plastic mounts, or pinch the internal battery compartment.
Once the light is secured to the board, attach the board to your BCD, harness, or wrist strap. Perform a physical tug-test on land: pull firmly on the flashlight in multiple directions to verify that it does not slide, rotate, or wobble within the mount. Shake the entire assembly to check for any loose hardware or rattling parts that could vibrate loose during a dive.
Establish clear stop conditions before every dive. Conduct a visual inspection of the mounting board, looking for stripped threads, cracked plastic, frayed webbing, or loose screws. If you observe any of these signs of wear, do not enter the water with the setup. Immediately replace the damaged components or consult a qualified dive equipment professional at a local dive center to ensure your gear is safe for underwater use.
Frequently Asked Questions (FAQ)
Can I use a standard camera mount board for my dive light?
Standard camera mount boards are generally not suitable for scuba diving unless they are explicitly rated for marine use and deep-water pressure. Generic camera mounts often use low-grade metals or standard plastics that corrode rapidly in saltwater or crack under pressure. Furthermore, they may lack the robust locking mechanisms and redundant attachment points required to prevent a heavy dive light from working loose during active swimming or in strong currents. Always check the manufacturer’s intended use, depth ratings, and material specifications before attempting to adapt non-diving gear for underwater use.
How do I prevent the flashlight from slipping out of the mount underwater?
To prevent your flashlight from slipping, regularly inspect the internal rubber inserts, O-rings, or silicone bands that provide the necessary friction between the light body and the mounting board. Over time, exposure to saltwater, heat, and compression can cause these rubber components to dry out, crack, or lose their grip. Replace worn or compressed inserts according to the manufacturer’s maintenance schedule, and always perform a thorough dry-land tug-test before every dive to verify that the tension is sufficient to hold the light secure under water pressure.

Community discussion
Share your experience or ask a question. Comments are reviewed before publication.