
Choosing a solo tent for camping in the Philippines requires balancing lightweight packability with robust weather protection. Because local environments range from hot, humid coastal beaches to cold, wind-swept mountain ridges, a single universal tent does not exist. Instead, the ideal solo tent is one that matches your specific destination, offering high-level ventilation to combat tropical humidity while providing a reliable waterproof barrier against sudden monsoon downpours.
Backpacking in the tropics places unique demands on gear. A tent that is too heavy will exhaust you on steep, muddy trails, while a tent that lacks proper airflow will turn into a stifling sauna. By focusing on key structural designs, fabric specifications, and ventilation features, you can select a shelter that keeps you dry, cool, and secure throughout your journey.
Key Selection Criteria for Philippine Camping Conditions
When evaluating a solo tent for camping in the Philippines, weather resistance must be your top priority. The country experiences intense tropical downpours, sudden thunderstorms, and high humidity levels year-round. To ensure your shelter can withstand these conditions, you must carefully evaluate the manufacturer’s waterproofing specifications. Look for the hydrostatic head rating on the product label, which is measured in millimeters. A rating of 1,500mm to 3,000mm for the rainfly is generally sufficient for moderate to heavy rain, while the tent floor should ideally have a higher rating, such as 3,000mm or more, to prevent water from seeping through when pressure is applied by your body weight. Additionally, verify that the tent features factory-taped or sealed seams, as water is highly likely to penetrate through needle holes along the stitching if they are left unprotected.
Products mentioned in this guide
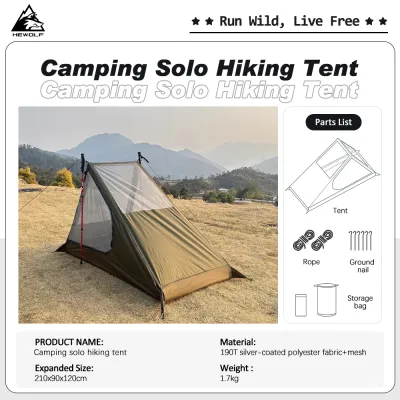
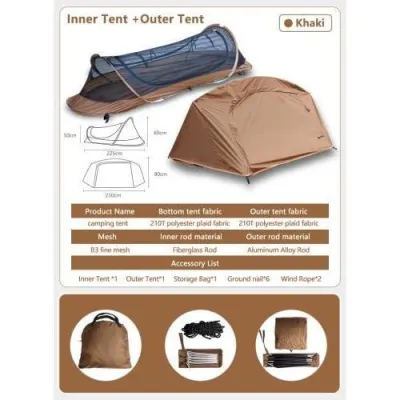
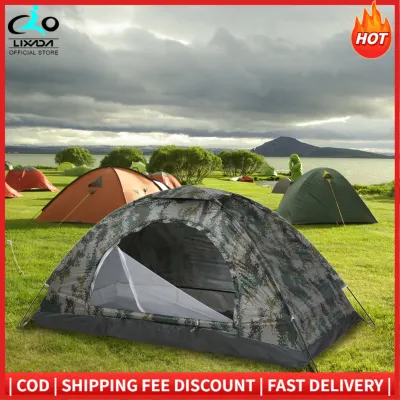
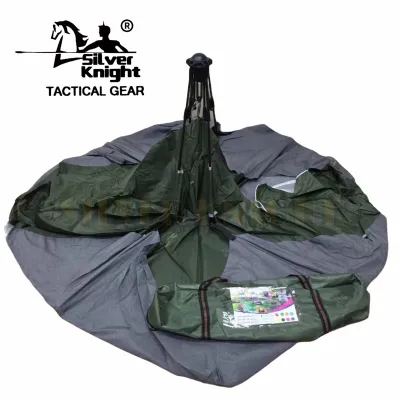
Prices are valid at publication and may change. Please refer to the product page for the latest price.
Ventilation is equally critical when camping in a tropical climate. High humidity means that the moisture from your breath can easily condense on the inside of the tent walls, leading to a damp sleeping environment. To manage this condensation, prioritize tents with extensive mesh panels on the inner tent body. These panels allow warm air to escape while keeping insects out. Dual-door designs are particularly beneficial because they facilitate cross-ventilation, allowing breeze to flow directly through the shelter. Some tents also feature adjustable vents on the rainfly that can be propped open even during rainstorms, ensuring continuous airflow without compromising waterproof protection.
Finally, you must balance the packed weight and volume of the tent against your specific carrying method. If you are backpacking along challenging trails like Mt. Pulag or Mt. Dulang-dulang, a lightweight solo tent is essential to minimize physical fatigue. In these scenarios, look for tents that weigh under 1.5 kilograms, which often utilize advanced, lightweight materials like high-tenacity nylon or specialized aluminum poles. Conversely, if you are car camping, overlanding, or motorcycle camping, weight is less of a concern. In these cases, you can opt for a slightly heavier, more spacious solo tent made from thicker polyester fabrics, which often offer greater durability and a lower price point.
Tent Designs and Structural Stability
The structural design of your solo tent directly impacts how easy it is to set up and how well it performs in adverse weather. The two primary categories to consider are freestanding and non-freestanding designs. Freestanding tents utilize a dedicated pole system that supports the tent’s structure independently of stakes. This design is highly versatile, allowing you to pitch the tent on almost any surface, including rocky ground, wooden platforms, or sandy beaches where driving stakes deep into the ground is difficult or impossible. They are also easy to move around once assembled, allowing you to adjust your positioning for the best view or wind protection before securing the corners.

Non-freestanding tents, often referred to as trekking pole tents, rely on your trekking poles and tensioned guylines to remain upright. The primary advantage of this design is significant weight savings, as you do not need to carry heavy tent poles. However, they require a secure ground anchor at every corner to maintain their structure. Pitching a non-freestanding tent on hard rock, loose sand, or muddy terrain can be highly challenging and requires advanced pitching skills. If you choose a non-freestanding model, you must be prepared to use creative anchoring techniques, such as wrapping guylines around heavy rocks or trees, when traditional stakes cannot be driven into the ground.
Wind resistance is another critical factor, especially if you plan to camp on exposed mountain ridges or coastal areas. Review the tent’s pole geometry to understand how it distributes external forces. Tents with crossing pole designs or hubbed pole systems generally offer superior stability because they distribute wind load across multiple points. Additionally, inspect the rainfly for dedicated guyline attachment points. Guylines are essential for stabilizing the tent in high winds, preventing the fabric from flapping violently against the inner tent, and maintaining the structural integrity of the poles.
The quality of the stakes and guylines included with the tent should not be overlooked. Many budget-friendly tents come with basic steel or aluminum pegs that easily bend in hard clay or fail to hold in loose soil. Before heading out on a trip, inspect these components and consider upgrading to aftermarket options if necessary. For example, Y-beam or V-angle aluminum stakes offer excellent holding power in firm soil, while wider, curved stakes are necessary if you plan to camp on sandy beaches. Ensuring you have the right stakes for the local terrain is a simple step that can prevent your shelter from collapsing in the middle of the night.
Building Your Shortlist: Features to Verify Before Buying
As you begin narrowing down your options, creating a practical checklist will help you evaluate candidate tents against your personal comfort and logistical needs. Start by checking the interior floor dimensions and peak height of each model. A solo tent should provide enough length and width to accommodate your sleeping pad and sleeping bag without your head or feet touching the tent walls. If your sleeping gear presses against the fabric, moisture from condensation can easily transfer to your sleeping bag, compromising your comfort. Additionally, verify the peak height to ensure you can sit up comfortably to change clothes, organize gear, or read during a rainy afternoon.
Vestibule space is another essential feature to evaluate, particularly in wet tropical environments. A vestibule is the covered area outside the inner tent door created by the rainfly. It serves as a dedicated storage zone for wet gear, muddy hiking boots, and your backpack, keeping these items protected from the rain while preventing them from cluttering your limited sleeping space. Look for tents with generous vestibule areas, and check if the vestibule design allows for easy entry and exit without letting rain fall directly into the inner tent when the door is opened.
When finalizing your shortlist, confirm the local availability of your chosen models through specialized outdoor retailers or reputable e-commerce platforms operating in the Philippines. Purchasing from local sellers often ensures faster shipping and easier access to customer support. Be sure to review the manufacturer’s warranty terms, paying close attention to coverage for pole breakage, seam-seal failures, or fabric tears. Budget is also a key consideration; solo tents can range from entry-level options around ₱2,000 to premium, high-performance models exceeding ₱15,000. Determine how often you plan to use the tent and the severity of the conditions you expect to encounter to decide how much you should invest in your shelter.
Setup, Maintenance, and Longevity
Proper setup and meticulous maintenance are vital to extending the lifespan of your solo tent, especially when camping in the humid and demanding environments of the Philippines. Before pitching your tent, spend time preparing the ground. Clear the site of sharp twigs, rocks, pinecones, and other debris that could puncture the tent floor. Using a compatible footprint—a custom-cut ground tarp designed for your specific tent model—is highly recommended. A footprint acts as a protective barrier against abrasion, sharp objects, and rising ground moisture, preserving the waterproof coating on the bottom of your tent. Ensure the footprint is tucked completely under the tent floor so that it does not collect rainwater and channel it underneath your shelter.
After returning from a camping trip, establishing a thorough cleaning and drying routine is essential to prevent the growth of mold and mildew. The high humidity in the Philippines can cause damp fabrics to develop mildew within days, which degrades the waterproof coatings and creates unpleasant odors. Never store a wet or damp tent in its stuff sack. If you had to pack up in the rain, pitch the tent or hang it up in a well-ventilated, shaded area at home as soon as possible until it is completely dry. Clean off dirt, mud, and salt spray using a soft sponge and mild, non-detergent soap. Avoid using harsh household detergents or washing machines, as these can strip away the delicate waterproof polyurethane or silicone coatings on the fabric.
Proper long-term storage is the final step in ensuring your tent’s longevity. Avoid leaving the tent tightly compressed inside its original stuff sack for extended periods, as this can create permanent creases in the fabric and cause the seam tape to peel or degrade. Instead, store the tent loosely in a large, breathable mesh bag or a cotton pillowcase. Keep it in a cool, dry place away from direct sunlight, high heat, and extreme humidity, such as an air-conditioned room or a well-ventilated closet. By taking these simple precautions, you can preserve the waterproof integrity and structural strength of your solo tent for many adventures to come.
Frequently Asked Questions (FAQ)
Is a 1-person tent too small for a solo camper with a large backpack?
A standard 1-person tent is designed to maximize weight savings, which often results in a compact interior space that may feel cramped if you attempt to store a large multi-day backpack inside with you. If you prefer to keep all your gear inside your shelter, you may find a strict 1-person tent too restrictive. In this case, consider looking at 1.5-person or lightweight 2-person tent alternatives, which offer extra floor width at a minor weight penalty. Alternatively, you can maximize a 1-person tent’s space by utilizing the vestibule area to store your backpack and muddy boots, keeping the inner tent dedicated solely to your sleeping pad, sleeping bag, and small personal items. Many solo tents also feature interior mesh pockets and gear lofts, which are excellent for keeping essential items like headlamps, phones, and glasses organized and off the floor.
Do I need a double-wall tent for camping in the Philippines?
For most camping scenarios in the Philippines, a double-wall tent is highly recommended due to its superior condensation management. A double-wall tent consists of an inner mesh body and a separate waterproof rainfly. This design creates a physical barrier that prevents your body heat and breath from condensing directly on the walls of your sleeping compartment; instead, moisture passes through the mesh and condenses on the underside of the rainfly, keeping you dry. Single-wall tents, which combine the canopy and rainfly into a single layer, are lighter and faster to set up but are highly prone to interior condensation in humid tropical climates. If you choose a single-wall model, you must carefully check the manufacturer’s ventilation specifications and user reviews to ensure it has adequate venting options to minimize moisture buildup during humid nights.

Community discussion
Share your experience or ask a question. Comments are reviewed before publication.