
Selecting the right awning wall requires matching your existing shelter’s physical dimensions, attachment points, and material properties to your specific camping environment. Whether you are setting up a semi-permanent basecamp in a humid coastal region or rigging a quick sunshade for an overland stop, the wrong wall panel can lead to sagging fabric, torn connection points, or complete incompatibility.
To find a panel that integrates seamlessly with your setup, you must evaluate three primary pillars: the attachment mechanism, the precise dimensional fit, and the fabric specifications. While vehicle-mounted awnings and traditional camping tents serve different structural purposes, many modern modular wall panels offer cross-compatible features if you know what connection points to look for. Taking the time to identify your current shelter’s frame style and mounting channels is the essential first step before purchasing any extension panels.
Verify Your Awning Attachment Mechanism
Before comparing fabric weights or colors, you must determine how an awning wall physically connects to your existing structure. A mismatch here makes the wall completely unusable without custom modifications. Most outdoor shelters rely on one of three primary connection systems, each requiring specific hardware or fabric borders.
Products mentioned in this guide
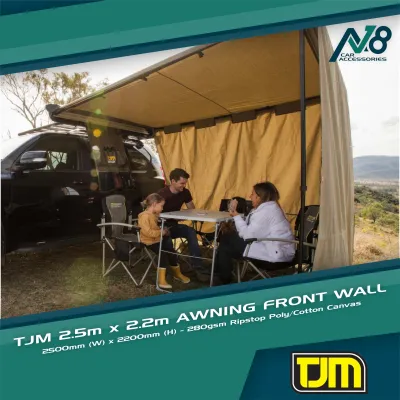
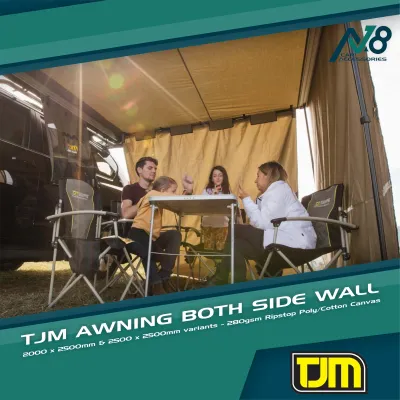
Prices are valid at publication and may change. Please refer to the product page for the latest price.
Track-Mounted Systems
Many premium vehicle awnings and hard-shell camper setups feature integrated aluminum channels, often referred to as sail tracks or C-channels. To use these, your awning wall must have a matching beaded edge, known as a keder rope, sewn along its top margin. When installing, you slide this bead directly into the channel, creating a continuous, windproof, and highly water-resistant seal. Before buying, check the diameter of your awning’s track channel; standard outdoor tracks typically require either a 6mm or 8mm bead, and using the wrong size will cause the wall to slip out or jam during setup.
Zipper and Hook-and-Loop Fasteners
For rapid deployment, many 4WD and pull-out vehicle awnings utilize heavy-duty zippers or hook-and-loop (velcro) strips running along the inside edge of the main rafter beams. Zipper attachments provide a highly secure, draft-free connection, but they require matching zipper teeth sizes and orientations. If you are buying an aftermarket wall panel for a branded awning, verify that the zipper coil size matches the manufacturer’s specifications. Hook-and-loop systems offer more flexibility and are easier to align on uneven ground, though they may let in minor drafts during high winds.
Pole-and-Sleeve or Grommet Setups
Traditional camping tents and freestanding tarps often lack dedicated metal tracks or zipper lines. Instead, they rely on fabric sleeves, pocket corners, or brass grommets that slip over adjustable awning poles. If you are adding a wall to a standard dome or cabin tent awning, look for panels equipped with adjustable webbing straps, plastic clips, or tie-tacks. These allow you to secure the wall directly to the vertical support poles and horizontal spreader bars, providing a stable barrier without the need for specialized track channels.
If you find yourself with mismatched gear—such as wanting to mount a track-style wall to a simple pole-supported tarp—you will need to invest in secondary track adapters or clip-on track conversions. These accessories clamp onto existing poles to provide a temporary C-channel, though they rarely offer the same wind resistance as an integrated factory system.
Measure for Proper Size and Ground Clearance
An improperly sized awning wall will either hang loosely, flapping violently in the breeze, or sit too high off the ground, leaving your gear exposed to rain and wind. Achieving a taut, protective pitch requires precise measurements of both your physical awning frame and your typical setup height.

To get started, park your vehicle or pitch your tent on a flat surface and fully deploy your awning to its standard working height. You will need to take two critical measurements:
- Horizontal Width: Measure the exact length of the outer horizontal rafter bar from end to end. Do not rely on general product names, as a "two-meter" awning may actually measure slightly more or less depending on the casing design.
- Vertical Drop Height: Measure the distance from the attachment track or zipper line down to the ground. If you have a lifted off-road vehicle or use high-clearance roof racks, your drop height will be significantly taller than a standard wagon or crossover setup.
Once you have these numbers, compare them directly against the manufacturer’s detailed sizing charts rather than relying on “universal fit” labels. Universal panels often use elastic tensioners or long, adjustable straps to bridge size gaps, but they rarely provide a clean, wind-tight seal on setups that fall at the extreme ends of the size spectrum.
When calculating your vertical drop, always account for uneven terrain and ground slope. If you frequently camp on uneven ground, look for awning walls that feature an extended, adjustable mud flap or PVC skirt at the bottom. This extra flap of heavy-duty material lies flat on the ground, allowing you to peg the wall down securely even if one side of your vehicle is parked higher than the other. It also prevents wind from whistling underneath the panel on rocky or sandy campsites.
Evaluate Fabric Specifications and Weather Protection
The environmental conditions of your campsite should dictate the material composition of your awning wall. In tropical climates characterized by intense sun, high humidity, and sudden downpours, fabric performance is the difference between a comfortable shelter and a stifling, leaky enclosure.
Understanding Waterproof and UV Ratings
When reviewing product specifications, look closely at the fabric’s hydrostatic head rating, which measures water resistance in millimeters. A rating of 1,500mm to 3,000mm is generally sufficient for moderate to heavy rain, ensuring water does not seep through the fabric under wind pressure. Additionally, verify that the panel features taped or heat-sealed seams; untaped stitched seams will inevitably leak during prolonged downpours. For sun protection, look for fabrics treated with a UV-resistant coating (often rated as UPF 50+), which protects both your skin and the fabric itself from solar degradation.
Solid Privacy Panels vs. Mesh Windbreaks
Choosing between a solid fabric wall and a mesh panel depends on your primary goal:
- Solid Panels: Typically constructed from high-density polyester or poly-cotton canvas, these panels block wind, rain, and direct sunlight entirely. They are ideal for creating private changing areas or blocking cold wind, but they can trap heat and humidity in warm climates.
- Mesh Panels: Made from fine, tightly woven mesh (often referred to as no-see-um mesh), these walls allow breeze and ambient light to pass through while keeping mosquitoes, flies, and midges out. They also act as effective windbreaks, reducing harsh gusts to gentle drafts without catching the wind like a sail.
Fabric Weight and Durability
Fabric weight is measured in denier (D) or grams per square meter (GSM). High-denier fabrics, such as 300D or 400D polyester, offer exceptional tear resistance and durability, making them suitable for rugged off-road camping. However, they are bulky to pack and heavy to carry. If you are backpacking or have limited vehicle storage, a lighter 75D to 150D ripstop polyester panel offers a sensible balance of packability and moderate weather protection.
Keep in mind that heavy canvas or high-denier walls place additional stress on your awning’s frame. In high winds, a heavy, solid wall acts as a massive sail, which can easily bend aluminum poles or snap mounting brackets. Always check your awning manufacturer’s manual to ensure the frame can support the weight of fully enclosed wall panels under windy conditions.
Compare Awning Wall Configurations for Your Setup
Awning walls are available in several configurations, ranging from minimalist single-panel windbreaks to fully enclosed multi-room systems. Selecting the right configuration depends on your group size, camping style, and how long you plan to stay at each campsite.
Fully Enclosed Rooms
An enclosed room configuration typically consists of three or four integrated walls, often featuring a built-in floor and ceiling. This setup transforms your open awning into a fully sealed tent, providing maximum protection from insects, driving rain, and blowing dust. It is an excellent option for family camping or multi-day basecamps where you need a secure living, dining, or sleeping space. The primary trade-offs are increased setup complexity, longer pitching times, and a larger packed size in your vehicle.
Single Privacy Panels and Windbreaks
If you prefer a minimalist approach, a single wall panel offers incredible versatility. You can mount it on the side of your awning to block the morning sun, move it to the front to deflect a sudden wind shift, or angle it downward to create a quick privacy screen. Single panels pack down incredibly small, weigh very little, and can be set up by a single person in just a few minutes. They are perfect for quick lunch stops, beach days, or solo weekend trips.
Modular Multi-Panel Systems
Modular systems offer the ultimate flexibility by allowing you to zip or velcro individual panels together as needed. You can run a single side wall for wind protection on mild days, add a front mesh panel when the bugs emerge, or zip on a third solid wall when a storm rolls in. This customizable approach allows you to adapt your shelter to changing weather conditions throughout the day without committing to the bulk of a full tent room.
| Configuration | Setup Complexity | Best For | Key Limitation |
|---|---|---|---|
| Fully Enclosed Room | High (15–20 mins) | Multi-day basecamps, family sleeping quarters, severe weather | Heavy packed weight, high wind resistance stress on frame |
| Single Privacy Panel | Low (2–5 mins) | Quick stops, beach days, targeted sun/wind protection | Limited coverage, does not protect against shifting weather |
| Modular Multi-Panel | Medium (5–10 mins) | Variable tropical climates, changing group sizes, custom setups | Requires managing multiple separate panels and storage bags |
| Mesh Insect Screen | Medium (5–10 mins) | Humid forest camping, buggy coastal areas, high-airflow dining | No protection from heavy rain or cold winds |
Safe Installation and Maintenance Guidelines
Proper installation and regular maintenance are vital to ensure your awning wall performs reliably and lasts for years. Because these panels catch a significant amount of wind, incorrect pitching can damage both the wall and your vehicle or tent frame.
Tensioning and Pole Placement
When setting up your wall, always tension the fabric evenly. Use adjustable guy lines and heavy-duty pegs driven into the ground at a 45-degree angle pointing away from the shelter. Avoid over-tightening the fabric, as this places immense stress on the zippers, tracks, and seams, which can lead to premature tearing. If your wall panel relies on vertical support poles, ensure they are seated firmly on stable ground or sand plates, and secure them with dedicated guy lines to prevent them from shifting under wind loads.
Routine Inspections
Before and after every camping trip, inspect your awning wall for signs of wear. Pay close attention to:
- Zippers and Tracks: Clean out any sand, salt, or dirt from zipper teeth using a soft brush. If the zippers stick, apply a silicone-based zipper lubricant to keep them sliding smoothly.
- Seams and Stitching: Look for loose threads or peeling seam tape. Address minor leaks early by applying a flexible outdoor seam sealer to the inside of the stitching.
- Grommets and Tie-Down Points: Check for fabric fraying around metal grommets and webbing loops, reinforcing them if necessary before they tear completely.
Cleaning and Mold Prevention
In humid tropical environments, mold and mildew can ruin outdoor fabrics in a matter of days. Never pack away your awning wall while it is wet or damp. If you must pack up in the rain, deploy the wall at home in a shaded, well-ventilated area within 24 hours to let it dry completely. To clean dirt or mud off the fabric, use a soft sponge, fresh water, and a mild, non-detergent soap. Harsh detergents or abrasive brushes can strip away the waterproof polyurethane coatings and UV inhibitors.
Severe Weather Stop-Conditions
No awning wall is designed to withstand extreme weather. If you experience high winds, heavy tropical storms, or localized flooding, you must dismantle the wall immediately. Leaving a large fabric panel deployed during a storm can easily bend your vehicle’s roof racks, snap awning rafters, or tear the mounting tracks clean off your vehicle. Prioritize safety and equipment longevity by packing down the wall and seeking shelter inside your vehicle or a permanent structure when conditions deteriorate.
Frequently Asked Questions (FAQ)
Can I use a vehicle awning wall on a standard camping tent?
Generally, vehicle awning walls are not directly compatible with standard camping tents due to different attachment systems. Vehicle walls typically rely on rigid aluminum C-channels, specialized zippers, or specific rafter dimensions unique to 4WD awning frames. Standard tents usually feature flexible fiberglass or aluminum poles without these integrated tracks. To bridge this gap, you would need to use universal clip-on adapters, custom-sewn velcro straps, or freestanding tarp poles to support the wall panel independently alongside your tent.
How do I prevent water from pooling on my awning wall?
To prevent water from pooling on your awning roof and spilling down the wall, you must create a steep, consistent slope for runoff. Lower one of your front vertical support poles significantly lower than the other to force water to drain off to one side. Additionally, ensure the wall panel is tensioned tightly using guy lines; loose, sagging fabric creates pockets where water can collect, quickly overloading the frame and causing a structural collapse. For prolonged rain, consider using specialized anti-pooling curved rafters to keep the overhead fabric taut.

Community discussion
Share your experience or ask a question. Comments are reviewed before publication.