
Selecting the right Mountain Hiker tent requires matching the shelter’s structural and material specifications to your specific outdoor environment. Whether you are planning a high-altitude trek or a coastal weekend, evaluating capacity, weather resistance, and portability through manufacturer labels and physical tags ensures your gear performs safely and comfortably in the diverse climates of the Philippines. Choosing a tent is not just about picking a style; it is about verifying that the materials can withstand local humidity, sudden downpours, and varying terrain. By understanding how to read product specifications and match them to your itinerary, you can make an informed decision that keeps you dry and secure.
Identify Your Camping Scenario and Capacity Needs
When selecting a tent, the first step is determining the actual space you need inside the shelter. Manufacturer capacity ratings, such as a “two-person” or “four-person” designation, typically assume sleepers are lying shoulder-to-shoulder with minimal gear. To ensure a comfortable trip, you should calculate your true capacity needs by accounting for both the number of occupants and the physical volume of your backpacks, boots, and personal items. If you prefer keeping your gear inside the tent to protect it from moisture or pests, consider choosing a model rated for one additional person beyond your actual group size.
Your choice must also account for the seasonal rating of the tent, which dictates how well the structure handles temperature and wind. A three-season tent is designed primarily for spring, summer, and autumn, offering excellent ventilation through mesh panels to manage tropical heat and humidity. In contrast, a four-season tent features heavier fabrics and more robust pole configurations designed to withstand high winds, heavy rainfall, and cold temperatures at high elevations. For most lowland and moderate-altitude camping in the Philippines, a well-ventilated three-season model is highly suitable, whereas exposed mountain peaks may require the structural reinforcement of a four-season shelter.
Products mentioned in this guide
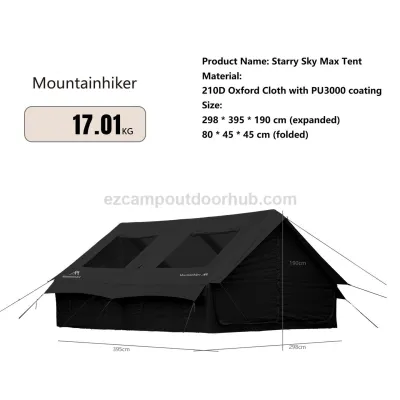
Prices are valid at publication and may change. Please refer to the product page for the latest price.
Finally, evaluate the terrain of your destination to decide between a freestanding and a non-freestanding tent structure. Freestanding tents use a rigid pole system that supports itself without requiring stakes to remain upright, making them highly adaptable for rocky ground, wooden platforms, or hard-packed soil where driving stakes is difficult. Non-freestanding tents rely on guy lines and stakes anchored firmly into the ground to maintain their shape and tension. While non-freestanding models are often lighter, they require suitable soil conditions and careful pitching to remain stable in windy conditions.
Verify Weather Resistance and Ventilation Specifications
To protect yourself from sudden tropical downpours, you must verify the weather resistance specifications on the tent’s product tag or manual. The primary indicator of fabric waterproofness is the hydrostatic head (HH) rating, measured in millimeters. This rating represents the height of a water column that the fabric can resist before water begins to penetrate. When reviewing Mountain Hiker models, look for the HH rating on the packaging or spec sheet; a higher rating generally indicates greater resistance to heavy rain, though it must be balanced with fabric breathability to prevent internal condensation.

Beyond the fabric rating, inspect the physical construction details that prevent water from seeping into your living space. Ensure the product description or physical tags confirm that the seams are fully taped, which means a waterproof tape has been heat-sealed over the stitching holes to block moisture. Additionally, look for a bathtub-style floor design, where the waterproof floor material extends several inches up the sides of the tent before meeting the wall fabric. This design keeps ground water, mud, and splashing rain from entering through the lower seams of the shelter.
In humid tropical climates, managing internal condensation is just as important as blocking external rain. When you sleep, your breath releases moisture that can condense on the cold inner walls of the tent, leading to damp gear and an uncomfortable interior. To prevent this, evaluate the ratio of mesh panels to solid fabric on the tent body. A high proportion of mesh allows warm, moist air to escape, while strategically placed vents on the rainfly promote continuous cross-ventilation. Ensuring adequate airflow is critical for maintaining a comfortable interior temperature and keeping your sleeping area dry.
Evaluate Setup, Weight, and Portability Features
Balancing the ease of assembly against the weight of the tent is essential for a successful camping trip, especially if you plan to carry your gear over long distances. When reviewing specifications, compare the packed weight—which includes everything shipped in the box, such as stakes, guy lines, and carrying bags—versus the trail weight, which represents only the essential components like the tent body, rainfly, and poles. If you are backpacking, the trail weight is the more accurate measure of what you will actually carry on your back, and keeping this weight low helps reduce fatigue on steep trails.
The durability and setup speed of the tent depend heavily on the pole material and shock-cord design. Aluminum poles are highly favored for their excellent strength-to-weight ratio and flexibility, allowing them to bend without breaking under wind loads. Fiberglass poles are heavier and more brittle but offer a budget-friendly alternative for casual camping. Look for poles with integrated shock cords, which hold the pole segments together and allow for rapid assembly, even in low-visibility conditions or during sudden weather changes where a quick setup is necessary.
Your choice between freestanding and non-freestanding designs also influences your setup flexibility and carrying preferences. Freestanding tents can be pitched quickly on almost any surface and can even be lifted and moved to a different spot after assembly if you discover a rock or root under your floor. Non-freestanding tents require precise tensioning and staking, which can take longer to master but often results in a lighter overall packed size. Consider your hiking distance, campsite flexibility, and personal comfort with tent pitching when deciding which style fits your needs.
Match Your Tent to Specific Camping Scenarios
Applying these technical specifications to your primary camping environment helps narrow down your choices. Use the following scenario profiles to cross-reference your chosen tent’s tags and structural features before making your purchase.
High-Altitude and Mountain Trekking
When camping on exposed mountain peaks where weather conditions can change rapidly, your shelter must prioritize structural integrity. Look for aerodynamic, low-profile dome shapes that allow strong winds to flow over the tent rather than pushing against flat walls. Verify wind-resistance claims on the manufacturer’s label and ensure the rainfly extends close to the ground to prevent wind from lifting the shelter. Robust pole structures, preferably made of high-grade aluminum, are essential for maintaining stability against sudden gusts, ensuring your tent remains secure throughout the night.
Coastal, Beach, and Lowland Camping
For beachside and lowland camping, managing heat, humidity, and sun exposure is the primary concern. Focus on tents that offer maximum mesh ventilation to catch coastal breezes and keep the interior cool. Verify UV protection indicators on the fabric tags to ensure the material can withstand prolonged sun exposure without degrading. Additionally, plan for sand-compatible anchoring solutions; standard metal stakes often fail to hold in loose coastal soil, so you may need to invest in wider sand pegs or use heavy rocks to secure your guy lines.
Car-Camping and Basecamp Setup
When weight and packed size are not primary constraints, such as when camping near your vehicle, you can prioritize interior comfort and space. Opt for cabin-style designs with higher peak heights that allow you to stand upright, along with larger vestibules for storing bulky gear. Multi-room configurations offer privacy for families or larger groups. For these setups, look for durable, heavier floor materials that can withstand high foot traffic, heavy camping cots, and the general wear and tear of a busy basecamp.
Frequently Asked Questions (FAQ)
How do I maintain my tent after a wet camping trip?
To prevent mold, mildew, and fabric degradation, you must dry your tent completely before storing it. After returning from a wet trip, pitch the tent in a shaded, well-ventilated outdoor area or hang it loosely indoors. Avoid exposing the tent to direct heat sources or prolonged, intense sunlight, as ultraviolet rays can damage the waterproof coatings and weaken the fabric fibers. Never pack or store a damp tent in its carrying bag, as moisture can ruin the seam tape and polyurethane coatings within a few days, leading to permanent leaks and unpleasant odors.
What groundsheet or footprint should I use with my tent?
Using a footprint protects your tent floor from sharp rocks, twigs, and abrasive soil, extending the lifespan of your shelter. When selecting a groundsheet, ensure it is sized slightly smaller than the tent’s base dimensions. If the footprint extends beyond the edges of the tent floor, it can catch rainwater dripping off the rainfly and pool it directly underneath your sleeping area. Check the manufacturer’s recommendations to see if a custom-fit footprint is available for your specific model, or carefully fold a generic tarp to match the exact footprint of your tent floor.

Community discussion
Share your experience or ask a question. Comments are reviewed before publication.