
Choosing a single tent for camping in the Philippines requires balancing the intense tropical heat, high humidity, and sudden downpours. A solo shelter must serve as a reliable shield against monsoon rains while allowing maximum airflow to prevent the interior from turning into a sauna. By focusing on specific material ratings, structural designs, and ventilation features, you can find a lightweight shelter that keeps you dry and comfortable during your solo adventures.
Key Selection Criteria for Philippine Camping Conditions
The tropical climate presents unique challenges that demand careful consideration of tent specifications. High humidity means condensation is your primary enemy. When warm, moist air from your breath hits the cooler tent fabric, it condenses into water droplets. To combat this, look for a tent with a full-coverage rainfly that extends all the way to the ground to block wind-driven rain, combined with an inner tent body made largely of fine mesh. This mesh allows warm air to escape while keeping out persistent tropical insects like mosquitoes and sandflies.
Weight and packed size are critical depending on your transportation. If you are backpacking through trails in Benguet or hiking up Mt. Dulang-Dulang, every gram counts. A lightweight tent weighing under 1.5 kilograms is ideal for long treks. However, if you primarily engage in drive-up car camping or beach camping in Zambales, you can prioritize a slightly heavier, more spacious tent that offers thicker, more durable fabrics and extra headroom.
Products mentioned in this guide
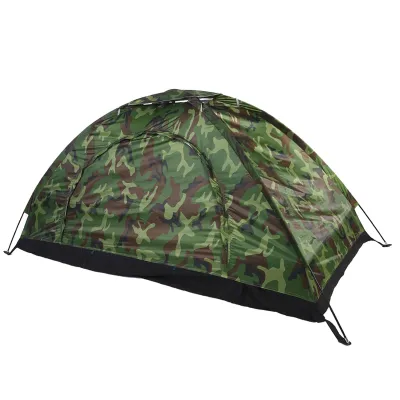
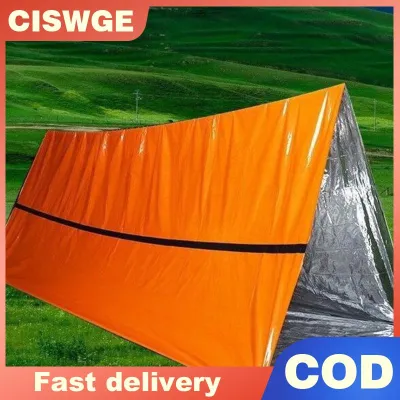
Prices are valid at publication and may change. Please refer to the product page for the latest price.
Do not overlook interior dimensions and vestibule space. A single-person tent can feel incredibly cramped if you have to share your sleeping area with a muddy backpack, hiking boots, and cooking gear. A tent with a generous vestibule—an extension of the rainfly that creates a covered porch outside the inner door—allows you to store wet gear securely protected from the rain while keeping your sleeping compartment clean and dry. Look for a floor length that accommodates your height with at least 10 to 15 centimeters of clearance at both ends to prevent your sleeping bag from touching wet tent walls.
Comparing Tent Shapes and Wall Constructions
The structural design of your tent dictates how easily you can pitch it on different terrains. Freestanding dome tents are highly popular because they support themselves using a dedicated pole system. You can pitch a freestanding tent on rocky ground, wooden camping platforms, or sandy beaches where driving stakes is difficult or impossible. They are also easy to move around once assembled to find the flat spot. In contrast, non-freestanding trekking pole shelters rely on your hiking poles and tensioned guy lines to stand. While they are exceptionally lightweight, they require solid ground to anchor stakes securely and demand more practice to pitch correctly in high winds.

Wall construction is another pivotal decision. Double-wall tents consist of two distinct layers: a breathable inner canopy (often mostly mesh) and a separate waterproof rainfly. This design is highly recommended for tropical climates because it physically separates you and your gear from the condensation that naturally forms on the underside of the waterproof rainfly. Single-wall tents combine these layers into a single fabric sheet. While single-wall tents are lighter and faster to pitch, they are prone to severe condensation issues in humid environments, often leaving your sleeping bag damp by morning.
Consider the door configuration. A single-door tent typically features an entry at the front or one side, which saves weight but can limit your views and entry options. A two-door configuration on a solo tent is less common but highly beneficial. It provides dual vestibules for organized gear storage and allows you to open both sides for maximum cross-ventilation during hot, humid afternoons.
How to Verify Materials and Weatherproofing Claims
To ensure your tent can withstand a sudden tropical downpour, you must learn to read technical specifications rather than relying on vague marketing claims. Look closely at the fabric denier (denoted by a “D”), which measures the fiber thickness of the threads. A lower denier (such as 15D or 20D) indicates a lighter, more delicate fabric that requires careful handling, while a higher denier (such as 40D or 75D) offers greater durability and puncture resistance at the cost of added weight.
The waterproof capability of a tent fabric is measured by its hydrostatic head rating, expressed in millimeters (mm). This rating indicates the height of a water column the fabric can support before water starts leaking through. For the wet conditions often encountered in the Philippines, look for a rainfly with a rating of at least 1,500mm to 2,000mm, and a tent floor rating of 3,000mm or higher, as the floor must withstand the added pressure of your body weight pressing down on damp ground.
The choice of pole material directly impacts the tent’s structural integrity. Aluminum poles (typically 7000-series alloy) are the gold standard for backpacking because they are lightweight, flexible, and highly resistant to snapping under strong wind loads. Fiberglass poles are heavier, less flexible, and prone to splintering or shattering when stressed. While fiberglass is common in budget-friendly tents, aluminum is highly recommended for reliable performance in exposed highland campsites.
Even the most waterproof fabric will leak if the seams are poorly constructed. Verify that the tent features factory-sealed seams, where a waterproof tape is heat-applied along all stitched lines on the inside of the rainfly and floor. Inspect these seams closely for any lifting, bubbling, or gaps. If you purchase a tent with untaped seams, or if the tape begins to degrade over time, you will need to apply a liquid seam sealer manually to maintain waterproof integrity.
Safe Purchasing Channels and Delivery Inspections
To avoid counterfeit products or low-quality imitations, purchase your camping gear through reliable channels. Prioritize official brand websites, authorized local outdoor specialty retailers, or verified flagship stores on reputable online marketplaces. Buying from authorized sellers ensures you receive genuine materials that match the advertised technical specifications, which is critical when relying on your gear for safety in remote areas.
Once your tent arrives, perform a thorough home inspection before taking it into the field. Set up the tent in your living room or backyard to verify that all components are included, such as the inner tent, rainfly, poles, stakes, guy lines, and repair sleeves. Carefully inspect the poles for hairline cracks or bent sections, test all zippers to ensure they glide smoothly without catching on fabric, and examine the seam tape for uniform adhesion.
Familiarize yourself with the warranty terms and return policies of the retailer or manufacturer. A reliable brand typically offers a warranty covering manufacturing defects in materials and workmanship. Keep your proof of purchase, receipt, or digital order confirmation in a safe place, as you will need to present it if you discover a defect during your initial inspection or early trips.
Essential Accessories to Protect Your Tent and Gear
To extend the lifespan of your single-person tent, always use a matching footprint or groundsheet. This protective barrier sits directly beneath your tent floor, shielding the thin fabric from abrasive gravel, sharp twigs, pine needles, and rising ground moisture. Ensure the footprint is slightly smaller than the tent floor outline so that rainwater running off the rainfly does not pool between the footprint and your tent.
Your sleep system must be tailored to your specific camping destination. For tropical lowlands and beach camping, a lightweight, highly breathable sleeping pad paired with a simple travel sheet is often sufficient. However, if you are camping in cooler highland areas like Mount Pulag, temperatures can drop significantly. In these environments, select an insulated sleeping pad with an appropriate R-value (a measure of thermal resistance) to prevent the cold ground from sapping your body heat, and pair it with a compact sleeping bag rated for the expected nighttime temperatures.
Always pack a basic field repair kit in your tent bag. This kit should include a metal pole splint (a sleeve used to temporarily repair a broken pole section), a small tube of seam grip, and adhesive patch tape for quick fabric repairs. Additionally, store your tent in a loose, breathable storage sack when at home rather than keeping it tightly compressed in its travel stuff sack, which can degrade the waterproof coatings over time.
Frequently Asked Questions (FAQ)
Can I use a single-wall tent in the Philippines?
Using a single-wall tent in the Philippines is generally not recommended due to the country’s high humidity and frequent rainfall. Without a separate, breathable inner canopy, the moisture from your breath quickly condenses on the cold, waterproof interior walls of a single-wall tent. This can lead to damp gear and a wet sleeping environment. For tropical camping, a double-wall tent is highly preferred as it provides excellent ventilation and physically separates you from any condensation buildup.
How do I prevent mold on my tent after a wet camping trip?
To prevent mold and mildew from ruining your tent’s fabric and waterproof coatings, you must dry it completely as soon as you return home. Pitch the tent or hang it up in a shaded, well-ventilated indoor or outdoor area until every section is bone-dry. Avoid exposing the tent to direct, intense sunlight for extended periods, as ultraviolet rays can degrade the synthetic fabrics. Never machine wash, machine dry, or pack away a damp tent, as mold can develop within 24 to 48 hours, permanently damaging the materials.

Community discussion
Share your experience or ask a question. Comments are reviewed before publication.