
Selecting the right tent canopy requires matching the shelter’s dimensions, weight, and material specifications to your specific outdoor activities and local weather conditions. In tropical climates like the Philippines, where sudden downpours and intense sun are common, a canopy serves as a critical shield for your communal living space. By evaluating your group size, transport limits, and the structural design of the shelter, you can find a canopy that integrates seamlessly with your camping setup.
Assess Your Group Size and Camping Style
To calculate the necessary footprint, map out your planned activities. If you are camping with a group of four, a simple shelter that only covers your sleeping tents will leave you exposed during meal preparation. You must account for the physical dimensions of your camp kitchen, cooler placement, and camp chairs. A general rule of thumb is to allow at least 1.5 to 2 square meters of covered space per person for comfortable seating and gear storage. A communal cooking space requires extra clearance to ensure stove heat does not damage the canopy fabric.
Your carrying method dictates the maximum weight of your canopy. Car campers can easily transport heavy, steel-framed pop-up canopies that weigh over 15 kilograms. These structures offer instant shade but are entirely impractical if you must hike even a short distance to your campsite. For backpacking or trail-heavy adventures, every gram counts. You must opt for lightweight tarps made of silnylon or ultralight polyester, which require trekking poles or trees for support, reducing your pack weight to under a kilogram.
Products mentioned in this guide
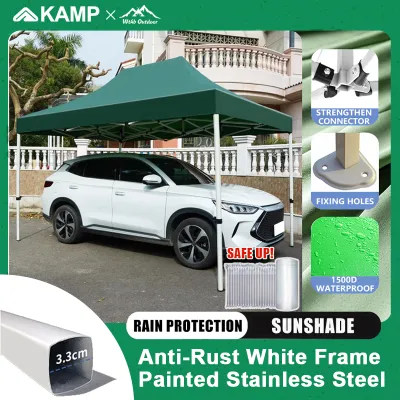
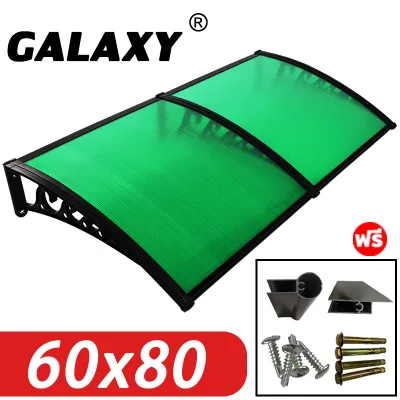
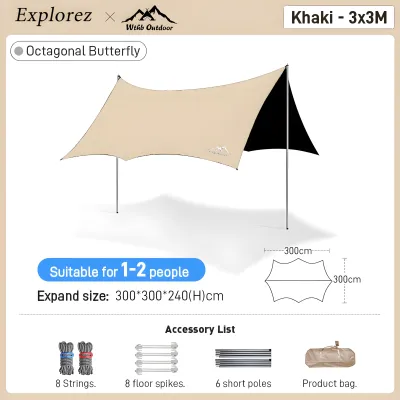
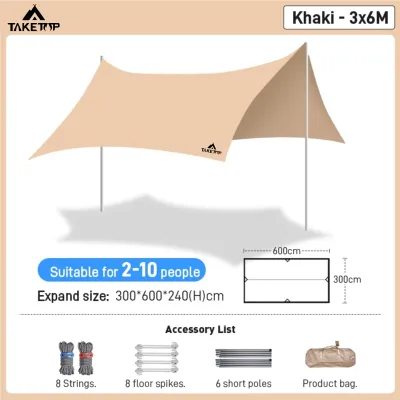
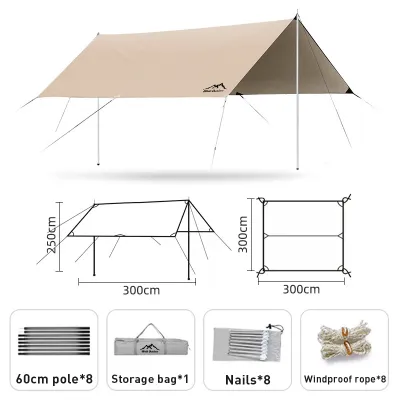
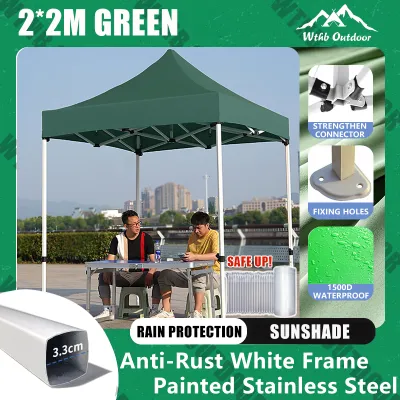
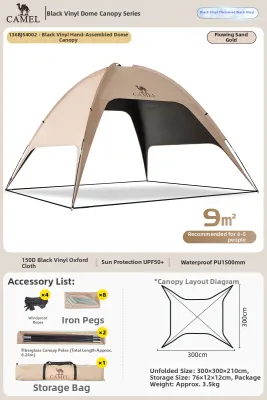
Prices are valid at publication and may change. Please refer to the product page for the latest price.
Evaluating the trade-offs between a single large communal shelter and multiple smaller personal tarps is essential. A large communal canopy creates a central gathering point that fosters social interaction and keeps everyone dry under one roof. However, in dense forests or uneven terrain, finding a flat, clear space large enough to pitch a massive canopy can be highly challenging. In contrast, smaller personal tarps offer modular flexibility, allowing each camper to adapt their shelter to the immediate terrain, though this sacrifices the shared social space.
Evaluate Weather Protection and Fabric Specifications
When reading manufacturer labels, the Hydrostatic Head (HH) rating is your primary indicator of water resistance. This rating, expressed in millimeters, represents the height of a water column the fabric can withstand before leaking. For tropical climates prone to sudden, heavy downpours, look for a canopy with an HH rating of at least 1,500mm to 2,000mm. Additionally, inspect the product specifications for factory seam-sealing. Unsealed seams will allow water to slowly drip through the needle holes during prolonged rain, rendering even the most waterproof fabric ineffective.

Sun protection is another critical factor, especially when camping in open, unshaded areas. Check the fabric specifications for an Ultraviolet Protection Factor (UPF) rating; a rating of UPF 50+ blocks a significant portion of harmful solar radiation. The durability of the fabric is often indicated by its denier (D) rating, which measures the fiber thickness. High-denier fabrics, such as 150D polyester, offer excellent resistance to tears, abrasions, and UV degradation over time. While lower denier fabrics (like 20D nylon) are much lighter, they require more careful handling to avoid punctures from stray branches.
Wind resistance is a complex specification that cannot be determined by fabric type alone. Instead of assuming a canopy is durable based on marketing buzzwords, look for explicit wind testing claims or structural design limits provided by the manufacturer. A canopy’s ability to withstand high winds depends on its aerodynamic profile, the flexibility of its poles, and the reinforcement of its tie-out points. During extreme weather events, such as tropical storms or typhoons, a canopy cannot guarantee safety; your primary safety measure must be evacuation or seeking permanent shelter, as no lightweight camping gear is designed to withstand gale-force winds.
Compare Canopy Shapes and Structural Designs
The shape of your canopy directly influences its stability and usable interior space. Dome-shaped canopies feature arched poles that maximize headroom and provide a freestanding structure that is easy to position. However, their high, vertical walls present a large surface area to the wind, requiring robust anchoring in gusty conditions. Tunnel designs offer a more aerodynamic profile that sheds wind exceptionally well when aligned parallel to the wind direction, though they require tension from guylines to remain upright. Flat or hexagonal tarps offer the ultimate in pitching versatility, allowing you to configure them as A-frames, lean-tos, or low-profile windbreaks depending on the immediate weather.
Pole materials and hub designs are critical to the structural integrity of your setup. Aluminum poles are highly recommended for their balance of strength, flexibility, and low weight; they bend under wind loads without snapping. Fiberglass poles are common in budget-friendly models but are heavier and prone to splintering under sudden stress. For heavy-duty, semi-permanent setups, steel poles offer unmatched rigidity but are heavy and susceptible to rust if not dried properly. Look for simple, robust hub designs that allow for quick assembly without complex plastic joints that can crack under pressure.
The security of your canopy ultimately relies on its guylines and stake points. A reliable canopy should feature multiple reinforced guyline attachment points with tensioners that allow for easy adjustment. The stakes included in standard packages are often basic steel pegs, which may fail in soft sand or muddy tropical soils. Consider upgrading to specialized stakes, such as wide, curved sand pegs for beach camping or heavy-duty steel stakes for hard-packed clay, to ensure your canopy remains anchored in all conditions.
Verify Compatibility with Your Tent and Campsite
Before purchasing, verify how the canopy will integrate with your existing tent. If you plan to pitch the canopy over your tent entrance to create a dry porch area, check the clearance heights. The canopy’s peak height must be taller than your tent’s highest point to prevent the canopy fabric from resting on the tent poles. Constant friction between the two fabrics can wear down waterproof coatings and place unnecessary stress on both structures.
You must also evaluate the physical footprint required by the canopy, including the extended guylines. In many established campsites in the Philippines, designated camping pads or clearings are limited in size and surrounded by dense tropical vegetation. A canopy that requires a wide, sprawling footprint may be difficult to pitch if you cannot find suitable anchor points within your designated campsite boundaries. Always measure your typical camping setup to ensure it fits within standard campsite dimensions.
Finally, always inspect your campsite for potential overhead hazards before setting up your canopy. In tropical environments, falling debris such as dead branches, heavy seed pods, or coconuts can cause severe damage to canopy fabrics and aluminum poles. Avoid pitching your shelter directly under overhanging limbs or coconut palms. Instead, look for clear overhead spaces or use nearby sturdy trees as anchor points for guylines rather than direct overhead cover.
Finalize Your Shortlist and Pre-Trip Checks
When finalizing your shortlist, cross-reference your options against your budget in ₱ and prioritize features that align with your primary camping style. If you primarily camp in hot, humid coastal areas, prioritize high UV protection and robust sand stakes. If you frequently camp in mountainous regions prone to sudden storms, invest in a canopy with a high HH rating and strong aluminum poles. Balancing these priorities ensures you do not overpay for features you do not need.
Once you make your purchase, perform a complete dry run at home before your trip. Pitch the canopy in your yard or a nearby park to familiarize yourself with the setup process. This practice is crucial for identifying any missing components, such as stakes or guylines, and ensures you can pitch the shelter quickly and efficiently when you arrive at your campsite, especially if you have to set up in the rain.
During your dry run, carefully inspect all components for any signs of damage or manufacturing defects. Check the seams for peeling tape, inspect the poles for cracks or loose shock cords, and ensure all guyline tensioners hold securely under pressure. Identifying and addressing these issues at home allows you to seek replacements or perform minor repairs before you are in the field, preventing a minor gear failure from ruining your outdoor adventure.
Frequently Asked Questions (FAQ)
Can I use a regular tarp instead of a dedicated tent canopy?
Yes, a standard utility tarp can serve as a canopy, but it lacks the specialized features of a purpose-built model. Dedicated tent canopies typically feature reinforced tie-out points, catenary cuts that prevent fabric flapping, and lightweight, UV-resistant materials. Pitching a flat utility tarp effectively in windy or rainy conditions requires advanced knot-tying skills and adjustable poles, whereas a dedicated canopy is designed for straightforward, reliable setup.
How do I clean and store my tent canopy after a wet camping trip?
Never store a wet canopy, as trapped moisture quickly leads to mold, mildew, and the degradation of waterproof coatings. Once home, hang the canopy in a shaded, well-ventilated area until it is completely dry. If it is dirty, check the manufacturer’s care label; typically, you should gently wipe the fabric with a soft sponge and clean water. Avoid harsh detergents or machine washing, which can strip away the protective polyurethane or silicone coatings.

Community discussion
Share your experience or ask a question. Comments are reviewed before publication.