
Correcting your basketball shooting form requires identifying your specific mechanical flaw—such as elbow flare, a flat arc, or an inconsistent release point—and matching it with targeted training aids like shooting straps, weighted balls, or visual backspin trainers. In the Philippines, where neighborhood pickup games are played on outdoor concrete courts under intense tropical heat, sweat can quickly compromise your grip and physical fatigue can break down your shooting mechanics. Training aids act as physical constraints and visual guides to build muscle memory, but they must be selected and used systematically to ensure long-term improvement.
Identify Your Specific Shooting Form Mistake
Correcting a flawed basketball shooting form requires a systematic approach that begins with accurate self-diagnosis. Before purchasing any training aids, you must pinpoint the exact mechanical breakdown in your shot. The most effective way to do this is through structured video analysis. Set up a mobile phone on a stable tripod or have a teammate record your shooting motion from three distinct angles: directly in front, from your shooting-hand side, and from directly behind. Record at least ten shots from each angle, focusing on both successful makes and misses to identify consistent patterns.
When reviewing the footage, look for specific physical cues. An elbow that flares outward—often called a “chicken wing”—is easily spotted from the front and rear angles. This flare forces the ball off a straight-line path, requiring lateral compensations that ruin consistency. From the side view, check your release point and arc; a flat shot trajectory often stems from pushing the ball forward from the chest rather than releasing it at the peak of your jump with an upward extension. Finally, observe your follow-through. A lazy wrist that drops immediately after the release, or a guide hand that pushes or rotates the ball, will destabilize the ball’s flight and ruin backspin.
Products mentioned in this guide
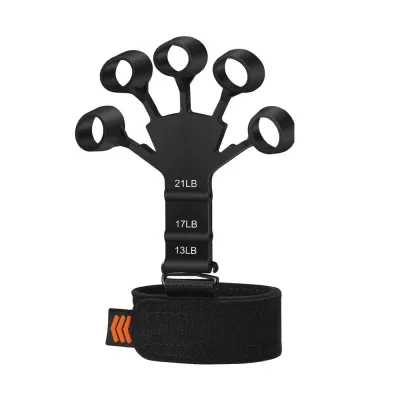
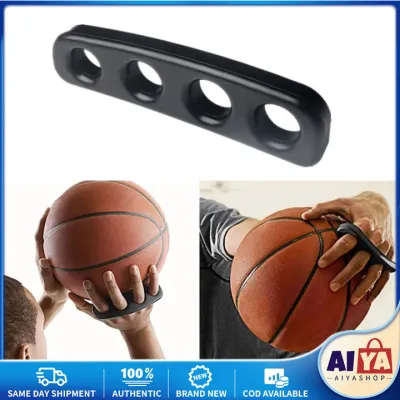
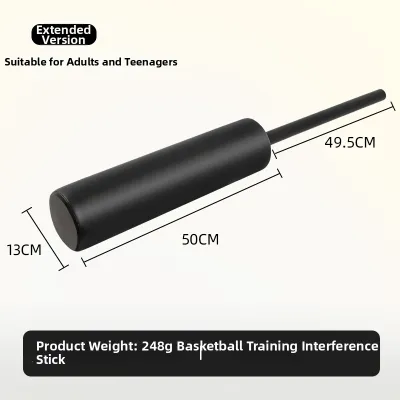
Prices are valid at publication and may change. Please refer to the product page for the latest price.
Before isolating your arm and wrist mechanics, always verify your foundational footwork and balance. If your feet are not properly aligned—typically shoulder-width apart and slightly staggered toward your shooting side—your entire upper body will struggle to compensate for the lack of stability. In outdoor court settings, which are highly common in the Philippines, uneven concrete surfaces or worn-out court lines can silently disrupt your stance. Ensure your base is balanced and consistent before attributing all shooting errors to your upper-body mechanics.
Training Equipment for Elbow Flare and Alignment
Once you have confirmed that elbow flare or poor alignment is your primary mechanical issue, you can select targeted training equipment to physically restrict or visually guide your shooting arm. Elbow flare prevents the shooting hand, elbow, and shoulder from forming a single, efficient lever. To correct this, players often turn to physical restrictors like shooting straps and specialized arm sleeves.

Shooting straps function by physically binding the arms or anchoring the guide hand, preventing the shooting elbow from flaring outward during the upward motion of the shot. When selecting a shooting strap, it is vital to verify the material’s breathability, elasticity, and fastening security. In hot, humid tropical climates, heavy neoprene or non-breathable synthetic straps can trap sweat rapidly. This not only causes skin irritation but can also cause the strap to slip out of place mid-shot, altering the physical feedback. Look for lightweight, moisture-wicking elastic bands with adjustable hook-and-loop fasteners that stay secure even during high-perspiration workouts.
For players who prefer to avoid physical restrictions, form-shooting mirrors and alignment markers offer excellent visual feedback. Placing a full-length mirror in your training area allows you to perform slow, ball-free shooting repetitions while directly observing your alignment. You can visually check if your shoulder, elbow, hip, and knee form a straight line. On the court, temporary alignment markers or floor decals can help you position your feet consistently relative to the basket, ensuring your body is aligned before you begin your upward shooting motion.
The choice between physical straps and visual feedback tools depends largely on the severity of your elbow flare. If your muscle memory is deeply ingrained and you find it difficult to keep your elbow tucked voluntarily, a physical shooting strap provides the immediate, unyielding boundary needed to force your muscles into the correct path. However, if your flare is minor or only occurs when you are fatigued, visual feedback tools are highly recommended. They allow you to maintain a natural, unrestricted shooting motion while building the conscious awareness needed to self-correct.
Tools for Consistent Release Point and Arc
A flat shot trajectory significantly reduces the margin of error for a basketball entering the hoop. To maximize your shooting percentage, you must establish a repeatable, high release point that produces a soft, downward arc. Several specialized training tools are designed to help you visualize and execute this optimal trajectory.
Shooting arcs and trajectory rings are physical attachments that clip onto the rim. These tools either reduce the diameter of the hoop—forcing you to shoot with high precision—or feature a raised barrier that physically blocks low-trajectory shots. When considering these tools, verify that the attachment mechanism is compatible with the specific rims you use. Many neighborhood courts in the Philippines feature heavy-duty, double-rim configurations or custom-welded steel nets. Ensure the training aid can be securely mounted to these non-standard rims without damaging the equipment or the hoop itself.
Weighted basketballs and heavy shooting balls are excellent for building the specific muscle groups required for a high release point. By adding resistance, these balls force your body to utilize a more vertical push, discouraging a flat, chest-push motion. However, you must verify the manufacturer’s weight specifications and age recommendations before incorporating them into your routine. Using a ball that is too heavy for your current strength level can strain your shoulder joints and actually worsen your form, as your body will naturally resort to awkward, inefficient movements to launch the extra weight.
Targeting nets and rim attachments provide a visual focal point to encourage a consistent downward trajectory. These aids often feature a brightly colored marker or a small net suspended in the center of the hoop, giving you a clear target to aim for rather than the broad circle of the rim. When practicing outdoors under bright sunlight, high-contrast yellow or orange targeting aids are highly visible and help maintain your focus. Ensure these attachments are made of weather-resistant, UV-stabilized materials to prevent cracking or fading under intense sun exposure.
Aids for Proper Follow-Through and Wrist Snap
The final phase of a successful shot is the follow-through, which dictates the ball’s backspin and final flight path. A clean wrist snap ensures the ball rolls off your index and middle fingers, creating a consistent rotation that helps the ball drop softly into the basket even if it hits the rim.
Wrist trainers and snap bands are designed to enforce this complete follow-through. These devices typically consist of elastic bands or molded plastic guides worn on the wrist, hand, or fingers. They provide gentle resistance during the shot and snap the wrist forward into the correct “goose-neck” position upon release. This physical feedback prevents you from dropping your hand prematurely, a common mistake that cuts off the ball’s backspin and causes shots to fall short.
Backspin training balls are standard-weight basketballs featuring high-contrast visual lines, dual-color panels, or specific hand-placement guides. When you shoot, the spinning pattern of the colors or lines provides immediate visual feedback. If the lines spin straight and vertically, your release is clean and even. If the lines wobble or spin diagonally, it indicates that your guide hand is interfering or that the ball is rolling off your fingers unevenly. This visual cue is highly effective for self-correction during solo shooting drills.
Before purchasing any wrist or finger-worn training aids, always check the manufacturer’s sizing charts, material safety, and tension limits. The device must fit snugly enough to stay in place but must not restrict natural blood flow or pinch your joints. In tropical conditions, sweat can accumulate under rubber or plastic bands, potentially causing skin chafing or slipping. Opt for hypoallergenic, medical-grade silicone or soft, lined fabrics that offer both safety and comfort during extended training sessions.
How to Build a Corrective Shooting Practice Routine
Owning the right training equipment is only half the battle; you must integrate these tools into a structured, progressive practice routine to achieve lasting results. Over-relying on physical aids can create a dependency, meaning your form may revert to old habits the moment the equipment is removed.
Your routine should begin with a close-range progression. Start just one to two meters away from the basket, using your chosen training aid. Perform ten to fifteen slow, deliberate form-shooting repetitions without jumping. Focus entirely on the physical sensation of the correct movement—whether it is the tucked elbow, the high release, or the complete wrist snap. Only when you can consistently execute perfect form at this close range should you take a step back. Gradually increase your distance in small increments, ensuring your mechanics remain stable at each spot.
To prevent dependency, implement a systematic weaning strategy. Use the “alternating set” method: perform a set of ten shots with the training aid, then immediately remove the device and shoot ten more shots with a standard basketball. During the unrestricted shots, focus on replicating the exact physical feeling and muscle tension that the training aid enforced. Over several weeks, gradually reduce the proportion of shots taken with the aid until you can maintain perfect form entirely on your own.
Always establish clear stop conditions for your practice sessions. Monitor your physical state closely; if you experience joint discomfort, sharp pain, or extreme muscle fatigue, stop the drill immediately. When your muscles tire, your body naturally compensates by using incorrect muscle groups, which reinforces the very mechanical flaws you are trying to correct. Quality of repetitions is far more important than quantity when rebuilding your basketball shooting form.
Frequently Asked Questions (FAQ)
Can training equipment completely replace a basketball shooting coach?
No, training equipment cannot fully replace a qualified basketball coach. While training aids are excellent for providing physical constraints and immediate visual feedback, they lack the ability to analyze your entire kinetic chain. A coach can spot subtle issues that equipment cannot, such as a hitch in your hip drive, poor energy transfer from your legs, or psychological tension. If you experience persistent form issues, plateaued progress, or physical pain, it is highly recommended to seek guidance from a professional coach or physical therapist.
Are weighted basketballs safe for younger players?
Weighted basketballs require strict adherence to safety guidelines, especially for younger players. You must always check the manufacturer’s age, weight, and usage recommendations before allowing a youth athlete to train with a weighted ball. Developing joints and growth plates are highly susceptible to strain from excessive weight. For younger players, safer alternatives include lighter form-shooting balls or standard youth-sized basketballs (such as Size 5 or Size 6) that allow them to develop proper mechanics without overloading their joints.
How long does it take to see improvements in shooting form?
The timeline for correcting your shooting form depends on several variables, including your practice frequency, consistency, and how deeply ingrained your old habits are. Generally, it takes several weeks of daily, focused practice to build new muscle memory. During this transition period, your shooting percentage may temporarily decrease as your body adjusts to the new mechanics. It is crucial to track your progress using regular video analysis rather than relying solely on short-term shooting percentages to measure your improvement.

Community discussion
Share your experience or ask a question. Comments are reviewed before publication.