
To fill a punching bag correctly for a home training setup, you must layer compressed soft materials like shredded textiles around a stable, centered weighted core. This method ensures the bag absorbs impact evenly, protects your joints from injury, and maintains its shape over time. Simply dumping loose sand or hard materials directly into the shell creates dangerous hard spots and can tear the seams.
Setting up a home boxing corner in the Philippines requires extra attention to local conditions. High humidity can easily trap moisture inside your bag, leading to mold if the materials are not prepared and packed correctly. By following a systematic layering process, you can customize the weight and density of your heavy bag to match your fitness level while ensuring the equipment remains safe and durable for daily workouts.
Remember that a heavy bag is a tool for skill development, and proper setup is a prerequisite for safe training. No amount of equipment quality can replace proper striking technique, hand protection, and physical preparation. Before you begin filling your bag, take the time to understand the materials and steps required to build a reliable, long-lasting training partner.
Products mentioned in this guide
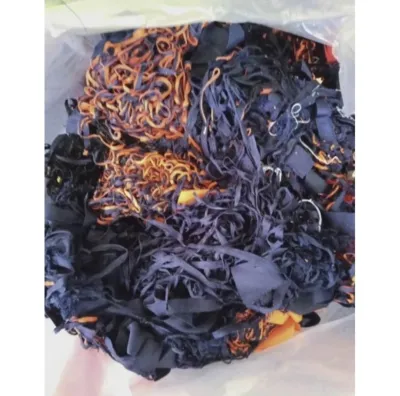

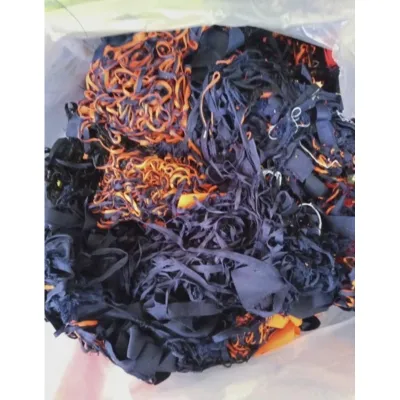
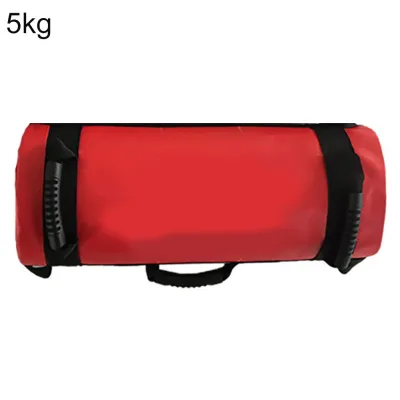

Prices are valid at publication and may change. Please refer to the product page for the latest price.
Choosing the Right Filling Materials for Your Punching Bag
The choice of filling material directly dictates how the bag responds to your punches. Soft textiles, such as old t-shirts, bedsheets, and denim rags, serve as the ideal primary filler. These materials compress tightly under pressure, providing excellent shock absorption that mimics the resistance of a human torso while protecting your knuckles, wrists, and elbows from excessive impact.
While rubber mulch is a consistent alternative that does not settle as quickly as fabric, it is significantly heavier and less forgiving. If you choose rubber mulch, mix it with fabric scraps to prevent the bag from becoming too rigid for safe training. Avoid using organic materials like sawdust or grain, as these attract pests and absorb moisture rapidly in tropical climates.
A common mistake is filling the entire bag with sand. Sand is incredibly dense and settles rapidly at the bottom of the bag due to gravity. This creates a rock-hard lower section that can cause severe joint sprains upon impact, while leaving the top section completely hollow. Furthermore, the extreme weight of a pure sand fill puts immense stress on the stitching, often leading to sudden seam blowouts.
To achieve the necessary weight without sacrificing safety, you should use a central weighted core. This involves placing a narrow, sealed container—such as a sand-filled PVC pipe wrapped in foam—directly down the center of the bag. The surrounding space is then packed tightly with soft rags. This design keeps the heavy sand concentrated in the core for stability while ensuring the striking surface remains cushioned and safe.
Before stuffing any fabric into your bag, proper preparation is mandatory. You must cut all old clothes and rags into small, uniform pieces, roughly the size of your hand. Leaving garments whole creates large air pockets and uneven lumps that ruin the striking surface. Additionally, you must inspect every piece of fabric and remove all hard objects, including metal zippers, plastic buttons, rivets, and snaps, to prevent internal tearing.
Tools and Preparation Before Filling
Gathering the right tools before you begin makes the filling process much smoother and ensures a tighter, more consistent pack. You will need several heavy-duty trash bags to contain your weighted core materials and prevent moisture absorption. High-quality duct tape and heavy-duty zip ties are essential for sealing these internal bags and securing the core.

A reliable packing tool is indispensable for compressing the filling materials as you build the layers. A long wooden broomstick or a rubber mallet with an extended handle works perfectly. This tool allows you to reach deep into the bottom of the bag and pack the fabric scraps into every corner, eliminating empty spaces.
Your workspace must be completely clean, dry, and well-ventilated. Working on a damp garage floor or an open outdoor patio during the rainy season can introduce moisture to your filling materials. Once sealed inside the synthetic leather or canvas shell, trapped moisture will quickly breed mold and foul odors, ruining your equipment.
Before adding any filling, perform a thorough pre-fill inspection of the empty bag shell. Lay the bag flat on a clean surface and examine the stitching along the side seams and the bottom panel. Check the zipper or lacing mechanism at the top to ensure it operates smoothly without skipping teeth. Inspect the D-rings, metal rivets, and hanging straps for any signs of fraying or cracking.
Step-by-Step Guide to Filling the Punching Bag
Step 1: Create a Protective Base Layer Begin by packing a thick layer of soft, shredded rags directly into the bottom of the empty bag. This base layer should be approximately 10 to 15 centimeters deep once fully compressed. Use your packing tool to push the fabric firmly into the bottom corners and edges. This initial cushion protects the bottom seams from the downward pressure of the weighted core and prevents the bag from sagging or losing its shape at the base.
Step 2: Position and Secure the Weighted Core Prepare your weighted core by filling a heavy-duty plastic bag or a sealed PVC pipe with dry sand. Wrap the core in duct tape to ensure it is completely airtight and leak-proof. Place this core directly in the horizontal center of the punching bag, resting on top of the base layer you just created. The core must be suspended in the center, meaning it should never touch the outer walls or rest directly on the bottom fabric of the bag.
Step 3: Layer and Pack the Surrounding Materials With the core held steady in the center, begin adding your prepared fabric scraps around it. Add the rags in small batches, creating layers of about 10 centimeters at a time. After adding each layer, use your broomstick or packing tool to compress the fabric downward and outward against the bag’s shell. Work your way around the central core in a circular motion to ensure even density on all sides.
Packing the materials tightly is crucial. If you simply dump the rags in without compressing them, they will quickly settle during your first few workouts, leaving the top half of your bag completely empty and the bottom half rock-hard. Take your time with this step, applying firm pressure to eliminate all air pockets and create a uniform, solid striking surface.
Step 4: Close and Reinforce the Top Continue layering and packing until the fabric reaches the very top of the bag, just below the zipper or lacing line. If your bag has a top foam collar, ensure it is properly aligned before sealing. Once the bag is completely full, compress the top layer one final time and add extra rags if any settling occurs immediately.
Zip or lace the top closure shut carefully. To prevent the filling from shifting upward or putting direct pressure on the zipper during heavy use, you can reinforce the top closure. Wrap heavy-duty duct tape around the upper collar of the bag, covering the zipper line if the manufacturer’s instructions permit, to provide extra structural support and keep the contents securely contained.
Testing and Adjusting the Filled Punching Bag
Once the filling process is complete, hang the bag temporarily to conduct a thorough physical inspection. Stand back and look for any visible bulging, asymmetrical shapes, or lopsidedness. Walk around the bag and press your hands firmly into the surface from top to bottom, feeling for hollow air pockets or unusually hard lumps.
Give the bag a few light, controlled punches with wrapped hands or gloves. If you detect a hard spot, it is usually a sign of clumped fabric or a shifted weighted core. You can often resolve minor lumps by rolling the bag on a clean floor or tapping the bulging areas gently with a rubber mallet to redistribute the internal fibers.
If the bag feels too light and swings excessively when struck, you will need to lower it, open the top, and add more weight to the central core or pack the fabric layers even tighter. Conversely, if the bag feels like solid concrete and hurts your hands upon impact, you must remove some of the filling and replace it with softer, less compressed fabric scraps.
Before executing any full-power strikes, you must perform a comprehensive safety check on your entire mounting system. Inspect the ceiling mount, wall bracket, or heavy bag stand to ensure all bolts are securely tightened into solid wood joists or concrete. Check that the hanging chains are not twisted and that the swivel rotates freely. A properly functioning swivel prevents the chains from binding and reduces the rotational stress transferred to your ceiling mount.
Maintenance and Long-Term Care for Filled Bags
Over time, gravity and the repeated impact of your strikes will cause the internal filling to settle downward. This is a completely natural process for any fabric-filled heavy bag. You will eventually notice that the top 15 to 20 centimeters of the bag becomes soft or hollow, while the bottom becomes denser. When this happens, simply open the top closure, compress the existing filling, and pack in additional shredded rags to restore the bag’s original shape.
In the tropical climate of the Philippines, managing humidity is critical for preserving your home gym equipment. High humidity and sweat can easily lead to mold growth inside the bag if it is kept in a damp, unventilated space like a closed garage. Ensure your training area has adequate airflow, and occasionally wipe down the exterior of the bag with a dry microfiber cloth. If you suspect moisture has penetrated the shell, open the top during a dry, sunny day to let the internal materials air out.
Establish a routine inspection schedule based on how often you train. If you use the bag two to three times a week, inspect the hanging hardware, chains, and D-rings every month for signs of metal fatigue or wear. Check the stitching along the bottom seams and around the hanging straps for any loose threads or stretching. Catching these minor issues early prevents dangerous equipment failures and extends the lifespan of your home boxing setup.
Frequently Asked Questions (FAQ)
Can I use water to fill a standard heavy punching bag?
No, you should never use water to fill a standard heavy punching bag. Standard bags are designed strictly for dry, compressible materials like textiles and sand. Filling a standard canvas or synthetic leather bag with water will result in immediate leaks, ruined seams, and structural collapse. Water also creates an ideal breeding ground for mold and mildew, which will quickly destroy the bag’s shell. If you prefer the unique impact absorption of water, you must purchase a specialized aqua training bag specifically engineered with a thick, waterproof vinyl shell and a secure water-valve system. Always follow the manufacturer’s specifications for approved fill types.
How heavy should my filled punching bag be?
As a general training guideline, a heavy punching bag should weigh approximately half of your body weight. For example, if you weigh 70 kilograms, a bag weighing around 35 kilograms is an excellent starting point. However, your personal fitness level, striking power, and training goals should dictate the final weight. Beginners and those focusing on speed and cardiovascular endurance often prefer a lighter bag that swings slightly more, which helps develop timing and footwork. Experienced strikers focusing on power development may require a heavier, more stable bag. Ultimately, joint comfort and a responsive striking feel are far more important than adhering to a strict mathematical formula.
Why is my punching bag too hard after filling?
If your punching bag feels excessively hard and unforgiving, the primary cause is usually over-packing or using materials that are too dense. If you packed the fabric scraps too tightly with your packing tool, or if you used large, uncut garments that have clumped together, the bag will lose its shock-absorbing properties. To correct this issue safely, open the top of the bag and remove the upper layers of filling. Take out any large pieces of clothing and cut them into smaller, hand-sized rags. Re-pack the bag with a lighter touch, or mix in softer materials like shredded foam or lighter cotton rags to restore proper cushion and protect your hands from injury.

Community discussion
Share your experience or ask a question. Comments are reviewed before publication.