
Finding a replacement tent frame that fits your existing tent requires matching three critical specifications: the total assembled length, the outer diameter of the poles, and the specific connection hardware at the ends and joints. When camping in the Philippines, where tropical humidity, coastal winds, and sudden downpours put immense stress on your shelter, a mismatched or weak frame can lead to structural failure in the middle of the night. By systematically measuring your broken poles, identifying their material properties, and verifying how they attach to your tent canopy, you can source a compatible replacement that restores your tent’s structural integrity.
Whether your poles snapped during a windy trek on Mount Pulag or corroded after a beach camping trip in Batangas, rushing to buy a generic replacement without checking the exact dimensions usually results in a frame that is either too long to tension properly or too thick to slide through the tent sleeves. Taking the time to document your existing setup ensures a safe, taut pitch that protects you from the elements.
Measure and Document Your Existing Tent Pole Specs
To establish an accurate baseline for your replacement frame, you must extract the physical dimensions of your original poles. If a pole is broken but still mostly intact, lay all the segments flat on a clean, hard surface. Push the unbroken segments together as if you were assembling the pole for a pitch, ensuring each joint is fully seated. Use a flexible tape measure to record the total length from end to end. If a segment is completely shattered or missing, measure the remaining intact segments, calculate the average length of a single segment, and multiply it by the total number of segments to estimate the original length.
Products mentioned in this guide
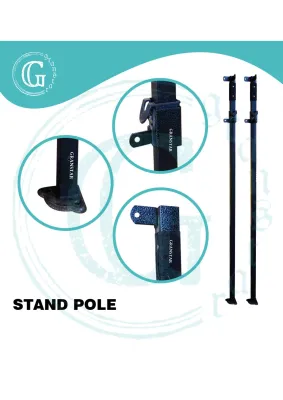
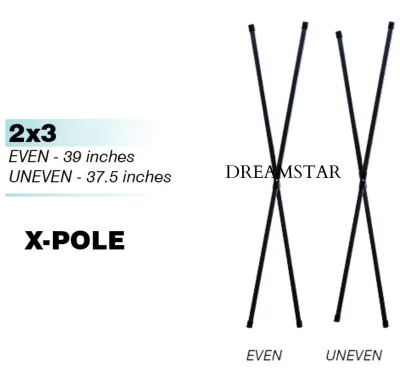
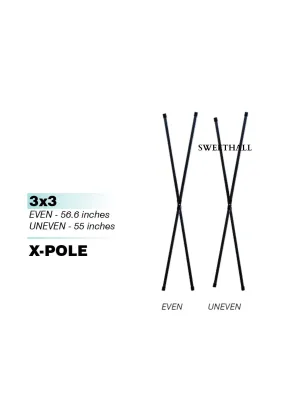
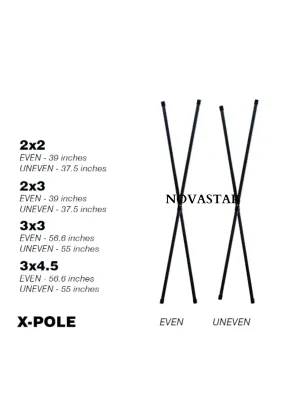
Prices are valid at publication and may change. Please refer to the product page for the latest price.
When measuring the total assembled length, do not include the insert portion of the ferrule—the smaller metal sleeve that slides inside the adjacent pole segment. Including this insert in your total length calculation will artificially inflate your measurement, resulting in a replacement pole that is too long. A pole that is even a few centimeters too long will overstretch the tent fabric, strain the zippers, and potentially snap under tension during assembly.
Identifying the exact outer diameter of your pole is equally critical. A difference of just half a millimeter can prevent a pole from sliding into your tent’s plastic clips or make it too bulky for the fabric sleeves. The most reliable way to measure diameter is with a digital caliper, measuring the main shaft of an unbroken segment rather than the ferrule. If you do not own a caliper, you can use a standard drill bit sizing gauge; find the smallest hole that the pole segment can cleanly slide through to determine its outer diameter, which typically ranges from 7.9 mm to 11 mm for standard backpacking and family tents.
Next, determine whether your poles are made of aluminum or fiberglass, as these materials have vastly different weight, flexibility, and performance characteristics. Aluminum poles are lightweight, have a metallic finish, and tend to bend or dent rather than snap cleanly when overloaded. Fiberglass poles are heavier, usually have a smooth resin coating, and tend to splinter or shatter longitudinally when they fail. In the humid, salty air of coastal Philippine campsites, aluminum offers excellent corrosion resistance if rinsed with fresh water after use, while fiberglass is immune to rust but can degrade and become brittle under prolonged exposure to intense tropical UV rays.
Finally, count the total number of individual segments that make up the complete pole arch. Note whether all segments are identical in length or if the end segments are tapered or asymmetrical. Some tent designs use pre-bent corner sections or specialized hub joints to create steeper walls and more interior headroom. Documenting these structural details will help you decide whether you need a simple straight replacement pole or a specialized, pre-curved frame set.
Match the Connectors and Tent Body Attachments
Once you have documented the physical dimensions of the pole segments, you must examine how the individual pieces connect to each other and how the completed frame interfaces with your tent canopy. The internal connection system relies on an elastic shock cord running through the center of the poles to keep the segments organized. Examine the ferrules—the metal sleeves that join the segments—to see if they are integrated into the pole shaft or if they are separate components glued in place. You must ensure that any replacement pole has a matching ferrule style and sufficient internal clearance for the shock cord and its securing knots.

How the tent body attaches to the frame determines the level of friction and stress the poles will experience. If your tent uses continuous fabric pole sleeves, your replacement poles must have smooth, low-profile joints that will not snag or tear the fabric as you slide them through. If your tent utilizes plastic snap clips, the outer diameter of the replacement pole must match the clip size perfectly; poles that are too thick will not snap into the clips, while poles that are too thin will slip and cause the canopy to sag.
Equally important are the tip styles at the very ends of the poles, which anchor the frame to the tent’s ground straps or grommets. The three most common configurations are grommet pins, blunt ends, and ball tips. Grommet pins are metal inserts attached to the tent’s corner webbing that slide directly into the hollow ends of the poles. Blunt ends are solid plastic or metal caps that sit inside fabric pockets or grommet holes. Ball tips are rounded ends that snap into specialized plastic sockets on the tent body.
Using the wrong tip style can make it impossible to secure the frame, or worse, cause the sharp, unprotected edge of a hollow pole to punch through the tent’s webbing or floor fabric. When sourcing replacement parts, verify that the end tips of the new poles are fully compatible with your tent’s existing anchoring hardware. If necessary, many universal pole kits allow you to unscrew or remove the default tips and install your original hardware onto the new frame.
Choose the Right Replacement Frame Solution
When looking for a replacement frame, you generally have three options depending on the age of your tent, the extent of the damage, and your budget. Evaluating these options carefully will help you balance cost, installation effort, and long-term durability.
First, check if the Original Equipment Manufacturer (OEM) offers exact-match replacement poles for your specific tent model. This is the most reliable solution because it guarantees perfect compatibility with the original design, preserving the tent’s intended tension, wind resistance, and structural integrity. However, OEM replacements can be difficult to find for older, discontinued, or generic tent models, and shipping parts from overseas manufacturers to the Philippines can sometimes incur high shipping fees and long wait times.
Second, universal tent pole kits are an excellent alternative when OEM parts are unavailable. These kits typically contain several high-quality aluminum or fiberglass segments, a length of shock cord, a wire threading tool, and various end tips. You will need to cut the segments to the correct length using a hacksaw or a pipe cutter and assemble the pole yourself. While this requires some manual effort and careful measurement, universal kits are highly versatile and widely available.
Third, if only a single segment of your pole is damaged, you can opt to replace just that individual section or use an emergency splint. An emergency splint is a short, hollow metal tube slightly larger than the outer diameter of your pole that slides over a break to provide temporary structural support. For a permanent fix, buying a single replacement segment of the exact same diameter and material allows you to repair the pole without the expense of buying an entirely new frame set.
| Solution Type | Estimated Cost Range | Fit Precision | Assembly Effort | Durability Trade-offs |
|---|---|---|---|---|
| OEM Exact-Match | ₱1,200 – ₱3,500+ | Perfect | Low (Ready to use) | Preserves original structural strength |
| Universal Pole Kit | ₱600 – ₱1,800 | High (Requires cutting) | Moderate to High | Dependent on assembly quality and material choice |
| Single Segment Repair | ₱150 – ₱400 | High (Must match specs) | Moderate | Restores original strength if matched correctly |
| Emergency Splint | ₱100 – ₱300 | Temporary | Low | Low durability; temporary field fix only |
Where to Source Compatible Tent Frames
Finding the right purchasing channel is crucial to avoid low-quality, incompatible generic listings that do not meet your tent’s structural requirements. Start by visiting the official website of your tent’s manufacturer. Many reputable outdoor brands maintain dedicated spare parts sections or have customer service teams that can look up your tent model and provide the exact part numbers or direct replacements, even if the model is no longer actively advertised.
If direct manufacturer support is not an option, explore specialized outdoor gear retailers and local camping equipment shops in the Philippines. Visiting a physical store allows you to bring your broken pole along, enabling staff to help you measure the diameter and match the connectors with compatible stock. Many local outdoor hubs in major cities carry universal aluminum and fiberglass pole kits, as well as individual repair sleeves and shock cords.
When navigating general online marketplaces, exercise caution and verify all seller specifications before making a purchase. Avoid listings that use vague terms like “standard size” without providing exact millimeter measurements for the outer diameter and wall thickness. Read customer reviews to check for complaints about brittle materials or inaccurate sizing, and prioritize sellers that offer clear return policies in case the replacement frame does not fit your tent’s attachments.
Test and Install Your New Frame Safely
Before heading out on your next camping trip, you must assemble and test your new tent frame in a controlled environment, such as your backyard or a local park. If you are using a universal kit, you will need to thread the shock cord through the new segments. Tie a secure, low-profile knot, such as a figure-eight knot, at one end of the cord, feed it through the poles using a thin wire guide, pull it tight to create moderate tension, and secure the other end. Ensure the knots are small enough to sit deep inside the end tips without blocking the joints.
Assemble the completed frame on a flat, clean surface free of sharp rocks or debris. Carefully insert each segment into its corresponding ferrule, making sure every joint is fully seated before applying any bending force. Partially joined segments are a primary cause of pole failure, as the concentrated stress on an unseated joint can easily split the female end of the pole when tension is applied.
Once assembled, perform a visual and physical stress test by slowly and gently flexing the pole to mimic the curve of your pitched tent. Listen closely for any cracking, creaking, or splintering sounds, especially if you are working with fiberglass. Watch the curve of the pole to ensure it bends smoothly and evenly without any sharp angles or flat spots, which indicate weak points or incorrect segment lengths.
If you encounter significant resistance, if the pole binds inside the tent sleeves, or if you notice immediate stress marks or hairline fractures on the segments, stop immediately. Do not force the pole into the tent grommets, as this can tear the canopy fabric or cause the pole to shatter violently, risking eye injuries or skin punctures. If the frame does not seat properly, disassemble it, re-verify your measurements, and consult a professional outdoor gear repair specialist or the manufacturer for guidance.
Frequently Asked Questions (FAQ)
Can I mix aluminum and fiberglass poles on the same tent?
No, you should avoid mixing aluminum and fiberglass poles on the same tent frame. Aluminum and fiberglass have different flex rates, weight distributions, and structural behaviors under load. Mixing them causes uneven tension across the tent canopy, which can lead to joint failures, bent aluminum segments, or shattered fiberglass sections. To maintain the structural integrity and wind resistance of your tent, ensure that all poles in the frame set are made of the same material.
How do I measure for a replacement if the original pole is completely lost?
If you no longer have the original pole to use as a reference, you can estimate the required length by setting up the tent body flat on the ground and measuring the distance along the pole sleeves or clip paths from one anchoring grommet to the opposite corner. Add roughly 2% to 5% to this flat measurement to account for the arch height when the tent is pitched. However, because this method is an estimate, your safest option is to contact the tent manufacturer directly with your exact tent model name and year of manufacture to request the official factory specifications.

Community discussion
Share your experience or ask a question. Comments are reviewed before publication.