
Making a mini DIY kite at home is an excellent, budget-friendly way to bring the family together for an afternoon of outdoor play. By using simple household items like bamboo skewers, lightweight plastic bags, and sewing thread, you can construct a highly responsive mini kite that catches even the gentlest tropical breeze. The key to success lies in maintaining a strict balance between structural strength and minimal weight. This guide walks you through the entire process, from selecting humidity-resistant materials to tuning your bridle for a stable, high-flying launch.
What You Need: Materials and Tools for a Mini Kite
To build a successful mini kite, every gram counts. In humid tropical climates like the Philippines, choosing materials that do not absorb moisture from the air is crucial for keeping the kite light enough to fly. Crafting this project typically costs less than ₱50 using common household items.
- Frame Materials: Look for lightweight, rigid, yet slightly flexible spars. Bamboo skewers (commonly used for local street food) are ideal because they are strong, incredibly light, and easy to trim. Alternatively, thin plastic drinking straws or slender, dry twigs can work. Test your spars by gently bending them; they should flex slightly without snapping or permanently warping.
- Sail Materials: The sail must be airtight and extremely light. While tissue paper and newspaper are classic choices, they can quickly become soggy and heavy in high humidity or light drizzle. A fantastic, durable alternative is a clean, lightweight plastic grocery bag or a piece of thin trash bag. These materials resist moisture, do not tear easily, and catch the wind efficiently.
- Binding and Adhesive Supplies: Heavy glues will weigh your mini kite down, preventing it from lifting. Instead, opt for lightweight clear tape, masking tape, or a very thin layer of school glue. For binding the frame and creating the flying line, standard cotton sewing thread or lightweight polyester string is perfect.
- Basic Tools: Gather a pair of scissors, a ruler for precise measurements, and a marker to trace your lines. If children are participating in the build, ensure they use child-safe scissors, and handle any trimming of bamboo skewers yourself to prevent splinters or sharp edges.
Step-by-Step Instructions to Build Your Mini DIY Kite
Assembling your mini kite requires patience and precision. A classic diamond shape is the easiest and most stable design for beginners to construct at home.
Products mentioned in this guide
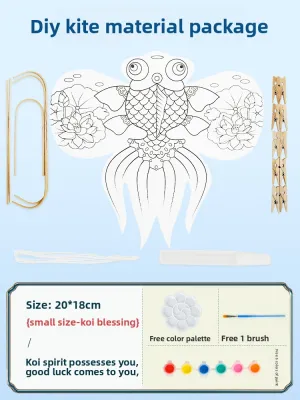





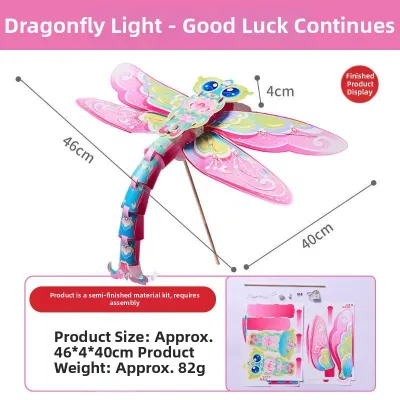
Prices are valid at publication and may change. Please refer to the product page for the latest price.

- Step 1: Preparing and Crossing the Frame: Cut two bamboo skewers to size using your scissors. For a standard mini diamond kite, make one vertical spine about 20 centimeters long and one horizontal crossbar about 15 centimeters long. Lay the vertical spine down, and place the horizontal crossbar across it at a right angle, approximately 5 centimeters from the top of the spine. This creates the classic cross shape.
- Step 2: Securing the Joint: Wrap your lightweight cotton thread tightly around the intersection of the two skewers in a diagonal, crisscross pattern. Ensure the two spars remain perfectly perpendicular. Once secure, tie a tight knot and apply a tiny drop of clear tape over the thread to lock it in place. Avoid using large globs of glue here, as center-heavy weight will cause the kite to dive.
- Step 3: Creating the Frame Boundary: Run a single strand of thread around the outer tips of the four spars to outline the diamond shape. To do this, make a tiny notch at the end of each skewer with your scissors, wind the thread through the notch, and pull it taut to the next tip. Tie it off securely. This thread boundary provides structural support and defines the shape of your sail.
- Step 4: Tracing and Cutting the Sail: Lay your chosen sail material (such as a flat plastic bag) on a clean table. Place your completed frame on top of it. Using your marker, trace an outline around the frame, leaving a margin of about 1.5 centimeters outside the thread boundary. Carefully cut along this outer line using your scissors.
- Step 5: Attaching the Sail to the Frame: Fold the 1.5-centimeter margin of the sail material over the boundary thread of the frame. Secure this fold in place using small, spaced pieces of clear tape. Do not use a single continuous strip of heavy tape, as this adds unnecessary weight to the edges. Ensure the sail is taut but not so tight that it warps or bends the bamboo frame.
- Step 6: Reinforcing the Corners: The corners of your kite will experience the most tension during flight. Apply a small square of tape over each of the four corners where the spars meet the sail to prevent the wood from poking through the plastic or paper.
Attaching the Flying Line and Bridle
The bridle is the harness that sets the angle at which the kite meets the wind. Without a properly balanced bridle, your mini kite will simply spin out of control or refuse to lift.
- Creating the Bridle: Cut a piece of lightweight string that is roughly twice the length of your vertical spine (about 40 centimeters). Tie one end of this string securely to the top of the vertical spine, right where it meets the sail. Tie the other end to the bottom of the vertical spine. This creates a loose loop of string hanging from the front (the non-frame side) of your kite.
- Finding the Tow Point: Hold the kite up by the bridle loop. To find the correct tow point, pinch the bridle string and let the kite hang. Adjust your pinch point until the kite hangs at an angle of roughly 15 to 20 degrees relative to the floor, with the nose pointing slightly upward. This angle allows the wind to push underneath the sail to lift it. Tie a small loop knot at this exact pinch point.
- Connecting the Flying Line: Tie your main spool of flying line—which can be lightweight sewing thread or thin nylon string—securely to the loop knot you just created on the bridle. A simple double knot works well, but ensure it is tight so it does not slip under tension.
- Adding the Tail: A mini kite is highly susceptible to spinning because of its low weight. To counter this, attach a tail to the bottom tip of the vertical spine. Cut a strip of lightweight plastic bag or ribbon that is about 3 to 4 times the length of the kite (around 60 to 80 centimeters) and about 1 centimeter wide. Tape or tie this tail to the bottom of the kite. The tail creates drag, keeping the nose pointed upward and preventing the kite from rolling.
Safety Rules and Choosing the Right Flying Spot
While flying a mini kite is a low-risk activity, practicing basic safety ensures a fun, injury-free experience for the entire family.
- Avoid Hazards: Never fly your kite near overhead power lines, busy streets, active driveways, or near airports. If your kite gets caught in a tree or a utility pole, do not attempt to retrieve it yourself; leave it behind to avoid falls or electrical hazards.
- Supervise Young Crafters: Children should always be supervised when using scissors, handling sharp bamboo skewers, or running with the kite. Ensure they do not wrap the flying line around their fingers or neck, as even thin thread can cause friction burns or cuts under sudden tension.
- Choose the Right Venue: Look for wide-open public spaces, such as local parks, school fields, or open beaches. Ensure the ground is flat and free of tripping hazards like large rocks, holes, or sudden drops. Be mindful of other park visitors; keep your flying line short to avoid tangling with passersby or pets.
- Monitor Weather Conditions: Mini kites are designed for gentle breezes. Avoid flying during strong winds, heavy rains, or when lightning is present. If a sudden tropical downpour approaches, pack up your gear and head indoors immediately.
Troubleshooting: Why Your Mini Kite Won't Fly
If your mini kite struggles to stay aloft during its first test run, do not worry. Most flight issues can be resolved with quick, minor adjustments.
- The Kite Loops or Dives: If your kite spins in circles or dives nose-first into the ground, the tow point on your bridle may be too high, or the kite may lack stability. Try sliding the tow point slightly lower down the bridle string to adjust the pitch. If it continues to spin, your tail may be too short or too light. Try adding another strip of plastic to the tail to increase drag.
- The Kite Refuses to Climb: If the kite flutters near the ground but won't rise, the tow point might be too low, preventing the wind from getting under the sail. Move the tow point slightly higher. Alternatively, the kite might be too heavy for the current breeze. Check if you used too much tape or if the frame spars are too thick.
- The Kite Pulls to One Side: If the kite consistently veers to the left or right, check the symmetry of your frame. One side of the crossbar may be longer than the other, or the sail may be taped tighter on one side. Trim any excess wood to ensure perfect balance, or adjust the sail tension so both sides are equal.
- Evaluating the Wind: Mini kites require very little wind to fly. If there is no breeze at all, the kite will not stay up. Conversely, if the wind is strong enough to bend tree branches, it will likely overpower and damage your mini kite's delicate frame. Wait for a gentle, steady breeze where leaves are rustling softly.
Frequently Asked Questions (FAQ)
Can I use regular printer paper for the kite sail?
Standard printer paper is generally not recommended for a mini DIY kite. It is too heavy for the delicate bamboo or straw frame to lift in light breezes, and it lacks the flexibility needed to spill excess wind. Additionally, printer paper tears easily under tension and can quickly degrade if it comes into contact with damp grass or high humidity. For the best results, stick to lightweight, moisture-resistant materials like thin plastic grocery bags, tissue paper, or tracing paper.
How long should the tail be for a mini DIY kite?
As a general rule, start with a tail that is approximately three to four times the length of your kite’s vertical spine (about 60 to 80 centimeters for a 20-centimeter kite). The ideal length depends on the weight of your materials and the strength of the wind. If you notice the kite spinning or looping erratically, the tail is too light; try adding another 20 centimeters of plastic strip. If the kite struggles to lift and feels weighed down from the bottom, the tail is too heavy; trim it back by 10 centimeters at a time until you achieve a stable flight.

Community discussion
Share your experience or ask a question. Comments are reviewed before publication.