
Selecting a 3×3 tent trapal (tarpaulin) for camping in the Philippines requires matching the gear’s physical specifications to the demands of a tropical climate. With sudden torrential downpours during the monsoon seasons and intense ultraviolet exposure during the dry months, a basic plastic sheet is rarely sufficient. A reliable outdoor setup must serve as a shield against heavy rain, provide shade from scorching heat, and withstand strong gusts of wind along coastal campsites or high-altitude ridges.
The core of your decision rests on understanding how material weight, coating quality, and structural reinforcement interact with the environment. A 3×3 meter trapal is highly versatile, but its performance depends entirely on how well its specifications align with your specific camping venue and carrying method. Car campers can afford heavy-duty, high-density materials, while backpackers must prioritize lightweight, packable options that do not sacrifice water resistance.
Before purchasing, you must evaluate the material composition, thickness, grommet durability, and corner reinforcements. This guide breaks down these technical factors to help you select a 3×3 trapal tent that keeps your gear dry, your camp comfortable, and your outdoor shelter secure.
Products mentioned in this guide
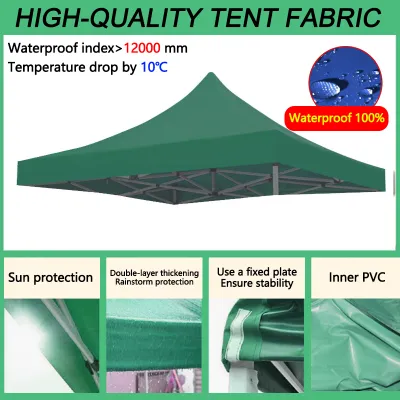
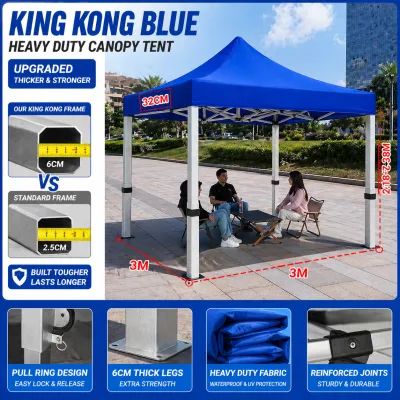
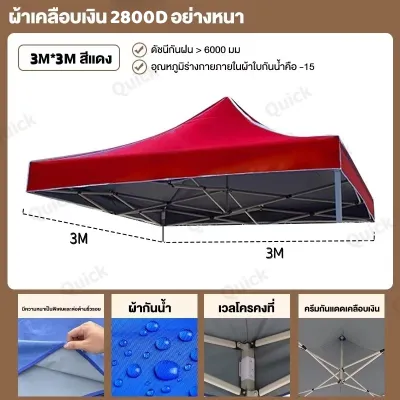
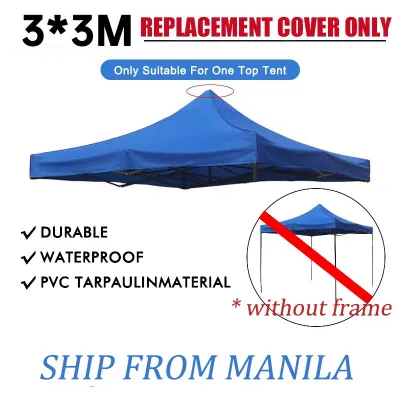
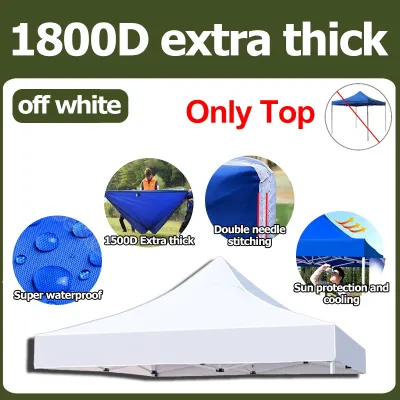
Prices are valid at publication and may change. Please refer to the product page for the latest price.
Core Selection Criteria for a 3×3 Trapal Tent
When shopping for a 3×3 tent trapal, a quick scan of the product specifications can save you from a collapsed shelter in the middle of a storm. The most critical decision-making factors include the base material composition, material thickness, edge construction, grommet spacing, and weather-resistant coatings. Each of these elements directly affects how well the tarp handles tension, repels water, and resists tearing over time.
It is vital to clarify that a “3×3” label refers strictly to the flat, un-pitched sheet dimensions of the tarpaulin. Once you pitch the trapal at an angle to shed rain or wind, the actual usable ground footprint will be significantly smaller than nine square meters. You must account for this dimensional reduction when planning your campsite layout and determining how many people or gear items the shelter can realistically protect.
Choosing the right trapal is always a balance between weight, durability, and weather protection. A thick, heavy-duty PVC trapal offers exceptional water resistance and durability but is highly impractical for multi-day hiking trips where every gram in your backpack counts. Conversely, an ultra-lightweight nylon or thin polyethylene sheet is easy to carry but may require more careful site selection and additional structural supports to survive strong winds.
Material and Coating Standards for Tropical Weather
The primary materials used in manufacturing camping trapals are polyethylene (PE), polyvinyl chloride (PVC), and various polyester or nylon blends. PE is highly common, affordable, and moderately lightweight, making it an accessible choice for casual campers. PVC is significantly heavier and stiffer but provides superior waterproofing and puncture resistance, making it ideal for semi-permanent setups or rugged ground covers. Polyester and nylon blends, often treated with specialized coatings, offer the best strength-to-weight ratio for backpackers who need high packability.

Instead of relying solely on generic material names, you should check the product labels for specific thickness and density indicators. In the Philippines, these are commonly measured in grams per square meter (GSM) or millimeters. For reliable outdoor camping, a PE trapal should ideally have a density of at least 120 to 150 GSM, while heavy-duty utility trapals often exceed 200 GSM. Thicker materials resist tearing under high tension and are less likely to develop micro-pinholes when folded repeatedly.
Tropical sun exposure can rapidly degrade untreated plastics, causing them to become brittle, crack, and lose their waterproof properties. When evaluating a 3×3 tent trapal, look for products that explicitly specify UV-treated coatings or silver-backed linings. These coatings reflect solar radiation, keeping the area underneath cooler while protecting the chemical structure of the polymer base from UV degradation.
Waterproofing is only as reliable as the seams and coatings applied to the fabric. Look for heat-sealed or taped seams rather than simple stitched seams, as needle holes are the first places water will penetrate during a heavy downpour. Verify the manufacturer’s stated hydrostatic head rating on the packaging, which is measured in millimeters (mm). For tropical rainstorms, a rating of at least 2,000mm to 3,000mm is recommended to ensure water does not seep through under pressure. Any specific waterproof claims should be verified against the official product specifications rather than promotional descriptions.
Usable Space and Footprint of a 3×3 Trapal
While a flat 3×3 meter trapal represents exactly nine square meters of material, the actual sheltered area is always smaller once pitched. When you angle the sides to shed rainwater or block wind, the horizontal coverage shrinks. For example, an A-frame configuration pitched at a 45-degree angle will cover a ground width of roughly two meters, leaving the remaining length to form the protective sloping walls.
Hemmed edges and grommet placements also slightly reduce the physical dimensions of the fabric. Many manufacturers use “cut size” measurements, meaning the 3×3 meter dimension is calculated before the edges are folded and hemmed. The finished size of the trapal may be several centimeters shorter on each side. You must factor in this margin when calculating whether the tarp will fully cover your sleeping area or camp kitchen.
To match a 3×3 trapal to your campsite needs, consider its primary function within your setup:
- Compact Dining Shelter: A 3×3 tarp can easily shelter a small folding table and two to three camp chairs, providing a dry communal area for meals.
- Dedicated Gear Storage: It can be pitched low to the ground to protect backpacks, coolers, and firewood from overnight dew and sudden rain.
- Extended Vestibule: You can attach one side of the trapal to the entrance of a smaller dome tent, creating a dry transition zone to take off muddy shoes before entering the sleeping quarters.
- Hammock Rainfly: The diagonal length of a 3×3 tarp (approximately 4.24 meters) provides excellent coverage for a standard camping hammock, protecting both ends from wind-driven rain.
Hardware and Structural Reinforcements
The longevity of your 3×3 tent trapal in windy conditions depends heavily on its hardware and structural reinforcements. Inspect the grommets carefully before making a purchase. Look for rust-resistant metals, such as brass or anodized aluminum, or high-grade reinforced plastic grommets that will not corrode when exposed to salty coastal air or persistent humidity. Ideally, grommets should be spaced every 0.5 to 1 meter along the entire perimeter to offer multiple tie-down options.
The corners and edges of the trapal bear the highest concentration of physical stress when the shelter is tensioned. Ensure the product features reinforced webbing, double-stitched or heat-welded hems, and multi-layered fabric patches at each corner and grommet point. Without these reinforcements, the grommets can easily pull out of the fabric under strong wind loads, rendering the entire shelter useless during a storm.
A basic trapal bundle sold on online marketplaces often includes only the sheet itself or very low-quality accessories. You must evaluate whether the included ropes and pegs are suitable for your destination. Standard thin nylon cords tend to slip under tension and stretch when wet, while cheap wire pegs easily pull out of soft, muddy tropical soil.
For a secure setup, consider upgrading to reflective paracord (such as 4mm 550 paracord) equipped with aluminum tensioners (guyline runners) for quick adjustments. If you are camping on sandy beaches or soft forest ground, invest in longer, V-shaped or Y-beam aluminum pegs (typically 18 to 25 centimeters in length), which cost around ₱300 to ₱800 for a set. These provide significantly better holding power than basic wire pegs.
Pitching Configurations for Rain and Wind Protection
The beauty of a flat 3×3 trapal lies in its adaptability, allowing you to alter its shape based on changing weather patterns and terrain features. Understanding how to execute different pitches is essential for maintaining safety and comfort in the wild.
- The A-Frame: This is the classic configuration for heavy rain. By running a ridge line between two trees or poles and securing the sides to the ground, you create a steep slope on both sides. This angle facilitates rapid water runoff and prevents pooling, making it the most reliable setup during afternoon downpours.
- The Lean-To: If you are facing strong, directional wind or need immediate shade from the afternoon sun, a lean-to pitch is highly effective. One side of the trapal is anchored directly to the ground on the windward side, while the opposite side is elevated using poles or tree branches to create a single sloping wall that blocks the elements.
- The Diamond Fly: By pitching the square trapal diagonally, with one corner high and the opposite corner low, you maximize the central headroom and create a long ridge line. This configuration requires fewer poles and anchor points, making it an excellent, fast-to-pitch shelter for solo campers or hammock users.
Each configuration dictates the number of poles, guylines, and stakes you need to carry. An A-frame typically requires at least two poles (if trees are unavailable) and four to six stakes, while a complex tarp-tent setup might require adjustable tarp poles to vary the height.
Always monitor and adjust tension throughout your stay. Many trapal materials, especially nylon and lower-grade polyethylene, naturally stretch and sag when they absorb moisture or experience temperature drops at night. If you fail to retension the guylines, the sagging fabric will form pockets where rainwater can accumulate, eventually causing the poles to collapse or the fabric to tear under the weight of the water.
Pre-Purchase Inspection and Post-Trip Care
Before taking a new 3×3 tent trapal into the field, perform a thorough physical inspection at home. Spread the sheet out in a well-lit area and check for any manufacturing defects, such as pinholes, uneven coating applications, or loose stitching along the hem. Gently pull on each grommet to verify its stability and ensure the seam tape is fully adhered to the fabric without peeling or bubbling.
Proper post-trip maintenance is critical to preventing mold, mildew, and material degradation in the humid Philippine climate. After returning from a trip, gently clean off any mud, sand, or organic debris using a soft sponge and clean water. Avoid using harsh chemical detergents or abrasive brushes, as these can strip away the waterproof and UV-resistant coatings.
Never fold and store a damp trapal. Mold and mildew can develop within 24 to 48 hours in warm, humid conditions, which will permanently damage the waterproof lining and create an unpleasant, musty odor. Hang the trapal in a shaded, well-ventilated outdoor area until it is completely dry on both sides before folding it loosely.
If your new trapal has a strong chemical odor or a sticky residue upon unboxing, do not use it immediately. This is common with some PVC and heavy polyurethane coatings. Follow the manufacturer’s specific airing-out and cleaning instructions, which usually involve hanging the tarp in a shaded outdoor space for a few days to allow the volatile compounds to dissipate safely. Store the clean, dry trapal in a cool, dry place away from direct sunlight to preserve its structural integrity for your next adventure.
Frequently Asked Questions (FAQ)
Can a 3×3 trapal tent be used as a primary sleeping shelter?
While a 3×3 trapal can serve as an emergency shelter or a minimalist bivvy in dry, controlled conditions, it is generally not recommended as a primary sleeping shelter for multi-day camping in the Philippines. It lacks a sewn-in floor, integrated insect netting, and fully enclosed walls. This leaves you completely exposed to ground moisture, crawling insects, mosquitoes carrying tropical diseases, and wind-driven rain. For a comfortable night’s sleep, it is far better to use the trapal as a supplementary shelter—such as a camp kitchen, gear cover, or a protective rainfly suspended over a dedicated inner tent or hammock.
How do I prevent water from pooling on the trapal during heavy rain?
To prevent water from pooling during heavy rain, you must maintain a steep pitch angle that encourages immediate runoff. Avoid flat or shallow setups. Utilize a center pole with a tennis ball or a dedicated protective cap on top to lift the middle of the tarp, or run a tight ridge line underneath the fabric to create a distinct peak. Ensure all guylines are anchored securely and tensioned tightly. Because trapal materials tend to stretch and sag when wet or cold, you should perform regular checks—especially before going to sleep—and tighten the tension adjusters to eliminate any sagging pockets where water could accumulate.

Community discussion
Share your experience or ask a question. Comments are reviewed before publication.